
Desserts
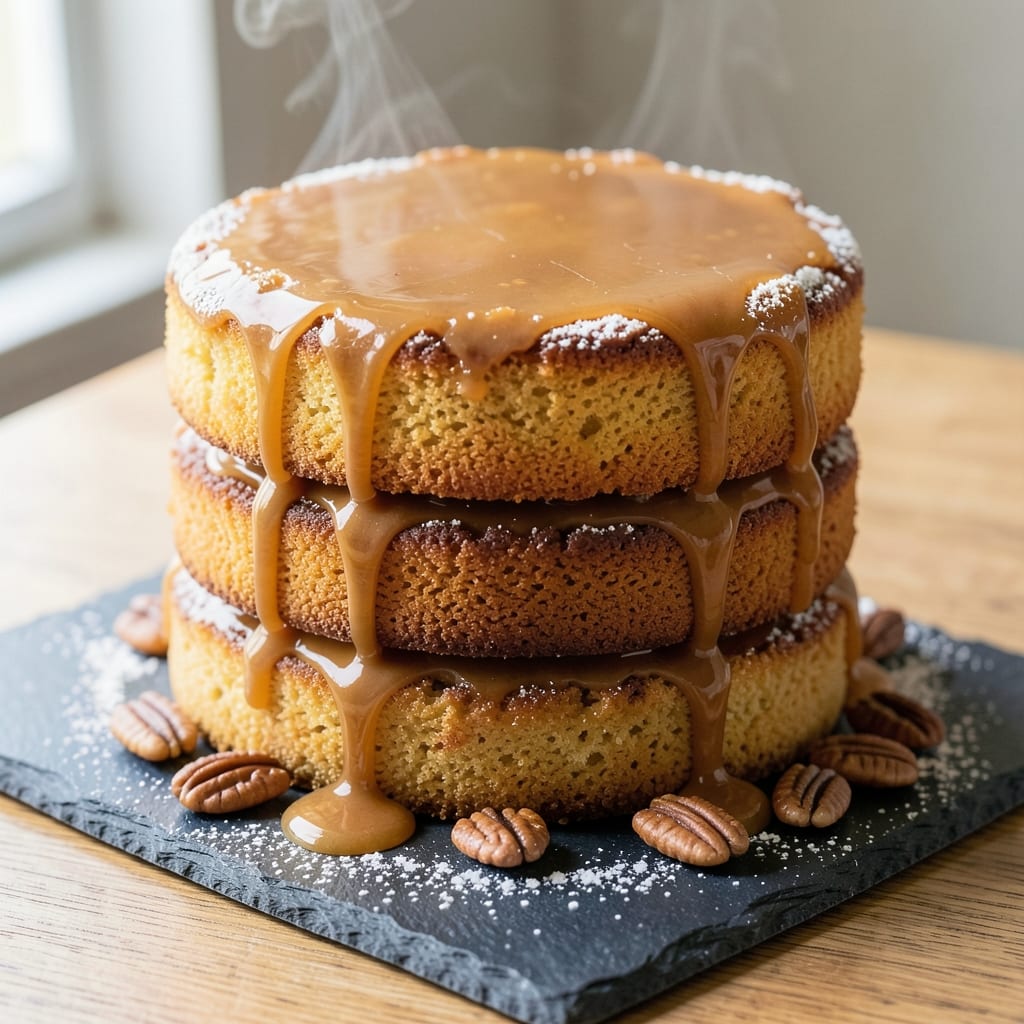
This 2-layer caramel cake recipe delivers the perfect balance of buttery vanilla layers and rich, salty-sweet caramel rivers that’ll have everyone begging for seconds. The secret lies in a foolproof cake batter that stays moist, paired with a slow-cooked caramel sauce that creates those signature golden rivers when poured between layers. I’ve perfected this technique over years of baking—no one will guess it’s made at home.
The cake itself is simple but never boring: tender vanilla layers infused with a hint of cinnamon, baked just until golden, and cooled to the perfect temperature for layering. The caramel isn’t just any sauce—it’s a slow-simmered blend of butter, brown sugar, and cream, thickened to a glossy consistency that spreads like liquid gold. No fancy equipment needed, just a few essential tools and patience for the best results.
What makes this cake truly special is the moment you pour the warm caramel between the layers—it sinks slightly, creating those iconic rivers that make every slice look like a bakery masterpiece. After chilling, the flavors meld into a perfect harmony: buttery cake, salty caramel, and a touch of vanilla that ties it all together. Restaurant-quality at home, this cake is ideal for birthdays, holidays, or when you just want to impress.
Top with whipped cream, fresh berries, or a dusting of powdered sugar for extra flair. The best part? It keeps well for days, so you can enjoy slices without rushing. Let’s get baking—this cake is worth every minute of the wait.
Ingredients for 2 layer caramel cake
Buttery layers, salty-sweet caramel rivers, and a touch of vanilla magic—this cake is pure indulgence.
| Ingredient | Amount | Notes |
|---|---|---|
| All-Purpose Flour 🌾 | 3 cups | Sifted for light texture |
| Granulated Sugar 🍚 | 2 cups | White or light brown |
| Unsalted Butter 🧈 | 1 ½ cups | Cold, cubed for cake layers |
| Large Eggs 🥚 | 4 whole | Room temperature |
| Vanilla Extract 🌸 | 2 tsp | Pure, high-quality |
| Baking Powder 🧂 | 2 tsp | Not baking soda |
| Ground Cinnamon 🌿 | 1 tsp | For subtle warmth |
| Salt 🧂 | ½ tsp | Fine sea salt |
| Heavy Cream 🥛 | 1 cup | Cold for caramel |
| Light Brown Sugar 🍚 | 1 ½ cups | Packed, for caramel |
| Unsalted Butter 🧈 | 1 cup | Melted for caramel |
| Flaky Sea Salt 🧂 | 1 tbsp | For caramel topping |
| Vanilla Bean Paste 🌸 | 1 tsp | Optional for depth |
| Powdered Sugar 🍚 | 1 cup | For dusting |
The flour is your foundation—King Arthur or Gold Medal are my go-tos for foolproof results. Brown sugar matters here: light for the cake, packed dark for the caramel. Unsalted butter is a must (salted throws off the delicate balance), and cold cubes ensure tender layers. Eggs should be at room temp to blend smoothly—no one likes lumps in their cake batter. Vanilla extract is non-negotiable; imitation won’t cut it. For the caramel, heavy cream needs to be cold to prevent graininess, and brown sugar should be packed tightly—no scooping. Flaky sea salt (like Maldon) is the secret weapon for that perfect salty crunch.
Short on butter? Coconut oil works in a pinch (same amount), but the flavor won’t be identical. No vanilla extract? Vanilla bean paste or even vanilla sugar (1 tsp) can save the day. For the caramel, honey can replace half the brown sugar if you're watching calories, but it’ll be less rich. Powdered sugar for dusting? Confectioners’ sugar is the only way—no substitutions here. The cinnamon adds warmth without overpowering, but if you’re feeling fancy, a pinch of cardamom (1/4 tsp) brings a sophisticated twist. Diamond Crystal baking powder is my go-to (it’s double-acting), but Aluminum-free is key—no metallic aftertaste.
Butter and cream can sit out for 2 hours at room temp before use, but eggs and flour should stay cold. Store cake layers in the fridge for up to 2 days before assembling—this lets the caramel set perfectly. Once fully assembled, it keeps for 4 days in the fridge or 3 months frozen (wrap tightly in plastic). Pro tip: Let it come to room temp before slicing—cold cake means cold caramel rivers. Double batch the caramel—it’s worth it for leftovers.
Why You'll Love This Recipe
- No Mixer Needed: I swear by this recipe because it only requires a bowl and a whisk—no stand mixer, no food processor, just elbow grease for a minute. The butter and sugar get creamed by hand until fluffy, and honestly? That’s half the fun.
- Salted Caramel Magic: That gooey, buttery caramel layer between the two moist vanilla sponge layers is the star. It’s rich but not cloying, thanks to the balance of sugar and butter, and the vanilla extract ties it all together like a warm hug.
- Birthday Party Ready: Between us, this cake looks impressive enough for a celebration but takes less time than ordering takeout. The layers are sturdy enough for frosting or just dusting with powdered sugar, and it feeds a crowd without stress.
- Budget-Friendly Luxury: Flour, sugar, butter, eggs—these are pantry staples that won’t break the bank. I’ve made this cake for holidays, potlucks, and even just because, and it always disappears. Leftovers? They’re rare, but if they happen, they’re just as good the next day.
Step-by-step instructions for 2 layer caramel cake
This is where the magic happens—rich, buttery layers meet luscious caramel rivers. Let's build it right.
Prepare the Cake Batter
Preheat your oven to 350°F and grease two 9-inch round cake pans with butter, then line the bottoms with parchment paper. In a large mixing bowl, whisk together the 3 cups all-purpose flour, 2 tsp baking powder, 1 tsp ground cinnamon, and 0.5 tsp salt. Set aside—this is your dry mix.
In a separate, large bowl, cream the 1.5 cups unsalted butter and 2 cups granulated sugar together on medium speed until light and fluffy—about 3-4 minutes. Add the 4 whole large eggs, one at a time, mixing well after each addition. Stir in the 2 tsp vanilla extract and 1 tsp vanilla bean paste (if using) until fully combined. Gradually add the dry ingredients to the wet, mixing on low speed just until combined—don't overmix!
Bake the Cake Layers
Divide the batter evenly between the two prepared cake pans. Tap each pan gently on the counter to release any air bubbles. Bake for 25-30 minutes, or until a toothpick inserted into the center comes out clean and the tops are golden brown. Rotate the pans halfway through baking for even cooking.
Let the cakes cool in the pans for 10 minutes before transferring them to a wire rack to cool completely. This cooling step is crucial—it prevents the layers from becoming soggy when you add the filling later. If you're in a hurry, place the pans on the rack and let them cool that way, but don't skip this step entirely.
Make the Salted Caramel Filling
In a medium saucepan, combine the 1 cup heavy cream, 1.5 cups light brown sugar, and 1 cup unsalted butter. Bring to a gentle simmer over medium heat, stirring occasionally until the butter is fully melted and the mixture is smooth. Reduce the heat to low and let it simmer for 10-15 minutes, stirring frequently, until it thickens into a rich, golden caramel.
Once thickened, remove the pan from the heat and stir in the 1 tbsp flaky sea salt and 1 tsp vanilla bean paste (if using). Let the caramel cool slightly—it will thicken further as it cools, but it should still be pourable when you're ready to assemble the cake. If it's too thick, warm it gently over low heat to loosen it up again.
Assemble the Cake
Once the cake layers are completely cool, place the first layer on a cake stand or plate. Spread about ½ cup of the salted caramel filling evenly over the top of the first layer, leaving a ½-inch border around the edges. This border prevents the filling from oozing out the sides when you cut the cake later.
Place the second cake layer on top of the first, pressing down gently to create a clean, flat surface. Spread the remaining caramel evenly over the top and sides of the cake, letting some of it drip down the sides for that classic caramel river effect. Use a spatula to smooth out the caramel and create a seamless finish. Chill the cake in the refrigerator for at least 2 hours to allow the caramel to set completely.
Dust and Serve
Before serving, dust the top and sides of the cake generously with the 1 cup powdered sugar using a fine-mesh sieve. This adds a beautiful, snowy finish and balances the rich caramel flavor. Let the powdered sugar settle for a few minutes before slicing to ensure it sticks.
Slice the cake with a sharp, hot knife (wipe the blade with a damp cloth between cuts) for clean, perfect slices. Serve at room temperature, and watch as the caramel rivers glisten and drip with every bite. This cake is best enjoyed within 2-3 days, stored in an airtight container in the refrigerator.
Pro Tips For Making 2 Layer Caramel Cake
- Weigh Your Butter: I learned this the hard way—packing butter into measuring cups leaves air gaps, and your cake ends up denser than a brick. Use a kitchen scale for 225g (1 cup) of unsalted butter, then press it into the bowl with a fork to melt it evenly. No lumps, no surprises.
- Rotate the Pan: Your oven’s hot spots are real, and they’ll bake one side of your cake faster than the other. Swap the pans halfway through baking (after 20-25 minutes in a 350°F/175°C oven). Yes, it’s annoying, but it’s how you get even layers that don’t sag in the middle.
- Chill the Batter: Skip this, and your cake might rise too fast, then collapse like a sad soufflé. Let the batter rest in the fridge for 10-15 minutes before baking—it relaxes the gluten and helps the layers stay light. (Pro move: Use this time to preheat your oven properly.)
- Brush, Don’t Drown: The caramel layer is where flavor happens, but drowning the cake in syrup turns it into a soggy mess. Brush the warm cake layers with just enough caramel sauce (about ¼ cup per layer) to coat, not soak. Let it set for 5 minutes before adding the next layer—patience here makes all the difference.
Best sauces and condiments for 2 layer caramel cake
Classic Salted Caramel
The star of this cake is the salted caramel sauce—already included in the recipe—so no extra shopping needed. But if you want to elevate it further, try adding 1 tbsp bourbon to the caramel while simmering for a smoky depth. For a lighter texture, whisk in 2 tbsp whipped cream at the end before cooling. I’ve also seen chefs add 1/4 tsp espresso powder to the caramel for a subtle coffee note that pairs beautifully with vanilla. 💫
Whipped Cream Swirls
For a lighter contrast, pipe 1 cup whipped cream (stabilized with 1 tsp powdered sugar) in swirls between the cake layers before adding the caramel. Use a piping bag with a star tip for elegant patterns. Top with extra caramel rivers for a two-toned effect. Store-bought whipped cream works, but homemade (with 1 cup heavy cream + 1 tbsp powdered sugar) tastes fresher. 🥛
Chocolate Ganache Drizzle
Drizzle dark chocolate ganache over the caramel rivers for a richer finish. Heat 1/2 cup heavy cream with 6 oz chopped dark chocolate (70%) until smooth, then let cool slightly before drizzling. The bitter-sweet contrast with caramel is divine. For extra flair, sprinkle crushed hazelnuts or sea salt flakes on top. 🍫
Caramel Apple Compote
Swap half the caramel filling with apple compote for a fruity twist. Cook 2 peeled, diced apples with 1/4 cup brown sugar, 1/4 cup water, and 1 tsp cinnamon until soft. Mix with the caramel before assembling. The tartness cuts through the richness perfectly. 🍏
Spiced Caramel Variations
Infuse the caramel with warm spices like 1/2 tsp cinnamon + 1/4 tsp cardamom while simmering. Or try 1/2 tsp smoked paprika for a BBQ-inspired twist. For a Mexican-inspired cake, add 1/4 tsp chili powder and top with tajín. These spices add complexity without overpowering the vanilla. 🌶️
Caramel Sauce for Sides
Save extra caramel sauce to drizzle over individual slices before serving. Warm it slightly in a saucepan or microwave for 30 seconds, then drizzle over the cake. Pair with vanilla ice cream or warm chocolate sauce for a sundae-style dessert. The warm caramel rivers make every bite feel special. 🍰
Nutrition facts
Frequently asked questions
Why does my caramel cake need to chill before serving?
The 2-hour chilling time is crucial for two reasons: First, it lets the caramel set properly so it doesn't ooze out when you slice. Second, it allows the flavors to meld together beautifully. Serving it straight from the fridge? Let it sit at room temperature for 30 minutes first—the caramel rivers will look even more stunning!
Can I make this cake without a cake stand?
Use a large, sturdy plate or even a cake pan as your base. Just make sure it's wide enough to support the cake layers. For extra stability, place a small piece of cardboard between the cake and plate to prevent sticking. The key is keeping the cake level so the caramel spreads evenly.
What's the secret to perfect caramel rivers?
The rivers happen when you pour the caramel between layers while it's still slightly warm (100-110°F) but not hot. Use about ½ cup per layer and let it drip naturally down the sides. For extra drama, chill the cake uncovered for 1 hour before the final 2-hour chill—this helps the caramel thicken into those signature rivers.
Can I bake this cake in advance?
Yes! Assemble the cake up to 3 days ahead and store it in an airtight container in the fridge. The flavors actually improve with time. For longer storage, freeze the fully assembled cake (without powdered sugar) for up to 3 months. Thaw overnight in the fridge before serving. The caramel will still be perfect!
How do I fix a cracked cake layer?
Don't worry—this happens sometimes! If you see cracks, simply spread a thin layer of leftover caramel over the top before adding the next layer. The caramel will "seal" the cracks when you press the layers together. For extra insurance, chill the cake for an additional 30 minutes after assembly to help everything hold together.