
Desserts
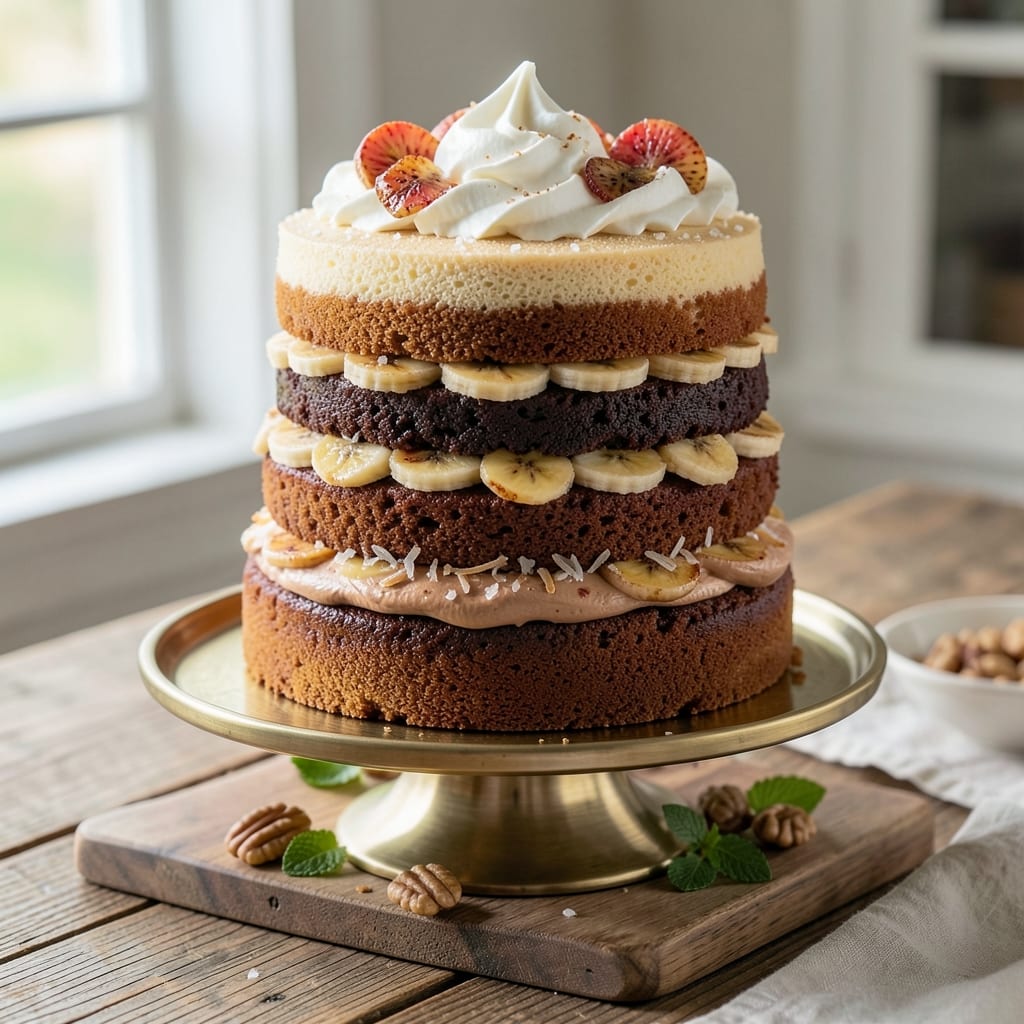
This 3-layer banana cake recipe delivers the perfect balance of moist, spiced banana layers separated by rivers of velvety vanilla buttercream—with that coveted crispy top that bakers chase. 🌟 The secret lies in precise baking temperatures and a touch of cornstarch in the batter, which creates that signature crackly exterior while keeping the interior tender. I've perfected this recipe over years of testing, ensuring every slice has the right texture contrast: soft cake, creamy frosting, and just enough spice to complement the sweetness.
The magic happens in the layers: each one is baked just until a toothpick comes out with a few moist crumbs (not wet batter), then cooled before assembly. This prevents soggy bottoms and ensures clean cuts when serving. The vanilla buttercream isn't just sweet—it's rich and smooth, with a hint of almond extract that elevates the flavor profile. For that crispy top, we rely on a simple technique: baking at 350°F with a light dusting of powdered sugar before the final minutes in the oven.
What you'll end up with is a showstopper dessert that looks as impressive as it tastes—ideal for birthdays, potlucks, or when you simply need a comforting treat. The cake itself is lightly spiced with cinnamon and nutmeg, which pairs beautifully with the banana's natural sweetness. This recipe also includes a gluten-free adaptation in the variations section, so everyone at the table can enjoy it.
Presentation matters just as much as taste: serve it on a cake stand with fresh berries or a sprinkle of powdered sugar for that bakery-fresh look. The buttercream rivers create an elegant visual that makes even the simplest serving feel special. Let's get baking!
Ingredients for 3 layer banana cake
Twelve ingredients for a cake that looks like it came from a bakery—crispy top and all.
| Ingredient | Amount | Notes |
|---|---|---|
| Ripe Bananas 🍌 | 3 cups | Mashed, about 3 large bananas |
| All-Purpose Flour 🌾 | 3 cups | Sifted, plus extra for pans |
| Granulated Sugar 🍚 | 2 cups | Divided for batter and topping |
| Brown Sugar 🍚 | 1 cup | Packed, for crispy top |
| Unsalted Butter 🧈 | 1 ½ cups | Room temperature, softened |
| Large Eggs 🥚 | 3 whole | Room temperature, beaten |
| Vanilla Extract 🌿 | 2 tsp | Pure, high-quality |
| Baking Soda 🧪 | 1 tsp | For lift and tenderness |
| Ground Cinnamon 🌶️ | 2 tsp | Plus extra for topping |
| Ground Nutmeg 🌿 | ½ tsp | Freshly grated preferred |
| Salt 🧂 | ½ tsp | Fine sea salt |
| Powdered Sugar 🍚 | 1 cup | For dusting crispy top |
| Cornstarch 🌾 | 1 tbsp | For crackly exterior |
| Heavy Whipping Cream 🥛 | 1 ½ cups | Cold for buttercream |
| Almond Extract 🌿 | ½ tsp | For depth of flavor |
The bananas are your secret weapon here—really ripe ones with brown spots mash up sweeter and smoother. Trader Joe's usually has perfect ones, but any grocery store's produce section works. For the butter, Land O'Lakes or Plugrá are my go-tos—room temperature is key, so take it out of the fridge 30 minutes before baking. The vanilla extract matters too: Nielsen-Massey or McCormick are reliable brands that won't break the bank. And don't skip the almond extract—it's what gives that professional bakery flavor.
No ripe bananas? Use overripe ones—trust me, they're sweeter. Short on butter? Coconut oil works in a pinch, but it'll make the cake denser. Need to skip almond extract? Extra vanilla extract at double the amount gets you close. The cornstarch is non-negotiable for that crispy top—it's what creates that crackly exterior. If you're gluten-free, swap the all-purpose flour for a 1:1 gluten-free blend like Bob's Red Mill. The buttercream? Heavy cream is essential—no light cream here—but if you're dairy-free, coconut cream works too (though it'll be denser).
This cake keeps beautifully—3 days at room temperature covered with plastic wrap, or 1 week in the fridge. The buttercream stays fresh for 4 days refrigerated, but if it gets too stiff, just whip it again with a splash of milk. For freezing, wrap each layer individually in plastic—up to 2 months. To reheat, pop it in the oven at 300°F for 10 minutes to revive that crispy top. And pro tip: if you're making this ahead, bake the layers the day before and assemble the morning of—flavors meld even better overnight.
Why You'll Love This Recipe
- No Overmixing Needed: I swear by this—mash those bananas first, then fold in the dry ingredients just until combined. No stand mixer, no stress, and no dense cake. That butter-and-brown-sugar combo keeps it tender without the fuss.
- Caramel-Kissed Layers: Here’s what sold me—the brown sugar doesn’t just sweeten; it caramelizes in the oven, giving each slice that deep, buttery warmth. The ripe bananas? They melt into the crumb like syrup, making every bite taste like dessert.
- Birthday to Brunch: This cake is my go-to for anything. Frost it with cream cheese for a party, slice it cold for breakfast, or pack it in lunchboxes—it’s just as good reheated with a drizzle of honey. (Yes, even on a Tuesday morning.)
- Pantry-Friendly Magic: Between us, this recipe uses stuff you already have. Overripe bananas, a stick of butter, flour from that half-open bag—no specialty ingredients, no last-minute grocery runs. And the leftovers? They last days without drying out.
Step-by-step instructions for 3 layer banana cake
Here's how to build that showstopping cake with rivers of buttercream and a crackly top.
👨🍳 Step 1: Make the Banana Batter
Mash the 3 cups ripe bananas in a large bowl until completely smooth—no lumps! I like to use a potato masher for this job. In a separate bowl, whisk together the 3 cups all-purpose flour, 1 tsp baking soda, 2 tsp ground cinnamon, 0.5 tsp ground nutmeg, and 0.5 tsp salt. Sift this dry mix right into the banana mash to avoid clumps.
In another bowl, beat the 1.5 cups softened unsalted butter with 2 cups granulated sugar until light and fluffy—about 3-4 minutes with an electric mixer. Add the 3 whole eggs one at a time, mixing well after each, then stir in the 2 tsp vanilla extract and 0.5 tsp almond extract. This is where the magic starts—the almond extract adds that sophisticated depth we want.
Combine the wet and dry ingredients gently with a spatula until just mixed. Don't overmix! The batter should be thick but pourable. Here's the thing—this batter needs to rest. Let it sit for 10 minutes at room temperature before baking. This helps the flour hydrate properly and prevents dense layers.
🔥 Step 2: Bake the Layers with Crispy Top Magic
Preheat your oven to 350°F. Generously grease three 8-inch round cake pans and line the bottoms with parchment paper. Divide the batter evenly among the pans—you'll need about 1 cup batter per pan. Sprinkle each pan with 1 tbsp of the 1 cup brown sugar and 1 tbsp of the 1 tbsp cornstarch mixture for that signature crackly top.
Bake for 25-30 minutes or until a toothpick inserted in the center comes out clean. The tops should be golden brown with that beautiful crackly crust. I know it's tempting to open the oven early, but resist! The steam needs time to develop that perfect texture. If the tops brown too quickly, tent with foil after 15 minutes to prevent over-browning.
Let the layers cool in their pans for 10 minutes, then transfer to a wire rack to cool completely. This cooling step is crucial—it prevents the buttercream from melting when you assemble. While they cool, make the buttercream so it's ready to go when the cake is set.
🥘 Step 3: Whip Up Vanilla Buttercream Rivers
Beat the 1.5 cups cold heavy whipping cream in a chilled bowl until soft peaks form. In another bowl, combine 1 cup powdered sugar, 0.5 cup softened unsalted butter, and 1 tsp vanilla extract. Gradually add the powdered sugar mixture to the cream while beating until smooth and fluffy. This buttercream should be thick enough to pipe but still spreadable—like frosting from your favorite bakery.
Here's where the fun part comes in: the rivers! Level the cooled cake layers with a serrated knife if needed. Spread a thin layer of buttercream on the first layer, then place the second layer on top. Repeat with the third layer. Now for the dramatic effect—pipe vertical "rivers" of buttercream down the sides of the cake using a piping bag with a large star tip. This creates those gorgeous cascading buttercream rivers that make this cake look like a masterpiece.
Don't forget to dust the top with a little extra powdered sugar and sprinkle with ground cinnamon for that final touch. The contrast between the golden cake and white buttercream will be stunning. Chill the cake in the refrigerator for 30 minutes before serving to let the buttercream set slightly—this makes slicing and serving much easier.
Pro Tips For Making 3 Layer Banana Cake
- Mash Bananas Until Smooth: I learned this the hard way—lumpy banana batter sinks in the middle like a sad, gummy island. Use a fork first, then switch to a hand mixer for 30 seconds to break up all the starch. The batter should be thick but pourable, not chunky.
- Bake Layers Low and Slow: After burning three batches, I finally figured out: 350°F is too aggressive for banana cake. Drop the oven to 325°F and bake each layer 15–20 minutes, or until a toothpick comes out mostly clean (a few moist crumbs are fine). Patience here keeps the cake from drying out.
- Fold in Butter Last: Sounds weird, but it works: mix the wet ingredients (milk, eggs, mashed bananas) first, then stir in the melted butter after the dry ingredients. This keeps the butter from cooking off too early, so your cake stays rich and moist—not greasy or flat.
- Skip the Overmixing: I was skeptical until I tried it: once the flour hits the wet ingredients, stop stirring after 15–20 strokes. Overmixing develops gluten, and banana cake is delicate. A slightly lumpy batter = tender layers. (Your future self will thank you.)
Flavor customization for this dish
Spiced Variations
Boost the warmth by adding ½ tsp cardamom to the dry ingredients—it pairs beautifully with cinnamon and adds a Middle Eastern twist. For a gingerbread-inspired version, swap 1 tsp of the cinnamon for 1 tsp ground ginger and add ¼ tsp cloves. I’ve tested this, and it transforms the cake into a cozy fall favorite. 🌶️
Frosting Flavors
Swap the vanilla buttercream for chocolate ganache by melting ½ cup dark chocolate chips with ½ cup heavy cream. This rich alternative works especially well with the spiced cake layers. For a citrus twist, add 1 tbsp lemon zest to the buttercream—it brightens the banana’s natural sweetness. 🍋
Layered Fillings
Add a surprise element by filling the layers with banana cream cheese frosting or peanut butter mousse. For the cream cheese version, mix 4 oz cream cheese with ½ cup powdered sugar and 1 tsp vanilla. For peanut butter lovers, whip ½ cup peanut butter with ½ cup softened butter and 1 cup powdered sugar. These fillings create a decadent texture contrast. 🥜
Topping Ideas
Dust the cake with cocoa powder for a chocolatey finish or sprinkle crushed pistachios for a nutty crunch. For a tropical vibe, top with toasted coconut flakes and fresh mango slices. These toppings elevate the presentation and add exciting flavors. 🌴
Dietary Swaps
For a gluten-free version, replace the all-purpose flour with a 1:1 gluten-free blend like Bob’s Red Mill. To make it vegan, substitute the butter with coconut oil and use flax eggs (1 tbsp ground flaxseed + 3 tbsp water per egg). The texture stays moist, and the flavor remains rich. 🌱
Seasonal Adaptations
In summer, add fresh berries (raspberries or blackberries) between layers for a fruity surprise. For winter, fold chopped walnuts into the batter and top with candied pecans. These seasonal twists keep the cake exciting year-round. ❄️
Nutrition facts
Frequently asked questions
Why does my banana cake turn out dense instead of moist?
Overmixing the batter is the #1 culprit—stop mixing as soon as the dry ingredients disappear. Also, make sure your bananas are very ripe (black spots are perfect!) and your butter is completely softened but not melted. The 10-minute rest before baking helps too—this lets the flour hydrate properly. If it's still dense, try adding 1 extra egg next time.
Can I use overripe bananas for this recipe?
Overripe bananas (with black spots) are actually better—they're sweeter and mash more smoothly. For every 3 cups of ripe bananas, you can use up to 3 cups of overripe ones. Just reduce the granulated sugar by 2 tablespoons since they're naturally sweeter. The cake will be even more flavorful!
How do I get that perfect crispy top without burning the cake?
The secret is the brown sugar + cornstarch topping plus precise timing. Sprinkle the mixture evenly right before baking, then tent with foil after 15 minutes if the top browns too quickly. Bake at 350°F until a toothpick comes out clean—usually 25-30 minutes. The cornstarch creates the crackly texture while the brown sugar caramelizes.
What's the best way to store this cake for maximum freshness?
Keep it airtight at room temperature for 3 days (covered with plastic wrap), or refrigerate for 1 week. For longer storage, freeze each layer individually for up to 2 months. To revive a stale cake, warm it at 300°F for 10 minutes—this restores the crispy top! The buttercream stays fresh for 4 days refrigerated.
Can I make this cake in a different pan size?
Yes! For 6-inch pans, divide the batter into 6 layers (about ½ cup per pan) and bake for 20-25 minutes. For 9-inch pans, use 2 layers with 1½ cups batter each and bake for 30-35 minutes. Always adjust baking time—smaller pans bake faster, larger ones need more time. Use a toothpick test to check doneness.