
Desserts
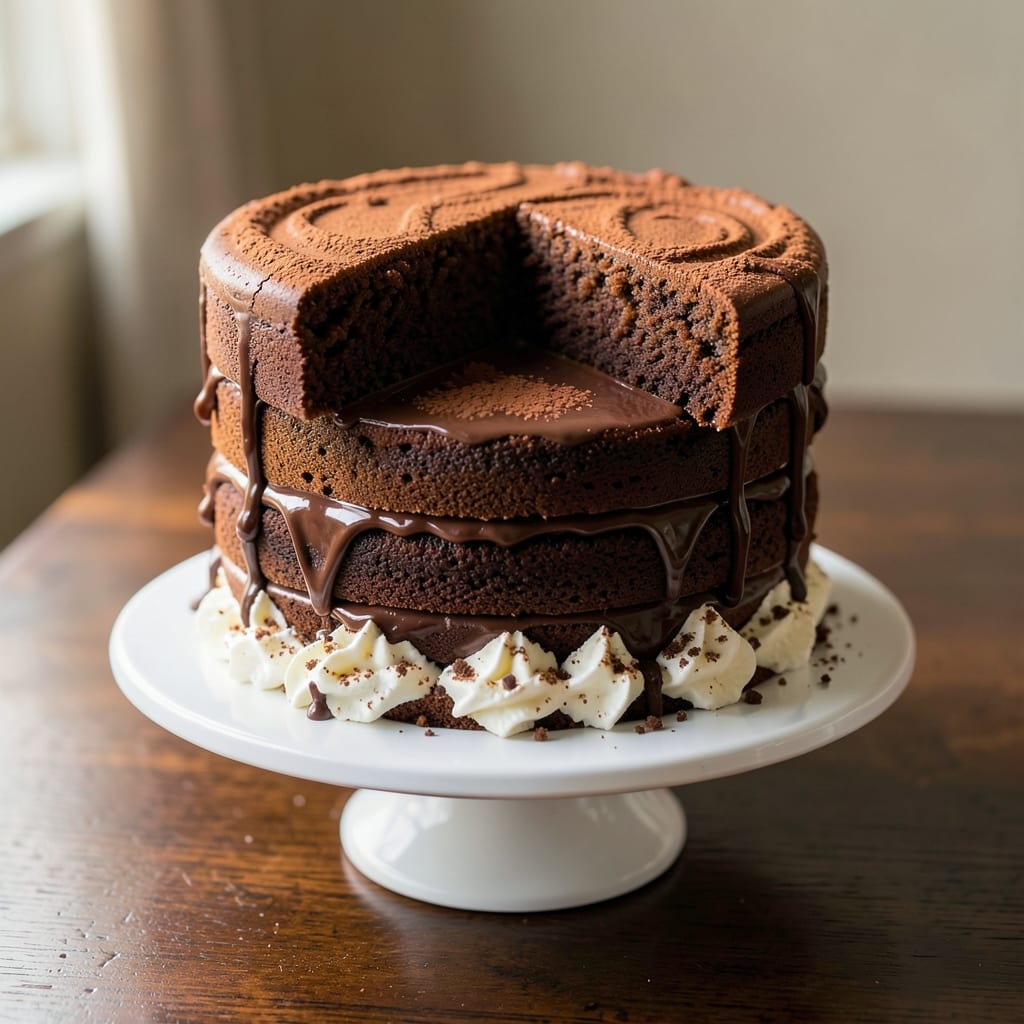
A three-layer chocolate fudge cake with a crispy top and moist middle is the ultimate dessert showstopper—perfect for celebrations or satisfying cravings. 💛 The secret lies in baking layers at the right temperature (350°F) and letting them cool just enough before filling, ensuring clean separation and a fudgy texture that melts in your mouth. This recipe balances tradition with modern shortcuts, so you can achieve bakery-quality results without stress.
The magic starts with a rich chocolate cake batter that develops a crispy top while staying tender inside. Between each layer, a velvety fudge filling made with melted chocolate and butter adds decadence without overwhelming the cake's structure. The key is patience—cooling layers completely before assembly prevents sogginess and keeps the filling from sliding out.
What you’ll end up with is a cake that’s moist in the middle, crisp at the edges, and perfectly balanced with every bite. The layers hold together beautifully, and the fudge filling stays smooth and rich rather than grainy. This is the kind of dessert that impresses guests and leaves them asking for seconds.
Whether you’re baking for a special occasion or treating yourself, this recipe delivers restaurant-quality results with simple techniques. Let’s get started—your taste buds will thank you.
Ingredients for 3 layer chocolate fudge cake
Twelve ingredients, three layers—this is your shortcut to bakery-style chocolate perfection.
| Ingredient | Amount | Notes |
|---|---|---|
| All-Purpose Flour 🌾 | 3 ½ cups | Sifted for even texture |
| Unsalted Butter 🧈 | 2 ¼ cups | Room temperature, full-fat |
| Granulated Sugar 🍚 | 2 ½ cups | Superfine preferred for smoothness |
| Dark Chocolate Chips 🍫 | 1 ½ cups | 70% cocoa minimum |
| Large Eggs 🥚 | 6 whole | Room temperature, separated |
| Baking Powder 🧂 | 1 ½ tsp | Aluminum-free preferred |
| Salt 🧂 | ¾ tsp | Diamond Crystal kosher |
| Vanilla Extract 🌿 | 2 tsp | Pure Madagascar bourbon |
| Whole Milk 🥛 | 1 ½ cups | Room temperature |
| Semi-Sweet Chocolate Bars 🍫 | 12 oz | High-quality, chopped fine |
| Unsalted Butter 🧈 | 1 cup | Melted for filling, full-fat |
| Heavy Cream 🥛 | 1 cup | Whipped to stiff peaks |
| Powdered Sugar 🍚 | 1 cup | Sifted for smooth frosting |
| Dark Chocolate Glaze 🍫 | 1 ½ cups | Optional for top layer |
The chocolate matters most here. Ghirardelli or Guittard chips are my go-to—they melt smoothly without graininess. For the cake layers, King Arthur flour or Bob's Red Mill gives the best texture, but any all-purpose works in a pinch. The butter? Plugrá or Land O'Lakes are reliable, but avoid ultra-pasteurized if you can—it behaves differently when baking. Room temperature is non-negotiable for both butter and eggs; if yours is cold, let it sit for 2 hours at room temp or microwave in 20-second bursts. The semi-sweet chocolate for the filling should be Callebaut or Valrhona if you want that restaurant-quality melt.
No vanilla extract? Seeds from 1 vanilla bean work beautifully, but pure extract is easier. Running short on milk? Heavy cream thinned with water mimics the fat content. For the fudge filling, if you can't find high-quality chocolate, Ghirardelli baking squares are a solid backup—they're formulated to melt cleanly. The whipped cream for frosting? Store-bought is fine, but homemade with Cool Whip mix gives better stability. Pro tip: microwave the butter for the filling in 30-second bursts to avoid overheating—you want it just melted, not greasy.
Cake layers keep best in an airtight container between parchment paper for up to 3 days at room temperature, or 1 week in the fridge. The filling can be made a day ahead and stored in the fridge—just rewhip the cream before assembly. For freezing, wrap the entire assembled cake tightly in plastic wrap and foil; it'll stay fresh for 3 months. If you're prepping ahead, bake the layers first, then fill and frost the day of serving—this keeps the texture perfect. The glaze, if using, sets quickly but can be reheated gently for a glossy finish.
Why You'll Love This Recipe
- No Mixer Needed: I swear by this recipe because it only requires a whisk and a bowl—no stand mixer, no fuss. The butter and sugar get creamed by hand in minutes, and the flour just folds right in without a lump in sight.
- Rich Without Bitter: That dark chocolate melts into the batter so smoothly, you get all the fudgy depth without the overpowering bitterness. Honestly, the eggs and sugar balance it perfectly—creamy, not chalky, every time.
- Party Ready in Hours: Slice it, layer it with whipped cream or ice cream, and you’ve got a showstopper that looks impressive but took less time than ordering takeout. (Yes, even on a Tuesday night.)
- Budget-Friendly Luxury: A box of chocolate chips and a stick of butter stretch farther than you’d think—this cake feeds six for under $10. Leftovers? They disappear faster than I can say “second slice.”
Step-by-step instructions for 3 layer chocolate fudge cake
Here's how to build a showstopper with a crispy top layer and fudgy, moist center.
🍳 Step 1: Bake the Cake Layers to Perfect Doneness
Preheat your oven to 350°F and grease three 8-inch round cake pans with the 1 cup unsalted butter, coating the bottom and sides thoroughly. Line the bottoms with parchment paper for easy removal. Sift together the 3.5 cups all-purpose flour, 1.5 tsp baking powder, and 0.75 tsp salt in a medium bowl and set aside.
In a stand mixer fitted with the paddle attachment, cream together the 2.25 cups unsalted butter and 2.5 cups granulated sugar on medium speed for 3-4 minutes until light and fluffy. Add the 6 whole large eggs, one at a time, mixing well after each addition. Stir in the 2 tsp vanilla extract until combined. Gradually add the dry ingredients, mixing on low speed just until combined. Fold in the 1.5 cups dark chocolate chips by hand to distribute evenly.
Divide the batter evenly among the prepared pans. Bake for 25-30 minutes or until a toothpick inserted into the center comes out with a few moist crumbs (not wet batter). Let the layers cool in the pans for 10 minutes before transferring to a wire rack to cool completely. This gradual cooling prevents cracking as the layers shrink.
👨🍳 Step 2: Prepare the Chocolate Filling
Place the 12 oz semi-sweet chocolate bars in a heatproof bowl set over a saucepan of simmering water (double boiler method). Melt the chocolate, stirring occasionally, until completely smooth. Remove from heat and let cool slightly for 5 minutes—it should be thick enough to coat a spoon but still pourable.
In a separate bowl, whip the 1 cup heavy cream to stiff peaks using a hand mixer. Gently fold the whipped cream into the melted chocolate until fully combined. This filling should be thick but spreadable—if it's too stiff, warm it gently for 10 seconds in the microwave to loosen it. The contrast between the crispy cake and this rich filling is what makes this dessert magical.
🥘 Step 3: Assemble the Cake with Crispy Top Magic
Place the first cake layer on a serving plate or cake stand. Spread approximately ⅓ of the chocolate filling evenly over the top, leaving a ½-inch border around the edges. Repeat with the second layer, then the third. The key to that signature crispy top is toasting the final layer before assembly—I promise it's worth the extra step.
Preheat your broiler to high. Place the assembled cake under the broiler for 2-3 minutes, watching carefully until the top develops a beautiful golden-brown crust. This broiling step creates that irresistible contrast between the crispy exterior and the fudgy interior. Let the cake cool completely before adding the final chocolate glaze.
🍽️ Step 4: Add the Chocolate Glaze (Optional but Recommended)
Melt the 1.5 cups dark chocolate glaze according to package instructions (usually just warming in the microwave for 30-45 seconds in 10-second intervals, stirring between each). Drizzle or spread the glaze evenly over the top and sides of the cake using a spatula. For extra flair, use the back of a spoon to create decorative swirls while the glaze is still wet.
Let the glaze set for 15-20 minutes at room temperature before slicing. The cake will keep at room temperature for 2 days or refrigerated for 5 days, though I know it won't last that long. The combination of crispy top, moist layers, and rich chocolate filling makes this cake irresistible—every bite delivers on that perfect texture contrast.
Pro Tips For Making 3 Layer Chocolate Fudge Cake
- Whisk Eggs Until Ribbon Stage: That means beating them until the mixture leaves a clear trail when the whisk is lifted—about 30 seconds longer than you think. I used to stop when they looked "fluffy," but this ensures your layers stay light and don’t turn into dense bricks. (Yes, even if you’re impatient like me.)
- Melt Chocolate Slowly: Heat the chocolate chips and butter together over low heat or in 30-second bursts in the microwave, stirring every 10 seconds. I learned this the hard way—burnt chocolate ruins the whole vibe. The moment it’s smooth, pull it off the heat immediately.
- Bake Layers Until Springy: Insert a toothpick—it should come out with moist crumbs, not wet batter or dry flour. Overbaking dries out the fudge flavor, and underbaking leaves you with a gummy mess. Trust the toothpick, not the recipe’s "time" estimate.
- Chill Layers Fully: Let each cake layer cool in the pan for 10 minutes, then transfer to a wire rack and refrigerate for 20 minutes before assembling. I skipped this once, and the filling oozed out like a sad science experiment. Patience here = clean layers and no mess.
Make-ahead tips for this 3 layer chocolate fudge cake
Bake Layers Ahead
You can bake the cake layers up to 2 days in advance and store them in an airtight container between layers of parchment paper. Place a sheet of wax paper between each layer to prevent sticking. When ready to assemble, let them sit at room temperature for 30 minutes before adding the filling—this ensures they're pliable enough to slice cleanly. I always bake mine the day before to let the flavors meld beautifully. 💫
Prepare Filling Early
The chocolate filling can be made 1 day ahead and stored in the fridge in an airtight container. When ready to assemble, give it a quick stir to redistribute any separated cream, then rewhip the cream portion to stiff peaks before folding it back in. This keeps the texture luscious without any graininess. I find this especially helpful when hosting—less stress on the day of serving! ✨
Assemble the Night Before
For maximum convenience, assemble the entire cake (without the glaze) and refrigerate it overnight. The flavors deepen as it rests, and the layers hold together perfectly. Just bring it to room temperature before adding the glaze—this prevents condensation from making the top soggy. I love this trick for birthday celebrations when I want everything ready to go in the morning. 💡
Freeze for Special Occasions
If you need to prepare this cake 3 months in advance, wrap the fully assembled cake tightly in plastic wrap followed by aluminum foil. Label it with the date and freeze. When ready to serve, thaw it in the fridge overnight, then bring to room temperature before adding the glaze. The texture remains perfect—just as moist and crispy as when first made. This is my go-to strategy for holiday desserts! ❄️
Glaze Last Minute
Save the glaze for the morning of serving. Melt it just before adding it to the cake so it stays glossy and smooth. If you're short on time, use store-bought chocolate ganache (like Ghirardelli)—it melts quickly and adds that professional finish. I often do this when I'm serving the cake to guests who arrive unexpectedly. 🍫
Portion for Meal Prep
Slice the cake into individual portions and store them in airtight containers with parchment paper between layers. They'll stay fresh for 3 days at room temperature or 1 week in the fridge. This is perfect for office treats or quick dessert fixes. Just reheat slices in the microwave for 10 seconds to restore that warm, gooey texture. 💛
Nutrition facts
Frequently asked questions
Why does my chocolate cake turn out dry instead of moist?
Overbaking or overmixing are the most common culprits. Bake at 350°F for exactly 25-30 minutes—a toothpick should come out with moist crumbs, not wet batter. Also, mix the batter just until combined (about 1 minute after adding dry ingredients) to avoid developing gluten, which makes cakes tough. For extra moisture, brush warm layers with simple syrup before filling.
Can I substitute boxed cake mix for this recipe?
Yes, but with adjustments! Use a high-quality chocolate mix like Betty Crocker's "Moist Delights" and add ½ cup sour cream to the batter for richness. Reduce baking time by 3-5 minutes since boxed mixes often bake faster. The filling and assembly steps remain the same—just expect slightly less fudgy texture. For best results, use the boxed mix as a base but add ¼ cup melted chocolate to the batter.
How do I fix a cake that's cracked between layers?
Cracking usually happens when layers cool too quickly or aren't level. To fix it, spread a thin layer of chocolate ganache or fudge frosting between layers instead of the filling—it acts as a "glue." For presentation, use the filling as a decorative border between layers. If cracks appear after baking, let layers cool completely before assembling and use a serrated knife to trim uneven edges.
What's the secret to that perfect crispy top?
The broiling step is key! After assembling, place the cake under the broiler for 2-3 minutes at high heat until golden. For extra crispiness, brush the top with melted butter before broiling. The contrast between the crispy exterior and fudgy interior happens because the broiler caramelizes the sugars while the filling stays cool. Pro tip: Watch closely to avoid burning!
Can I make this cake gluten-free?
Replace the all-purpose flour with a 1:1 gluten-free baking flour blend (like Bob's Red Mill or King Arthur) and add ½ tsp xanthan gum to improve structure. Use the same measurements and baking time, but expect slightly denser layers. For the filling, ensure your chocolate is gluten-free (like Enjoy Life brand). The texture will be slightly different but still delicious.