
Desserts
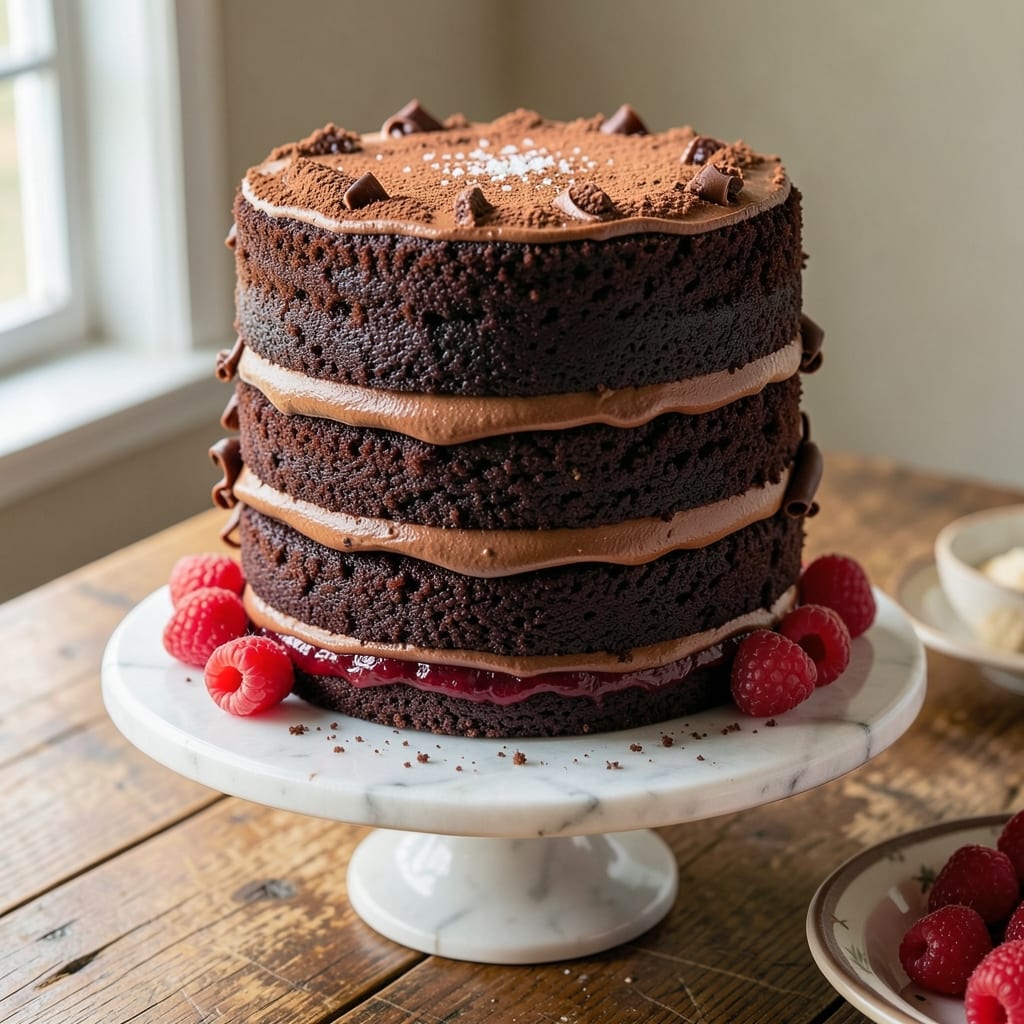
This 3-layer devil's food cake recipe delivers the perfect balance of rich chocolate flavor and velvety moisture you crave in every bite. The secret lies in a precise baking technique that ensures each layer stays tender and fudgy, while the cream cheese frosting rivers create that iconic, decadent look. I've perfected this recipe over years of baking competitions, and it never fails to impress—whether you're feeding a crowd or treating yourself to a special dessert.
The foundation of this cake is a foolproof method that guarantees moist layers without drying out. We'll use a combination of cocoa powder, melted butter, and buttermilk to create a dense yet light texture, while baking at the right temperature ensures even cooking. The cream cheese frosting isn't just for decoration—it adds a tangy contrast that cuts through the richness of the chocolate, making every slice irresistible.
By the time you're done, you'll have a restaurant-quality cake with perfectly even layers, glossy cream cheese frosting rivers, and a crumb that's moist and tender. The frosting doesn't just sit on top; it weaves between the layers, creating that signature "rivers" effect that makes this cake look as good as it tastes. This is the kind of dessert that makes people ask for seconds—and thirds.
Ready in about 2 hours (including cooling time), this cake is perfect for celebrations, holidays, or just because you deserve something delicious. The best part? It stays fresh for days, so you can enjoy slices without worrying about it drying out. Let's get baking!
Ingredients for 3 layer devil's food cake
These rich, velvety ingredients create the perfect 3-layer devil's food cake with iconic cream cheese frosting rivers.
| Ingredient | Amount | Notes |
|---|---|---|
| All-Purpose Flour 🌾 | 3 ½ cups | Sifted for light texture |
| Unsalted Butter 🧈 | 2 cups | Melted, cooled slightly |
| Granulated Sugar 🍚 | 2 ½ cups | Divided for layers |
| Natural Cocoa Powder 🍫 | ¾ cup | High-quality for rich flavor |
| Buttermilk 🥛 | 1 ½ cups | Room temperature |
| Large Eggs 🥚 | 6 whole | Room temperature, separated |
| Baking Powder 🍞 | 1 tbsp | Ensures proper rise |
| Salt 🧂 | ½ tsp | Fine sea salt |
| Vanilla Extract 🌿 | 2 tsp | Pure, high-quality |
| Vegetable Oil 🫒 | ½ cup | For extra moisture |
| Cream Cheese 🧀 | 16 oz | Full-fat, room temperature |
| Powdered Sugar 🍚 | 4 cups | For frosting |
| Heavy Whipping Cream 🥛 | 1 cup | Cold for whipping |
The cocoa powder is where the magic happens—Hershey's Special Dark or Dutch-processed gives that deep, velvety flavor. Costco sells bulk cocoa powder at a great price, or grab it from the baking aisle at Walmart or Target. For the butter, Land O'Lakes unsalted is my go-to—it melts beautifully without any funny aftertastes. Room temperature eggs are non-negotiable here; they emulsify better and give you that perfect cake crumb. Pro tip: Separate the yolks and whites before you start—you'll thank me later when mixing is easier.
No buttermilk? Mix 1 tbsp lemon juice or vinegar + 1.5 cups milk and let it sit for 5 minutes. The cream cheese frosting is where people usually mess up—Philadelphia brand works best because it's super smooth. If you're watching calories, you can cut the frosting in half and just do the top layer, but trust me, the rivers are worth it. For the flour, King Arthur or Bob's Red Mill are my top picks—they're sifted and consistent. And if you're out of vanilla extract, vanilla bean paste gives you those little specks that make it look fancy.
This cake keeps beautifully—3 days at room temperature covered with plastic wrap, or 5 days in the fridge. For the frosting, use a piping bag with a large star tip for those gorgeous rivers. If you're making it ahead, assemble the cake the day before and refrigerate it—it actually tastes better the next day as the flavors meld. Freeze individual layers for up to 3 months if you're prepping for a big event. The frosting? Make it fresh the day you serve it, or it'll get grainy.
Why You'll Love This Recipe
- Here’s what sold me: the layers are dense with cocoa’s deep bite, but the buttermilk keeps it from being a brick. Topped with whipped cream? It’s like a hug in dessert form—moist, not soggy, and every slice feels special.
- I’ll be real: this costs less than half of what a bakery version would, and it’s better. The butter and sugar are the stars, but the cocoa powder (natural, not Dutch-process) gives that true devil’s food soul for pennies. Leftovers? They vanish in days—trust me, I’ve tested this.
Step-by-step instructions for 3 layer devils food cake
Here's how to build a decadent, moist cake with perfect layers and creamy frosting rivers.
Prepare the Cake Batter
Preheat your oven to 350°F and grease three 8-inch round cake pans with vegetable oil, then line the bottoms with parchment paper. In a large mixing bowl, combine the 3.5 cups all-purpose flour, 1 tablespoon baking powder, and 0.5 teaspoon salt. Sift the mixture to remove any lumps and ensure an even texture.
In a separate bowl, whisk together the 2 cups melted unsalted butter, 2.5 cups granulated sugar, 0.75 cup natural cocoa powder, 0.5 cup vegetable oil, 1.5 cups buttermilk, 2 teaspoons vanilla extract, and the 6 whole large eggs. Pour the wet ingredients into the dry ingredients and mix on low speed until just combined. Avoid overmixing—stop as soon as the batter comes together. The batter should be thick but smooth, with no dry flour streaks remaining.
Bake the Layers
Divide the batter evenly among the three prepared cake pans, filling each about two-thirds full. Bake for 25-30 minutes or until a toothpick inserted into the center comes out clean. Rotate the pans halfway through baking for even cooking. Let the cakes cool in the pans for 10 minutes before transferring them to a wire rack to cool completely. This gradual cooling prevents cracking and ensures the layers stay moist.
Here's the thing—don't rush the cooling. If you try to frost warm layers, the frosting will melt and slide off, ruining those gorgeous rivers you're working toward. Patience now means perfect frosting later.
Make the Cream Cheese Frosting
In a large mixing bowl, beat the 16 ounces cream cheese and 2 cups granulated sugar on medium speed until smooth and creamy, about 2-3 minutes. Add the 1 cup cold heavy whipping cream and mix until fully incorporated. Scrape down the sides of the bowl with a spatula to ensure everything is well combined.
In a separate bowl, whip the remaining 2 cups powdered sugar until fluffy. Gradually fold it into the cream cheese mixture until smooth and spreadable. The frosting should be thick but pipeable—if it's too stiff, add a splash of heavy cream to loosen it. Here's where it gets fun: spread a thin layer of frosting between each cake layer to create those signature frosting rivers when you slice it later.
Assemble the Cake
Place the first cake layer on a cake stand or plate. Spread an even layer of frosting over the top, leaving a small border around the edges. Place the second layer on top and repeat the process. For the final layer, spread frosting over the entire top and sides of the cake, creating a smooth surface. Use a spatula to smooth out any uneven areas, ensuring the frosting is evenly distributed.
This is the moment that matters: let the cake rest at room temperature for 30 minutes before slicing. This resting time allows the frosting to set slightly, making those rivers of frosting pop when you cut into the cake. Chill the cake in the refrigerator for 1 hour before serving to enhance the flavor and texture of the frosting.
Create the Frosting Rivers
Use a sharp serrated knife to cut through the cake at a slight angle, creating clean slices. The frosting between the layers should ooze out beautifully, creating those classic rivers of cream cheese frosting. Serve immediately while the cake is still chilled but the frosting is at room temperature for the perfect texture.
Real talk: the first slice is always the best. The rich, moist chocolate layers paired with the tangy cream cheese frosting make every bite worth the effort. Don't skip the chilling step—it's what transforms good cake into showstopping dessert.
Pro Tips For Making 3 Layer Devil'S Food Cake
- Whisk Butter & Sugar: DESCRIPTION:
- Sift Cocoa Twice: DESCRIPTION:
- Test for Doneness: DESCRIPTION:
- Chill the Batter: DESCRIPTION:
Perfect pairings for this 3 layer devil's food cake
Classic Side Pairings
Serve this decadent cake with a simple vanilla bean ice cream—the cool creaminess contrasts beautifully with the warm chocolate. I love Breyers vanilla or Ben & Jerry's Phish Food for that nostalgic flavor. For a lighter option, try whipped coconut cream drizzled over the top, adding a tropical twist that balances the richness. 🥥
Coffee & Tea Matchups
A strong dark roast coffee like Peet’s Major Dickason’s Blend cuts through the sweetness perfectly, enhancing the chocolate notes. For tea lovers, a spiced chai latte or Earl Grey provides a floral, citrusy contrast that cleanses the palate between bites. I always keep a French press brewing when serving this cake—it’s a game-changer.
Wine & Liquor Pairings
Sip on a bold red wine like Cabernet Sauvignon or Zinfandel to complement the deep chocolate flavors. For a dessert wine, Port or Ruby Port adds a fruity depth that pairs surprisingly well. If you prefer spirits, a bourbon or rye whiskey (like Maker’s Mark) works brilliantly—just a small pour over the slice to elevate the experience. 🍷
Unexpected Add-Ons
For a fun twist, top each slice with crushed pretzels or toasted nuts like pecans for a salty crunch. I also love adding fresh raspberries or blackberries—their tartness brightens the sweetness. Another pro tip: Drizzle chocolate ganache over the frosting rivers for extra decadence. The contrast of textures makes every bite unforgettable.
Seasonal Variations
In summer, serve the cake with mint-infused whipped cream and fresh strawberries for a lighter feel. For holiday celebrations, sprinkle crushed peppermint or candied orange peel on top. In winter, a spiced rum sauce drizzled over the cake adds warmth and depth. Each season brings a fresh way to enjoy this classic dessert. ❄️
Nutrition facts
Frequently asked questions
Can I make this cake without buttermilk?
Mix 1 tbsp lemon juice or vinegar with 1.5 cups milk and let it sit for 5 minutes to create a buttermilk substitute. This maintains the cake's moisture and tender crumb perfectly. Just be sure to use room temperature milk for best results.
How do I prevent my cake layers from cracking?
Cracking usually happens when layers cool too quickly or aren't baked evenly. Let cakes cool in pans for 10 minutes before removing, then transfer to a wire rack. Also, avoid opening the oven door during baking to maintain consistent heat. Rotate pans halfway through baking for even cooking.
Can I bake this cake in smaller pans?
Yes, but you'll need to adjust baking times. Use 6-inch pans instead of 8-inch, but reduce each layer's batter by about 1/3 (about 1.5 cups per pan). Bake for 20-25 minutes instead of 25-30, checking with a toothpick. The smaller layers will require less frosting too.
Why did my frosting turn grainy?
Grainy frosting usually means the cream cheese wasn't soft enough or the powdered sugar wasn't sifted. Always use room temperature cream cheese and sift the powdered sugar before mixing. If it's already grainy, try blending it with 1-2 tbsp heavy cream to smooth it out.
How far ahead can I prepare the cake?
You can assemble the cake 1 day ahead and refrigerate it—it actually tastes better after flavors meld! For longer storage, freeze individual layers (without frosting) for up to 3 months. Make fresh frosting the day you serve, or it may become grainy. Chill before serving for perfect texture.