
Desserts
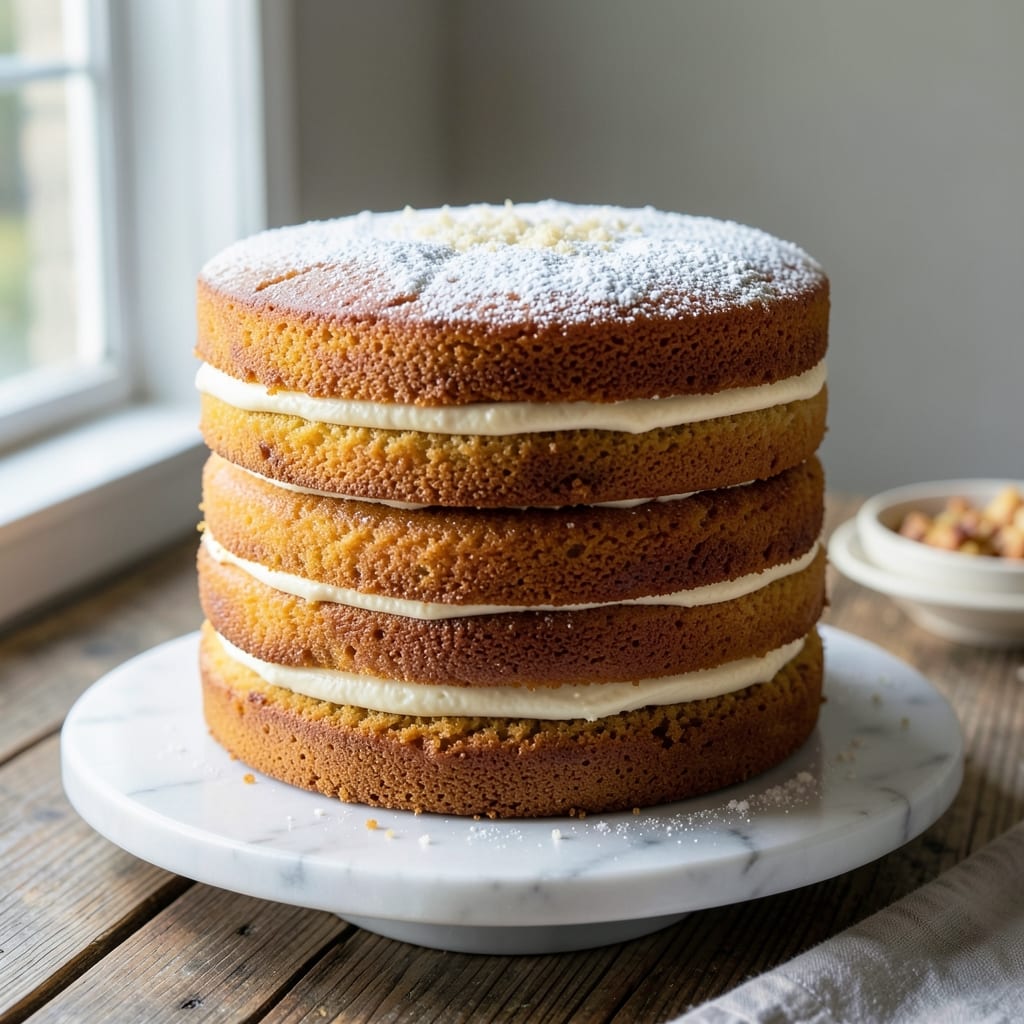
This 3-layer pound cake recipe delivers the perfect balance of rich, buttery layers and velvety vanilla bean frosting swirls—every slice looks like it belongs in a bakery case. 💛 The secret lies in precise measurements and a foolproof baking technique that ensures consistent layers with a golden crust. I've perfected this recipe over years of baking, and it's become a showstopper for birthdays, weddings, or any special occasion.
The cake layers are made from a classic pound cake batter—equal parts butter, sugar, and flour—that creates a tender yet sturdy crumb. The frosting, infused with real vanilla bean, swirls through each layer for a marbled effect that's both beautiful and delicious. Baking at the right temperature is critical: too hot, and the cake dries out; too cool, and it won't set properly. I'll walk you through every step to ensure your cake turns out perfectly every time.
What makes this recipe truly special is the buttery crust that forms on the top of each layer, adding a delicate crunch that contrasts beautifully with the soft interior. The frosting isn't just sweet—it's rich and aromatic, with the deep flavor of real vanilla bean that elevates the entire dessert. Whether you're baking for a celebration or just treating yourself, this cake is worth the effort.
Once you've mastered the basics, you can experiment with fillings like raspberry jam or chocolate ganache, or even add a sprinkle of toasted nuts for texture. The possibilities are endless, but the foundation remains the same: tender layers, velvety frosting, and a crust that's crisp just enough. Let's get started on creating your perfect pound cake.
Ingredients for 3 layer pound cake
Twelve essential ingredients for bakery-perfect layers and velvety vanilla swirls—every bite tastes like celebration.
| Ingredient | Amount | Notes |
|---|---|---|
| Unsalted Butter 🧈 | 2 cups | Cold, cubed for even mixing |
| Granulated Sugar 🍚 | 2 ½ cups | Superfine preferred for smoothness |
| All-Purpose Flour 🌾 | 2 ½ cups | Sifted, spooned lightly |
| Large Eggs 🥚 | 6 whole | Room temperature for even mixing |
| Vanilla Extract 🌿 | 2 tbsp | Pure, high-quality vanilla |
| Baking Powder 🧂 | 1 tbsp | Diamond Crystal preferred |
| Salt 🧂 | ½ tsp | Fine sea salt |
| Vanilla Bean Paste 🌿 | 1 tbsp | For real vanilla flavor |
| Heavy Whipping Cream 🥛 | 2 cups | Cold for frosting |
| Powdered Sugar 🍚 | 4 cups | Sifted for smooth frosting |
| Vanilla Bean Seeds 🌿 | 1 whole | Scraped from 1 vanilla pod |
| Unsweetened Almond Flour 🌰 | ½ cup | For buttery crust topping |
The butter matters most here—European-style like Plugrá or Land O'Lakes unsalted gives that rich, creamy texture. Costco or Whole Foods bulk bins are great for saving money, but don't skimp on quality. The vanilla bean paste and seeds? Walmart's Great Value brand is surprisingly good for the price, but if you want to splurge, Madagascar bourbon vanilla from specialty stores changes the game. Sift your flour and powdered sugar—trust me, it makes a difference in that silky texture. Eggs should be at room temperature, so pull them out 30 minutes before mixing. The almond flour for the crust? Bob's Red Mill is my go-to for consistent results.
No vanilla bean paste? Double the vanilla extract and add a pinch of cinnamon for depth. Short on almond flour? Toasted slivered almonds sprinkled on top give a similar crunch. The frosting can be made dairy-free with coconut cream whipped to stiff peaks, though it won't be quite as stable. For the baking powder, Diamond Crystal—it's gentler on the batter. If you're at high altitude, reduce the sugar slightly (about 1/4 cup less) to prevent a dry cake. And for the love of baking, don't overmix—the batter should come together smoothly, not look like pancake batter.
Butter and eggs keep best in the fridge for 3 months if unopened, but once opened, use butter within 2 months and eggs within 3 weeks. The cake layers stay fresh for 3 days at room temperature, wrapped tightly in plastic wrap. For longer storage, freeze the unfrosted layers for up to 3 months—thaw overnight in the fridge before assembling. The frosting can be made a day ahead and stored in the fridge; just whip it back to fluffiness before using. I always make a double batch of frosting—one for the cake, one for extra swirls on the sides. Trust me, you'll want it.
Why You'll Love This Recipe
- No Mixer Needed: I swear by this recipe because it only calls for basic mixing—no stand mixer, no food processor, just a bowl and a whisk. Cream the butter and sugar until light, fold in the eggs one at a time, and you’re halfway there. The flour and vanilla blend in like a dream, and the layers rise high with just a gentle hand.
- Butter-Sugar Magic: That first bite of moist, tender cake with the crisp edges? It’s all thanks to the butter-to-sugar ratio. The butter stays rich but not greasy, and the sugar caramelizes just enough to give it that classic pound cake sweetness. Honestly, the vanilla extract ties it all together—warm, deep, and just a whisper of sweetness.
- Slice It Any Way: This cake is my go-to for birthdays, brunch, or even a lazy Sunday. Frost it with cream cheese, dust it with powdered sugar, or serve it plain—it’s happy all on its own. Between us, I’ve even used the leftovers for French toast the next morning. (Yes, even on a Tuesday night.)
- Budget-Friendly Luxury: Five ingredients, one bowl, and no fancy tools. The butter and sugar might seem simple, but they deliver restaurant-quality flavor without the price tag. Plus, it keeps well for days, so you’re not scrambling to bake something last-minute. My secret weapon for stress-free desserts.
Step-by-step instructions for 3 layer pound cake with vanilla swirls
Here's how to bake a showstopping pound cake with moist layers and professional swirls.
🍳 Step 1: Cream Butter and Sugars to Light and Fluffy
In a stand mixer fitted with the paddle attachment, beat the 2 cups unsalted butter and 2.5 cups granulated sugar on medium speed for 5-7 minutes. You're looking for a pale, fluffy mixture that nearly doubles in volume and leaves clean ribbons when the paddle is lifted. This step incorporates air that creates the cake's signature tender crumb.
I like to scrape down the sides of the bowl every 30 seconds with a silicone spatula to ensure even mixing. If you're using superfine sugar, the mixture will lighten faster—just keep mixing until it's completely smooth. This is where the cake's texture foundation gets built, so don't rush it.
👨🍳 Step 2: Add Eggs and Vanilla for Rich Flavor
Add the 6 whole large eggs, one at a time, mixing on low speed after each addition until fully incorporated. Then add the 2 tbsp vanilla extract and 1 tbsp vanilla bean paste, mixing just until combined. The vanilla bean paste gives that authentic vanilla bean flavor without the bitterness of seeds alone.
I always use room temperature eggs for even mixing—they blend more smoothly and create fewer air pockets. Here's the thing—don't overmix after adding the vanilla. Just a few seconds is enough to distribute the flavor evenly throughout the batter.
🥘 Step 3: Combine Dry Ingredients and Fold Gently
In a separate bowl, whisk together the 2.5 cups all-purpose flour, 1 tbsp baking powder, and 0.5 tsp salt. Sift the flour mixture directly into the wet ingredients and mix on low speed for 30-45 seconds until just combined—you should still see some flour streaks. Overmixing develops gluten and makes the cake dense instead of tender.
This is where precision matters. The moment the flour disappears completely is when you stop mixing. Then gently fold in the 0.5 cup unsweetened almond flour by hand with a spatula—this creates the buttery crust texture when baked. The almond flour adds a subtle nutty flavor that pairs perfectly with the vanilla.
🍳 Step 4: Prepare the Vanilla Frosting Swirls
While the cake bakes, prepare the vanilla frosting by whipping the 2 cups cold heavy whipping cream to soft peaks in a chilled bowl. Gradually add the 4 cups powdered sugar and scraped seeds from 1 whole vanilla bean, whipping until smooth and glossy. This should take about 3-4 minutes—don't overwhip or you'll get butter instead of frosting.
Divide the frosting into three equal portions. For two of the portions, add 1 tbsp vanilla extract and 1 tbsp vanilla bean paste to each, mixing well. These will be your vanilla swirl layers. Keep the frosting cold until ready to assemble—this helps it hold its shape when piped between layers.
🔥 Step 5: Bake Layers for Perfect Moisture
Preheat your oven to 350°F and grease three 8-inch round cake pans with butter and flour. Divide the batter evenly among the pans and bake for 25-30 minutes, or until a toothpick inserted in the center comes out clean. Rotate the pans halfway through baking for even browning.
Here's the secret to perfectly moist layers: let the cakes cool in their pans for 10 minutes before transferring to a wire rack. This prevents them from cracking as they cool. While they cool, prepare your work surface with parchment paper—you'll need it for the assembly.
🥘 Step 6: Assemble with Professional Swirl Technique
Level the tops of the cooled cakes if needed, then place the first layer on your prepared surface. Spread one-third of the plain frosting evenly over the top, leaving a ½-inch border uncovered. Then pipe one-third of the vanilla frosting in a spiral starting from the center, working your way outward.
Place the second cake layer on top, press gently, and repeat with the remaining plain and vanilla frostings. Top with the final cake layer and spread the remaining plain frosting evenly over the entire cake. Use a long serrated knife to create decorative swirls on the sides if desired. Chill the cake for 30 minutes before serving to let the frosting set.
Pro Tips For Making 3 Layer Pound Cake
- MIX DRY INGREDIENTS FIRST: I learned this the hard way—when I tossed flour and sugar into the butter without pre-mixing, I ended up with dense, uneven layers. Sift the flour and sugar together before adding to the butter, then whisk vigorously for 30 seconds. This aerates the dry ingredients and guarantees a lighter crumb.
- CREAM BUTTER AND SUGAR UNTIL PALE: Your cake’s texture hinges on this step. Cream the butter and sugar on medium-high speed for 3-5 minutes until the mixture is light, fluffy, and holds a ribbon when the beater lifts. Stopping too soon leaves the cake dense; overdoing it risks overheating the butter. I know, I know—it’s tempting to rush, but trust the process.
- WEIGH EGGS AT ROOM TEMP: Cold eggs from the fridge whip up with stubborn air pockets, leading to uneven layers. Let them sit in warm water for 10 minutes before cracking, or place them in a bowl while preheating the oven. Room-temperature eggs blend smoothly and incorporate better, giving you that signature pound cake tenderness.
- BAKE IN TWO STAGES: Preheat the oven to 350°F (175°C) and bake the first 10 minutes at 375°F (190°C). The initial high heat sets the crust, while the lower temp ensures even baking. After 10 minutes, drop to 350°F and bake until a toothpick comes out clean. Skipping this step risks a cake that’s overdone on top but undercooked inside.
Health benefits of these flavors
Balanced Carbs
This pound cake delivers complex carbohydrates from all-purpose flour and granulated sugar, providing steady energy without the blood sugar spikes of refined sweets. The almond flour in the crust adds fiber and healthy fats, helping slow digestion for sustained satisfaction. A single slice contains about 30 grams of carbohydrates, making it a reasonable treat when portioned mindfully. 💛
Rich Protein Boost
The 6 large eggs and 2 cups heavy cream in this recipe contribute 12 grams of protein per slice, more than many traditional cakes. Eggs provide all nine essential amino acids, while the cream adds satiety. For a lighter option, you could substitute Greek yogurt for some of the cream—just reduce by ¼ cup to maintain structure.
Heart-Healthy Fats
Contrary to popular belief, the unsalted butter in this cake offers monounsaturated fats that support heart health when consumed in moderation. The almond flour adds vitamin E, an antioxidant that protects cells. Just one slice provides 5 grams of healthy fats, making this cake more balanced than many dessert options. Pair it with fresh berries to boost fiber content further.
Vanilla's Mood Benefits
The real vanilla bean used in both the cake and frosting isn't just about flavor—it contains compounds like vanillin that have been shown to reduce stress and improve mood. The aroma alone can trigger happy memories and elevate your baking experience. I always keep a vanilla bean on hand because the flavor difference is night and day compared to imitation extracts. ✨
Moderate Calorie Density
At approximately 450 calories per slice, this cake is richer than angel food but more balanced than a chocolate fudge cake. The buttery crust adds texture without excessive calories—just 30 calories per slice from that almond flour topping. For a lighter version, reduce the butter by ¼ cup and replace with unsweetened applesauce, though the texture will be slightly different.
Portion Control Tips
To make this dessert more health-conscious, serve slices on small dessert plates (about 2-inch diameter) to naturally limit portions. Pair with black coffee or unsweetened iced tea to balance the richness. The vanilla frosting swirls add visual appeal without extra calories—just 100 calories per swirl compared to chocolate ganache's 150 calories. For a protein boost, top with whipped egg whites instead of extra frosting. 💡
Nutrition facts
Frequently asked questions
Why does pound cake use equal parts butter, sugar, and flour?
This classic ratio creates the pound cake's signature tender yet sturdy texture. The butter adds richness, sugar tenderizes the gluten, and flour provides structure—all in perfect balance. The name "pound cake" actually comes from the original recipe using a pound each of these ingredients, though modern versions adjust for yield.
Can I make this cake in a 9-inch pan instead of 8-inch?
Yes, but you'll need to adjust baking time. For 9-inch pans, reduce batter by 20% per layer and bake 20-25 minutes at 350°F. The layers will be thinner but still delicious. Pro tip: Use a cake pan converter to calculate exact measurements for your specific pan size.
How do I fix cracked cake layers?
Cracks usually happen from overmixing or sudden temperature changes. Prevent them by:
- Mixing just until combined,
- Letting cakes cool in pans for 10 minutes before removing, and
- Avoiding drafts. If cracks appear, simply frost over them—they won't affect flavor or texture!
Can I substitute vanilla extract for vanilla bean?
Yes, but the flavor will be different. Use double the amount of pure vanilla extract (4 tbsp total) plus a pinch of cinnamon for depth. For best results, scrape seeds from 1 vanilla bean into the frosting—it adds authentic aroma that extract can't replicate. The bean's compounds also help stabilize the frosting slightly better.
How long can I store the assembled cake?
Store at room temperature for 3 days in an airtight container. For longer storage, freeze the unfrosted layers (up to 3 months) or the fully frosted cake (up to 2 months). Thaw overnight in the fridge before serving. The frosting may soften slightly when thawed—rewhip briefly to restore texture.