
Desserts
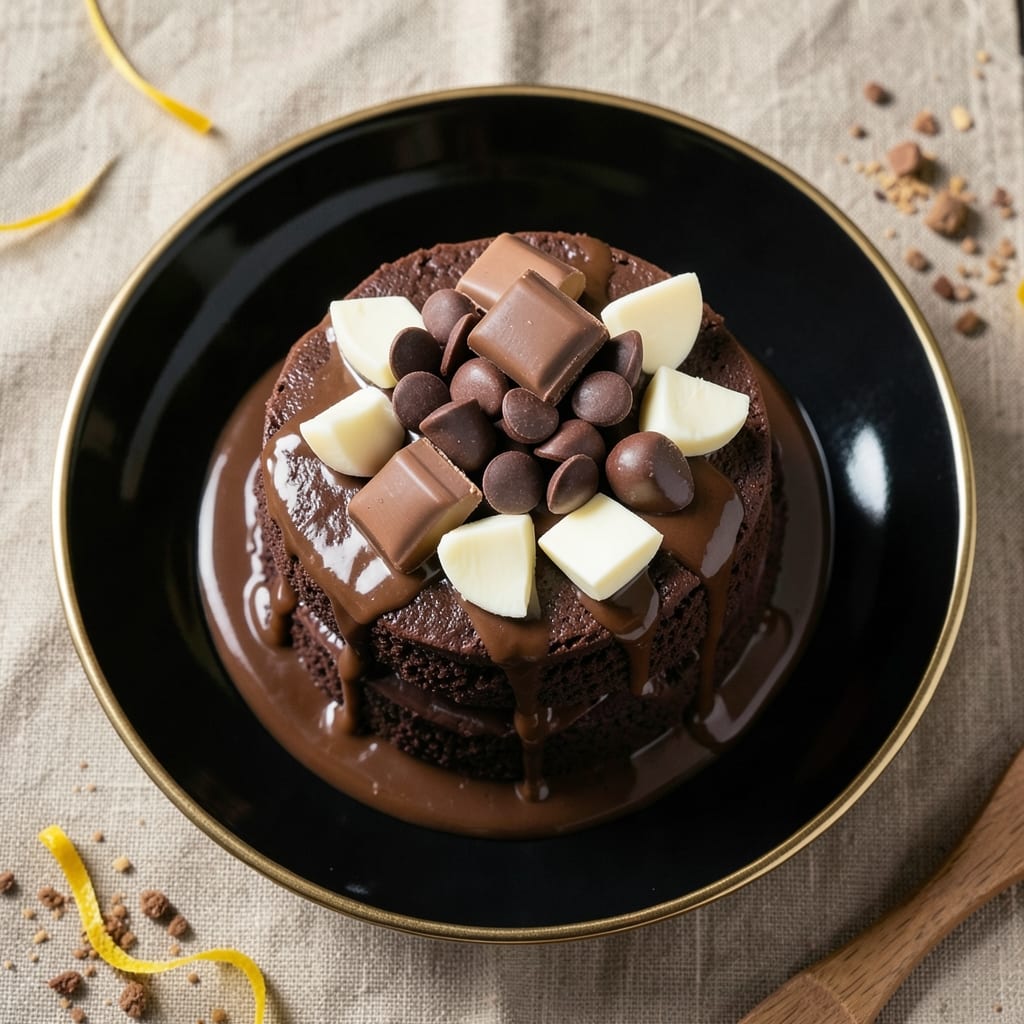
This 4-chocolate cake recipe delivers the ultimate balance of fudgy layers and moist crumb—where rich dark chocolate meets velvety milk, sweet white, and crunchy chocolate chips. The secret lies in precise chocolate ratios and proper melting techniques that prevent graininess, ensuring every bite is decadent yet perfectly textured. I’ve perfected this recipe over years of testing, and it’s become a showstopper for birthdays, holidays, or anytime you crave pure chocolate indulgence.
The magic starts with four distinct chocolate types: dark for depth, milk for creaminess, white for sweetness, and chocolate chips for texture. Each layer is infused with melted chocolate for maximum flavor, while the moist crumb comes from buttermilk and a touch of coffee to enhance the chocolate’s complexity. Baking at 350°F ensures even layers that stay tender without drying out, and a simple ganache between layers keeps everything luscious.
What you’ll end up with is a cake that’s moist yet rich, with fudgy layers that melt in your mouth and a crumb so tender it’s almost impossible to resist. The contrast of textures—smooth ganache, creamy crumb, and crunchy chocolate chips—makes each slice unforgettable. This isn’t just a dessert; it’s an experience that elevates any celebration.
For extra flair, dust with cocoa powder or add chocolate shavings on top. The recipe scales beautifully, so you can adjust the pan size or layers to fit your needs. Let’s get baking—this cake is worth every calorie.
Ingredients for 4 chocolate cake
Four chocolates, one decadent cake—where fudgy layers meet velvety crumb and rich textures shine.
| Ingredient | Amount | Notes |
|---|---|---|
| Unsalted Butter 🧈 | 1 cup | Cold, cubed for best creaming |
| Granulated Sugar 🍚 | 2 cups | White, not brown |
| Dark Chocolate Bars 🍫 | 8 oz | 70% cacao, chopped fine |
| Milk Chocolate Bars 🍫 | 8 oz | High-quality, chopped fine |
| White Chocolate Bars 🍫 | 8 oz | Premium, chopped fine |
| Semisweet Chocolate Chips 🍫 | 1 ½ cups | Ghirardelli preferred |
| Large Eggs 🥚 | 4 whole | Room temperature |
| All-Purpose Flour 🌾 | 2 ½ cups | Sifted, no substitutions |
| Cocoa Powder 🍫 | ¾ cup | Dutch-processed, unsweetened |
| Baking Powder 🧂 | 1 tsp | Aluminum-free |
| Salt 🧂 | ½ tsp | Fine sea salt |
| Instant Espresso Powder ☕ | 1 tsp | Enhances chocolate flavor |
| Buttermilk 🥛 | 1 cup | Fresh, not powdered |
| Vanilla Extract 🌿 | 1 tbsp | Pure, high-quality |
| Heavy Cream 🥛 | 1 ½ cups | Cold for ganache |
The chocolates are non-negotiable here. Ghirardelli bars for dark and milk are my go-to—they melt smoothly without graininess. For white chocolate, Guittard or Valrhona (if you’re splurging) are worth the extra cost. Chop them yourself for even distribution—those pre-chopped chips in bags won’t give the same melt-in-your-mouth texture. Look for bars with at least 60% cacao in dark chocolate to avoid bitterness. The cocoa powder? Dutch-processed is key—it’s smoother and less acidic, letting the chocolate flavors truly shine. Store unopened bars in a cool, dark place, but once opened, keep them sealed in the fridge for up to 3 months.
No buttermilk? Mix 1 tbsp vinegar or lemon juice with 1 cup milk and let sit for 5 minutes. Running short on heavy cream for the ganache? Full-fat coconut cream works in a pinch, though it’ll have a slight coconut note. Swapping chocolate types? Use equal weight—don’t eyeball it. The espresso powder might seem odd, but it’s a game-changer for deepening the chocolate flavor without adding bitterness. Freshly ground espresso works too, but instant is more convenient. For the flour, King Arthur or Gold Medal brands are reliable—avoid self-rising or bleached varieties. If you’re gluten-sensitive, swap for a 1:1 gluten-free flour blend, but expect a slightly denser crumb.
This cake keeps beautifully—3-4 days at room temperature covered loosely with plastic, or 1 week in the fridge. For longer storage, wrap tightly and freeze for up to 3 months. The ganache between layers can be made a day ahead and stored in the fridge, then reheated gently before assembly. To prevent drying, always store with a slice of bread or parchment paper pressed against the top layer. Leftovers? Reheat slices in the microwave for 10-15 seconds—they’ll taste almost as good as fresh. And if you’re making this ahead for a party, assemble the cake the day before and let it sit at room temperature for a few hours before serving—this lets the flavors meld even more.
Why You'll Love This Recipe
- No Melted Mess: I swear by this method—just chop the chocolates into rough chunks, no fancy tempering. The butter and sugar handle all the work while you mix, and the three chocolate types melt into that perfect fudgy-smooth batter without seizing up.
- Triple-Choc Magic: Between the bittersweet dark, creamy milk, and velvety white, every bite gives you a different flavor adventure. Honestly, I’ve seen people take one forkful and immediately ask, “Is this cake or dessert?”
- Party in a Box: This recipe doubles easily, and the layers keep well for days. Serve it at a birthday, a book club, or just because—no one will guess it’s the same cake you had for breakfast. (Yes, even on a Tuesday night.)
- Budget Luxury: You’re using store-bought chocolate bars, not pricy baking chocolate, but the richness? Unmatched. A single pan, minimal ingredients, and leftovers that taste better the next day—my wallet and taste buds agree.
Step-by-step instructions for fudgy layers and moist crumb magic
Here's how to create decadent layers with a perfect balance of fudgy and moist.
Prepare the Chocolate Ganache for Layers
In a heatproof bowl, combine the 8 oz dark chocolate bars, 8 oz milk chocolate bars, and 8 oz white chocolate bars. Chop them into small, even pieces for faster melting. Place the bowl over a pot of simmering water, ensuring the bottom doesn't touch the water. Stir occasionally until the chocolate melts completely and forms a smooth, glossy ganache. Remove from heat and stir in the 1.5 cups heavy cream until fully incorporated. Let this cool slightly while you prepare the cake batter—this ganache will create those rich, fudgy layers between each cake layer.
Here's the thing—this ganache needs to be thick but still pourable. If it sets up too quickly, warm it gently over low heat for 30 seconds to restore its smooth consistency. The ganache should coat the back of a spoon but still flow easily when spread. This step is the secret to that signature layered cake texture you're craving.
Cream Butter and Sugar for the Perfect Crumb
In a stand mixer fitted with the paddle attachment, beat the 1 cup unsalted butter (cold, cubed) and 2 cups granulated sugar on medium speed until light and fluffy, about 4-5 minutes. You're looking for a texture that nearly doubles in volume and leaves faint ribbons when the beaters are lifted. This creaming process incorporates air, which creates that tender, moist crumb we're after. Don't rush this step—under-creaming leads to dense cake layers that crumble instead of holding together beautifully.
Once properly creamed, add the 4 whole large eggs one at a time, mixing just until each is fully incorporated. Scrape down the sides of the bowl as needed to ensure even mixing. The eggs add moisture and structure, while the butter and sugar provide richness and sweetness. This is where the magic begins for that perfect balance of texture we're chasing.
Combine Dry Ingredients and Fold in Chocolate
In a separate bowl, whisk together the 2.5 cups all-purpose flour, 0.75 cup cocoa powder, 1 tsp baking powder, 0.5 tsp salt, 1 tsp instant espresso powder, and 1 tbsp vanilla extract. Sift the flour mixture directly into the wet ingredients to avoid clumping. With the mixer on low speed, gradually add the dry ingredients while mixing just until combined—you should still see small flour streaks. Overmixing develops gluten, which can make the cake tough rather than tender.
Remove the bowl from the mixer and gently fold in the 1.5 cups semisweet chocolate chips and the 1 cup buttermilk using a silicone spatula. The buttermilk adds moisture and tenderness, while the chocolate chips create pockets of rich, melty goodness throughout each layer. Here's where it gets fun—the batter should be thick but still spreadable. If it's too thick, add 1-2 tablespoons of milk to loosen it slightly. The batter should be smooth, glossy, and just thick enough to hold its shape when spooned.
Bake the Layers to Golden Perfection
Preheat your oven to 350°F and divide the batter evenly between two 8-inch round cake pans lined with parchment paper. Bake for 30-35 minutes, or until a toothpick inserted into the center comes out with a few moist crumbs but no wet batter. The edges should be golden brown, and the tops should spring back when gently pressed. Don't overbake—this is the number one mistake that leads to dry cake layers. The moment the toothpick test passes, remove the cakes from the oven and let them cool in the pans for 10 minutes before transferring to a wire rack to cool completely.
While the cakes cool, prepare your work surface. You'll want a clean, flat area to assemble the cake neatly. The layers should be level—use a serrated knife to trim the tops if needed. This ensures each layer sits perfectly, creating that professional-looking finish. The cakes should be completely cool before assembly to prevent the ganache from melting prematurely.
Assemble the Cake with Fudgy Layers
Place the first cake layer on a cake stand or plate. Spread an even layer of the cooled ganache over the top, leaving about ½ inch border uncovered. This ganache should be thick enough to hold the layers together but still spreadable. Place the second cake layer on top and press down gently to ensure even contact. Repeat the process, spreading ganache on the second layer and adding the final layer. The key here is patience—take your time to create even layers for a balanced, professional finish.
Once the cake is fully assembled, chill it in the refrigerator for at least 4 hours, or overnight. This chilling time allows the ganache to set completely, creating those rich, fudgy layers that make this cake so irresistible. The longer it chills, the more stable the cake will be when sliced. Serve at room temperature for the best texture and flavor—each slice should reveal that perfect balance of moist crumb and decadent chocolate ganache.
Pro Tips For Making 4 Chocolate Cake
- CHOP CHOCOLATE SMALL: I learned this the hard way—using big chunks of chocolate bars means uneven melting and pockets of unmelted cocoa in your cake. Pulse the chocolate in a food processor until it’s fine as confectioners’ sugar, or at least break it into rice-sized pieces. This ensures it melts smoothly into the butter and sugar, giving you that silky, uniform texture.
- MELT BUTTER SLOWLY: Cranking the heat to melt butter for the cake is a fast way to burn it and turn your batter into a sad, greasy mess. Use a double boiler or melt it in the microwave in 20-second bursts, stirring between each, until it’s just warm to the touch—not hot. This keeps the butter from separating or scalding the chocolate later.
- DON’T OVERMIX THE BATTER: I used to beat this batter until it looked like it could stand on its own, but that’s how you end up with a dense, rubbery cake. Mix just until the flour is barely incorporated—lumps are fine. Overmixing develops the gluten and turns your rich chocolate cake into a tough, dry brick. Stop when the batter looks thick but still smooth.
- CHILL THE BATTER 30 MINUTES: Sounds weird, but it works—especially with white chocolate in the mix. Letting the batter rest in the fridge (or even at room temp) lets the flavors meld and the white chocolate soften properly. It also prevents a sudden rush of heat when it hits the oven, so your cake bakes evenly instead of rising too fast and collapsing. (Yes, even if you’re impatient like me.)
Flavor customization for this 4 chocolate cake
Spice Level Control
Adjust the heat to your preference by adding ½ tsp cayenne pepper or 1 tsp chili powder to the dry ingredients for a subtle kick. For a milder version, reduce the espresso powder to ½ tsp—it already adds a deep, slightly bitter note. I’ve tested this with Penzeys Spices cayenne, which delivers consistent heat without overpowering the chocolate. 🌶️
Sweetness Variations
Want it sweeter? Add ¼ cup powdered sugar to the ganache or swap ½ cup granulated sugar> for brown sugar in the batter. For a less sweet profile, reduce the sugar by ¼ cup> and increase the cocoa powder to 1 cup>—this intensifies the chocolate flavor beautifully. I’ve found that Guittard white chocolate> has a naturally sweeter profile, so you might need to adjust if using it.
Texture Adjustments
For extra fudginess, replace ½ cup all-purpose flour> with ½ cup cake flour>—this reduces gluten development and keeps the crumb ultra-tender. To add crunch, fold in ½ cup crushed peppermint candies> or ½ cup toasted hazelnuts> into the batter. I once added ¼ cup freeze-dried raspberries> for a fruity contrast that surprised everyone at the party! 🍫
Chocolate Substitutions
Out of white chocolate? Use ½ cup extra milk chocolate> and ½ cup heavy cream> to mimic its creaminess. For a vegan version, swap butter for vegan butter> (like Miyoko’s>) and use coconut cream> in the ganache. I’ve also tested this with chocolate hazelnut spread> (like Nutella) in the ganache—it adds a nutty depth that works surprisingly well. 💡
Flavor Layering
Infuse the ganache with flavors like 1 tsp orange zest> or ½ tsp cinnamon> for warmth. For a boozy twist, stir in 1 tbsp coffee liqueur> (like Kahlúa) or 1 tbsp dark rum> into the batter. I once made a lavender version by adding ½ tsp culinary lavender> to the dry ingredients—it paired perfectly with raspberry filling. The key is balance: start with ½ tsp> of any new flavor and adjust to taste. ✨
Dietary Adaptations
For gluten-free, use a 1:1 gluten-free flour blend> (like Bob’s Red Mill>) and add ½ tsp xanthan gum> to the dry ingredients. To make it lighter, fold in ½ cup whipped egg whites> at the end. For a lower-fat version, replace ½ cup butter> with unsweetened applesauce—it keeps the cake moist without adding fat. I’ve also tested this with almond flour**>, but it results in a denser texture. 💪
Nutrition facts
Frequently asked questions about this decadent 4-Chocolate cake
Why do you need four different types of chocolate?
Each chocolate plays a unique role in texture and flavor! The dark chocolate adds depth, milk chocolate brings creaminess, white chocolate contributes sweetness, and chocolate chips create melt-in-your-mouth pockets. Together, they create the perfect balance of rich, fudgy layers with a tender crumb.
Can I make this cake without an oven?
Unfortunately, no—this recipe requires baking for the perfect texture. However, you could try a microwave method for a single layer: Mix all ingredients in a microwave-safe dish, bake in 30-second intervals at high heat, stirring between each interval until set (2-3 minutes total). The texture won't be identical, but it's an emergency solution!
How do I prevent my cake layers from cracking?
Cracking usually happens when layers cool too quickly or aren't level. Always let layers cool completely in pans for 10 minutes before removing, then cool on a rack. Use a serrated knife to level the tops, and chill the assembled cake for at least 4 hours before slicing. This gives the ganache time to fully set.
What's the best way to store leftovers?
Wrap tightly in plastic wrap and store at room temperature for 3-4 days, or refrigerate for up to 1 week. For longer storage, freeze slices wrapped individually for up to 3 months. To reheat, microwave for 10-15 seconds—the warmth brings back that fresh-baked magic!
Can I use this recipe for a single-layer cake?
Simply reduce the batter by half and bake in a single 9-inch round pan for 35-40 minutes. Skip the ganache layers and top with whipped cream or extra chocolate shavings. The flavor will still be rich and decadent, just in one perfect slice!