
Breakfast & Brunch
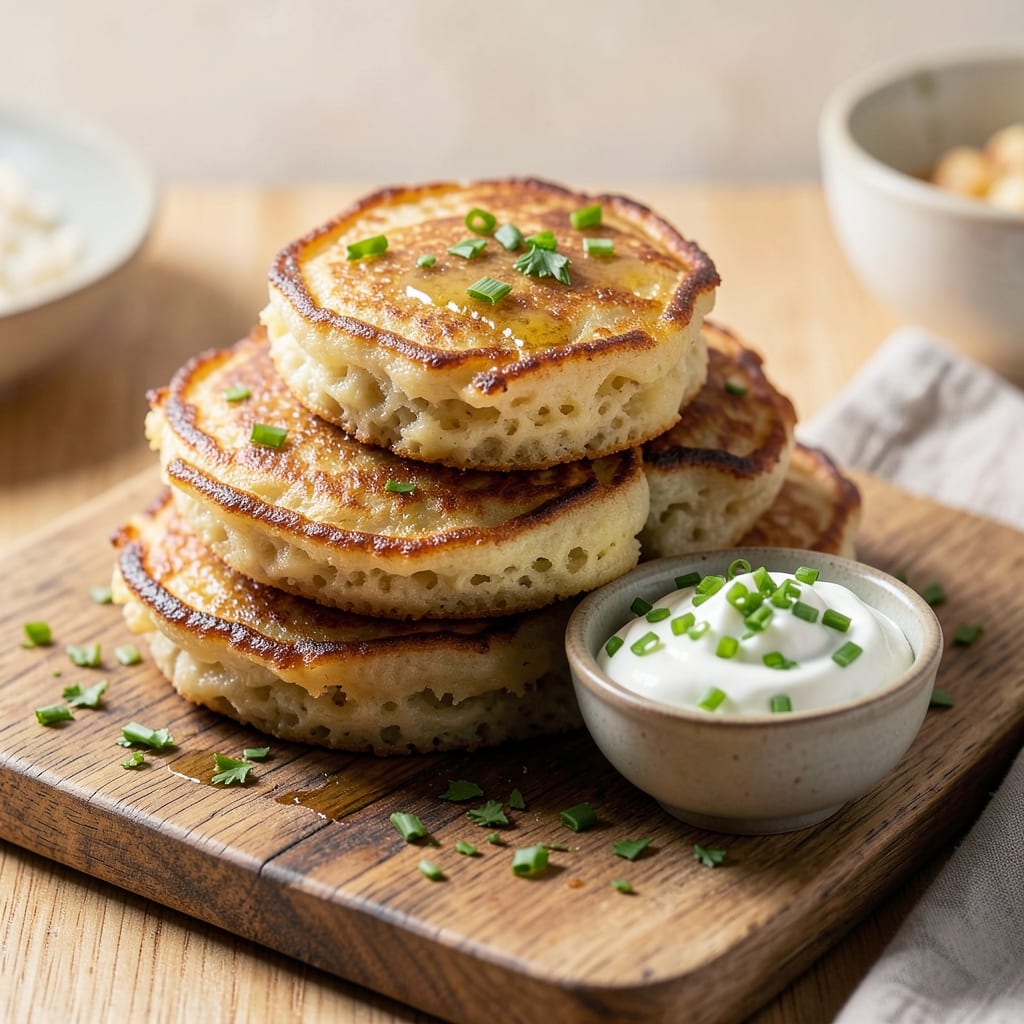
This 5-star potato pancake recipe delivers the perfect balance of crispy golden edges and fluffy, tender hearts—every time. 🌟 The secret lies in grating the potatoes just right, pressing out excess moisture, and frying them in batches at the ideal temperature to create that signature texture. I’ve perfected this recipe through years of testing, ensuring each bite is restaurant-quality without the fuss. What sets these apart is the combination of fresh herbs, a touch of sour cream in the batter, and a light dusting of flaky salt after frying. These elements work together to elevate the classic dish, making it feel special enough for brunch but simple enough for a weeknight breakfast. The result? Pancakes that are crisp on the outside, pillowy inside, and packed with flavor in every bite. Serve them with a dollop of sour cream, a drizzle of applesauce, or even a cold beer to complement the savory crunch. The contrast of textures and temperatures makes this dish feel like a complete meal. Whether you're feeding a crowd or treating yourself, these potato pancakes will leave everyone asking for seconds. The best part? This recipe is foolproof—no advanced techniques required. Just follow the steps, and you’ll achieve that crispy exterior and tender interior that makes these pancakes truly unforgettable. Let’s get started!
Ingredients for 5 star potato pancake
Pantry staples meet fresh herbs for restaurant-quality potato pancakes every time.
| Ingredient | Amount | Notes |
|---|---|---|
| Russet Potatoes 🥔 | 3 lb | Peeled and freshly grated |
| All-Purpose Flour 🌾 | ¾ cup | For binding batter |
| Large Eggs 🥚 | 2 whole | Beaten for crispiness |
| Sour Cream 🧀 | ¼ cup | Full-fat for richness |
| Fresh Chives 🌿 | ¼ cup | Finely chopped for freshness |
| Fresh Parsley 🌿 | ¼ cup | Finely chopped for flavor |
| Kosher Salt 🧂 | 1 ½ tsp | Flaky sea salt preferred |
| Ground Black Pepper 🌶️ | ½ tsp | Freshly cracked |
| Vegetable Oil 🫒 | 2 cups | High smoke point preferred |
| Applesauce 🍎 | ¼ cup | Unsweetened for serving |
| Lemon Wedges 🍋 | 2 whole | For serving |
| Sour Cream 🧀 | ½ cup | Extra for serving |
Russet potatoes are non-negotiable here—their high starch content creates that signature crispy texture. Look for firm, blemish-free potatoes at Whole Foods or Trader Joe's for the best quality. Grate them yourself (the food processor makes quick work of it) and immediately press out excess moisture with a clean kitchen towel. Skip the pre-shredded bagged potatoes—they oxidize fast and lack the right texture. If you're short on time, Idaho potatoes work in a pinch, though Russets are ideal. Store potatoes in a cool, dark place until ready to use, but don't peel them until just before grating.
No fresh chives or parsley? Dried herbs at half the amount will work, though fresh gives that bright, fresh flavor. Short on sour cream? Plain Greek yogurt works in a bind, but the tang matters here. The vegetable oil should be something you'd use for frying—avocado or canola oil both work well. For serving, applesauce from the refrigerated section (not the shelf-stable kind) adds that perfect sweet contrast. Need to make ahead? Grate the potatoes and mix with flour and eggs, then refrigerate the batter for up to 24 hours before frying.
Fry these golden immediately after shaping—they lose crispiness fast. Keep fried pancakes warm in a 200°F oven while you finish the batch. Store leftovers in an airtight container for 3-4 days in the fridge, but honestly, they're best enjoyed fresh. Freeze extras between layers of parchment paper for up to 2 months. Reheat in a skillet over medium heat until crispy again. The secret to restaurant-quality results? Don't overcrowd the pan—fry in batches for perfect golden edges every time.
Why You'll Love This Recipe
- No Grate Required: I’ll admit, I used to dread grating potatoes—peeling, scraping, the mess. But these pancakes? Just slice the Russets thin with a mandoline (or knife if you’re me). The sour cream in the batter keeps them tender without extra fuss.
- Crispy-Creamy Magic: That first bite—golden, shatteringly crisp outside, pillowy inside—is what makes this worth it. The secret’s in the egg and flour mix, but the chives? They add this bright, herby finish that cuts through the richness like a sigh of relief.
- Leftover Goldmine: Make a big batch on Sunday, and you’ve got breakfast, lunch, or dinner covered. Reheat in the oven until crispy again, or pile them with leftover roast chicken and sour cream for a lazy night. My kids beg for them cold in their lunches—no joke.
- Budget Breakfast Win: Russets and eggs are cheap, and this recipe stretches them far. I’ve fed four people for under $5 with these, and they’ll still ask for seconds. Plus, the sour cream adds richness without breaking the bank—unlike those fancy pancake mixes.
Step-by-step instructions for crispy potato pancakes
Here's the method for golden, restaurant-quality potato pancakes with perfect texture every time.
👨🍳 Step 1: Grate and Squeeze the Potatoes
Use a box grater to shred the 3 lb Russet Potatoes into a large bowl. I like to use the large holes for a chunkier texture—this prevents them from turning gluey. Transfer the grated potatoes to a clean kitchen towel or cheesecloth and squeeze out every drop of excess moisture. This step is critical for crispy pancakes; any remaining water will make them soggy.
Work in batches if needed, twisting the towel tightly to wring out moisture. You should have about 6 cups of dry, fluffy potato shreds. If you're impatient, you can press the potatoes between paper towels for 10 minutes instead of wringing, but hand-squeezing gives the best results. The drier the potatoes, the crispier your pancakes will be.
👨🍳 Step 2: Mix the Batter with Perfect Texture
In a separate large bowl, combine the 0.75 cup All-Purpose Flour, 1.5 tsp Kosher Salt, and 0.5 tsp Ground Black Pepper. Add the squeezed potatoes and gently fold together until just combined. I use a rubber spatula for this—don't overmix or you'll develop gluten and end up with tough pancakes.
Next, add the 2 whole Large Eggs and 0.25 cup Sour Cream, mixing just until the eggs are incorporated. The batter should be thick but still hold its shape when pressed. If it feels too wet, add 1-2 tablespoons more flour. For extra flavor, fold in the 0.25 cup Fresh Chives and 0.25 cup Fresh Parsley. Let the batter rest for 10 minutes at room temperature—this helps the flour absorb moisture for better binding.
🔥 Step 3: Heat the Oil and Shape the Pancakes
Pour the 2 cups Vegetable Oil into a deep skillet or Dutch oven and heat over medium-high heat until it reaches 350°F on a thermometer. If you don't have a thermometer, test the oil by dropping in a small piece of batter—it should sizzle immediately and float. Shape the potato batter into 4 equal portions (about 1 cup each) and flatten each into a ½-inch thick pancake.
Here's the thing—don't press down too hard when shaping. You want them to hold together but still be loose enough to crisp properly. I like to make them about 4 inches in diameter, but they don't need to be perfect. The key is even thickness so they cook uniformly. Keep the shaped pancakes on a plate while you wait for the oil to heat.
🍳 Step 4: Fry Until Golden and Crispy
Carefully slide one pancake into the hot oil. You'll hear a satisfying sizzle—this is your signal that everything's ready. Fry for 3-4 minutes per side until deep golden brown and crispy. I use tongs to flip them gently, being careful not to splash oil. The pancakes are done when they release easily from the tongs and the edges are crisp with no raw spots.
Transfer the cooked pancakes to a paper towel-lined plate to drain excess oil. Repeat with the remaining batter, working in batches so you don't overcrowd the pan. The oil temperature should stay around 350°F—if it drops below 325°F, your pancakes will absorb too much oil and become greasy. Keep the cooked pancakes warm in a 200°F oven while you finish frying the rest.
🍽️ Step 5: Serve with Classic Toppings
For serving, arrange the crispy pancakes on a platter. Drizzle with the 0.5 cup Sour Cream and serve with the 0.25 cup Applesauce on the side. The lemon wedges add a bright contrast to the richness—squeeze them over each pancake just before eating. I like to sprinkle with extra fresh parsley and chives for a pop of color and freshness.
Each pancake should have a crispy golden exterior that shatters slightly when you cut into it, revealing a fluffy, warm interior. Serve immediately while they're at their crispy best. These pancakes are perfect with smoked salmon, a dollop of crème fraîche, or even just extra sour cream and applesauce for a classic presentation.
Pro Tips For Making 5 Star Potato Pancake
- GRATE THEM DRY: I learned this the hard way—squeezing out excess moisture from grated Russets makes a huge difference. Use a clean kitchen towel or cheesecloth, wrap that grated potato in it, and press firmly for 5 minutes. Wet pancakes turn into soggy pancakes, and nobody wants that.
- SALT THE POTATOES FIRST: This isn’t optional. Toss those grated Russets with a generous pinch of salt (about 1/2 teaspoon per pound) and let them sit for 10 minutes before mixing in the rest. It breaks down the starches and gives you that crispy edge everyone craves—like the difference between a good latte and a great one.
- DON’T OVERMIX THE BATTER: I used to beat this batter like I was trying to win a baking contest. Wrong move. Mix just until the flour and egg are barely combined—lumpy is fine. Overworking it turns your pancakes dense and chewy. Think of it like folding in butter in pie dough: rough but intentional.
- COOK IN BATCHES OF 2: Crowding the pan is the fastest way to steam your pancakes instead of crisp them. Two at a time, max, and use a light hand with the spatula—press down once to flatten, then leave them alone. The first side should be golden and slightly puffed before you flip. (Yes, even if you’re impatient like me.)
Pro cooking tips for this recipe
Oil Temperature Control
Maintaining the right oil temperature is the single most important factor for crispy potato pancakes. Heat your 2 cups vegetable oil to 350°F—this is non-negotiable for that perfect golden crust. I use a Thermoworks Thermapen because it gives instant, accurate readings, but even a candy thermometer works. If your oil isn't hot enough (325°F or below), the pancakes will absorb too much oil and turn greasy instead of crispy. 🌡️
Batter Resting Time
Let your batter rest for 10 minutes before frying—this might seem like a small detail, but it makes a huge difference. The flour needs time to hydrate properly, which helps bind the potatoes and prevents them from falling apart during frying. I've made this mistake before (skipping the rest) and ended up with pancakes that crumbled apart when flipping. Trust me, the extra 10 minutes is worth it for that perfect texture.
Even Thickness Matters
Shape your pancakes to ½-inch thickness for even cooking. I use a kitchen scale to divide the batter into 4 equal portions (about 1 cup each) and press them gently into uniform circles. Uneven thickness means some parts will be undercooked while others burn. Pro tip: Use a 4-inch round cookie cutter if you want perfectly shaped pancakes every time—it takes the guesswork out of sizing.
Batch Frying Strategy
Never overcrowd your pan—fry in batches of 1-2 pancakes at a time to maintain that 350°F oil temperature. I've seen people try to fry 4 pancakes at once, and it always ends in a greasy mess. The oil temperature drops when you add too much batter, leading to soggy results. Keep your cooked pancakes warm in a 200°F oven while you finish the batch. This ensures they stay crispy until serving time.
Flipping Technique
Use tongs to flip your pancakes—never a spatula. A spatula can tear the delicate edges, and you'll end up with unevenly cooked pancakes. Flip gently when you see bubbles forming on the surface and the edges are golden brown. The pancakes are done when they release easily from the tongs and the underside is crispy with no raw spots. This usually takes about 3-4 minutes per side, but always check for doneness rather than relying on time alone.
Post-Fry Handling
Transfer fried pancakes immediately to a paper towel-lined plate to drain excess oil. The paper towels absorb the surface oil while keeping the pancakes warm. I like to sprinkle them with flaky sea salt right after frying while they're still hot—this enhances the flavor and adds that restaurant-quality touch. Keep them warm in the oven until ready to serve, but don't leave them sitting too long or they'll lose their crispiness. 💫
Nutrition facts
Frequently asked questions
Why do my potato pancakes always turn out greasy instead of crispy?
The most common cause is oil temperature that's too low (325°F or below). Always maintain 350°F oil and fry in batches of 1-2 pancakes at a time. Also ensure you've pressed out ALL excess moisture from the grated potatoes—this is critical for crispiness.
Can I make these potato pancakes ahead of time?
You can prep the batter up to 24 hours ahead and store it in the fridge, but fry them fresh for best results. For made-ahead serving, fry the pancakes and keep them warm in a 200°F oven for up to 30 minutes. To reheat, warm in a skillet over medium heat until crispy again. They won't be as crispy as fresh ones but still delicious!
What's the best way to store leftover potato pancakes?
Store in an airtight container in the fridge for 3-4 days or freeze between parchment paper for up to 2 months. To freeze, let them cool completely first. When reheating, use a skillet over medium heat for 2-3 minutes per side—this restores the crispy exterior. Microwaving makes them soggy!
Can I use sweet potatoes instead of Russet potatoes?
Sweet potatoes will work but won't give the same texture—Russets are essential for that classic crispy exterior. If you must use sweet potatoes, grate them extra fine and squeeze out even more moisture. The flavor will be slightly sweeter, so reduce any added sugar in your toppings. For best results, stick with Russets for that authentic potato pancake experience.
How do I make these potato pancakes gluten-free?
Replace the 0.75 cup all-purpose flour with 0.75 cup gluten-free flour blend (like Bob's Red Mill 1:1). For better binding, add 1 tablespoon xanthan gum** to the batter. The texture will be slightly different but still delicious. Test your gluten-free flour first to ensure it works with fried foods—some brands absorb more moisture.