
Desserts
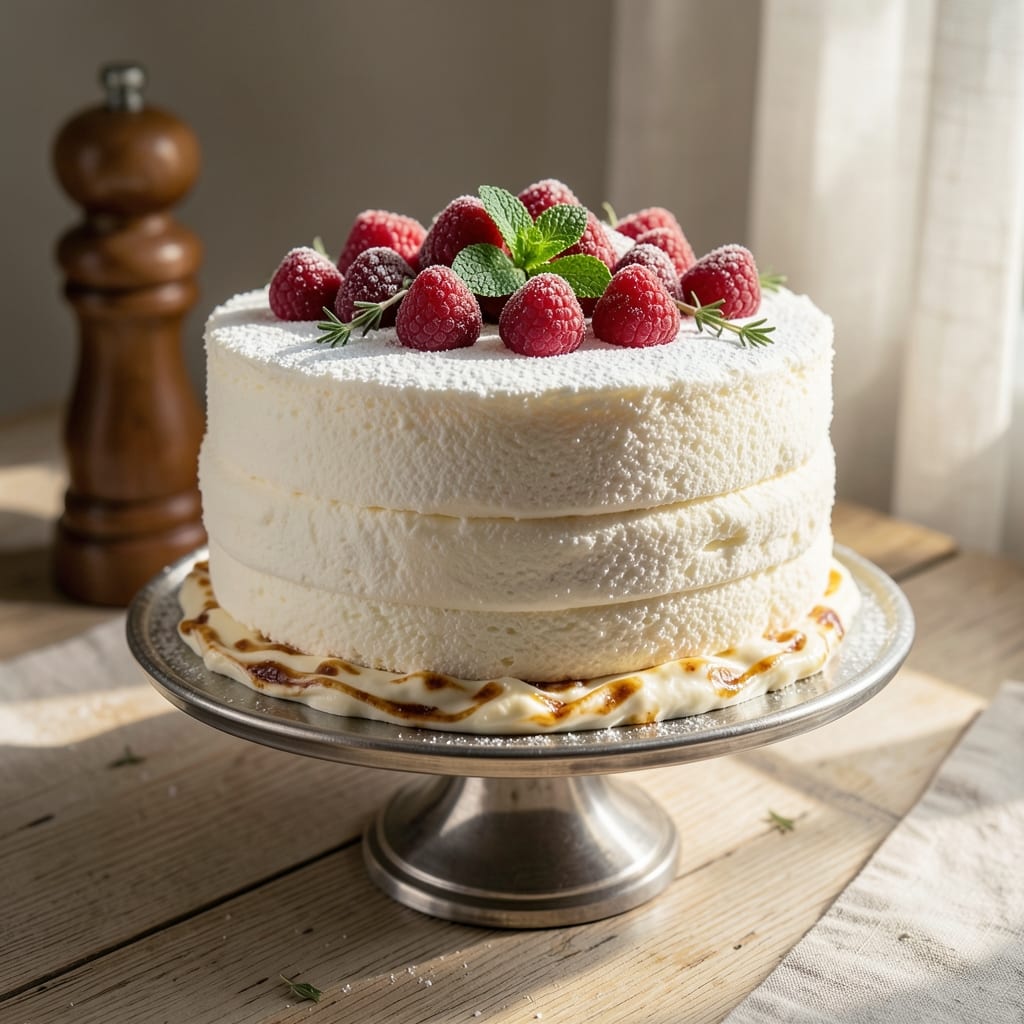
This 6-inch angel food cake recipe delivers the signature cloud-light texture without the fuss of traditional methods. ✨ The secret lies in properly whipped egg whites and gradual sugar incorporation—techniques that transform simple ingredients into a dessert with restaurant-quality height and tenderness.
Unlike heavier cakes, angel food relies entirely on air for structure, which means no butter or oil. Instead, we use whipped egg whites folded with sugar to create those signature air pockets that make each slice feel like a cloud. The key is patience—whipping the eggs to stiff peaks and folding gently to maintain volume.
What you’ll end up with is a tall, golden cake with a crisp crust and a light, airy interior that melts in your mouth. Serve it plain with fresh berries, or drizzle with whipped cream and chocolate sauce for a classic presentation. The best part? No greasy residue in your pan.
Perfect for special occasions or impromptu desserts, this cake bakes in just 30 minutes and requires minimal effort. Let’s get baking!
Ingredients for 6 inch angel food cake
Twelve egg whites and a touch of patience—this is all it takes for a cloud-light cake.
| Ingredient | Amount | Notes |
|---|---|---|
| Large Egg Whites 🥚 | 12 whole | Room temperature, pasteurized preferred |
| Granulated Sugar 🍚 | 1 ½ cups | Superfine preferred for smoothness |
| Unbleached All-Purpose Flour 🌾 | 1 ½ cups | Sifted for light texture |
| Cream of Tartar 🧂 | 1 ½ tsp | Essential for egg white stability |
| Vanilla Extract 🌿 | 1 tbsp | Pure vanilla preferred |
| Salt 🧂 | ½ tsp | Fine sea salt preferred |
| Unsalted Butter 🧈 | ½ tsp | For greasing pan only |
| Fresh Raspberries 🍓 | 1 cup | For filling, optional |
| Powdered Sugar 🍚 | ½ cup | For dusting, optional |
The egg whites make or break this cake. Room temperature whites whip up faster and hold volume better—pop them in a warm water bath for 10 minutes if they're straight from the fridge. Pasteurized egg whites from the store work great too, no need for raw eggs. Cream of tartar is non-negotiable—it stabilizes the whites and gives you those perfect stiff peaks. I grab mine at Whole Foods in the baking aisle, but any grocery store has it. The flour? King Arthur unbleached is my go-to—it's sifted and consistent. Pro tip: Sift it right into your mixing bowl to avoid extra mess.
No cream of tartar? Lemon juice at half the amount works in a pinch, but the flavor difference is noticeable. Superfine sugar isn't mandatory, but it dissolves faster during whipping—regular granulated works fine if you're in a hurry. The raspberries? Frozen works perfectly—thaw and drain them first. For dusting, powdered sugar is classic, but confectioners' sugar from Trader Joe's is cheaper and just as good. Want extra flavor? Add a splash of almond extract to the vanilla—trust me, it's a game-changer.
This cake is best served fresh—it loses its cloud-like texture after 24 hours. Store it in an airtight container at room temperature if you must, but honestly, it's better eaten the same day. The pan? Unbleached aluminum is ideal, but any 6-inch tube pan works. Grease it with butter and dust with flour—no need for fancy non-stick spray. Leftovers? Slice and freeze between parchment paper for up to 1 month. Perfect for quick desserts when you're in a rush.
Why You'll Love This Recipe
- I’ll be real: angel food cake can feel fancy, but this version is cheap. Egg whites in bulk, basic sugar, and flour? We’re talking under $5 for a whole batch. Plus, the leftovers (if there are any) reheat beautifully with a quick broil—just dust with powdered sugar and serve. My wallet thanks me every time.
- No-Fuss Ingredients: I swear by this recipe because it’s just five things—egg whites, sugar, flour, cream of tartar, and vanilla. That’s it. No butter, no oil, no fancy gadgets. The cream of tartar is the secret weapon here, stabilizing those whites so they whip up light as air without any guesswork.
- Cloud-Light Texture: Here’s what sold me—the way it bakes up. Fluffy, airy, and so tender you could cut it with a butter knife. The egg whites do all the heavy lifting, creating that signature angel food cake crumb that’s not dense or heavy. Honestly, it’s the kind of cake that makes me want to take a bite just to admire the structure.
- Slice-and-Serve Magic: Between us, this is my go-to for anything that needs a cake—birthday mornings, picnic toppings, or even dessert after a big dinner. The 6-inch size means I can pop it in the oven and have single servings ready in minutes. No leftovers? No problem. It’s so light it disappears fast.
Step-by-step instructions for light-as-air angel food cake
Here's how to bake a fluffy, cloud-like angel food cake that's foolproof every time.
🍳 Step 1: Prepare the Bowl and Egg Whites
Grease a 6-inch angel food cake pan with the 0.5 teaspoon unsalted butter, then dust it thoroughly with unbleached all-purpose flour. Tap out any excess flour—this prevents sticking. Place the pan in the freezer while you prepare the batter.
Separate the 12 large egg whites into a very clean, grease-free bowl. Any trace of fat will prevent proper whipping. Place the bowl in the refrigerator for 10 minutes to chill slightly—this helps stabilize the egg whites for better volume. Meanwhile, measure out the 1.5 teaspoons cream of tartar and 0.5 teaspoon salt in a small bowl.
👨🍳 Step 2: Whip the Egg Whites to Stiff Peaks
Remove the chilled egg whites from the fridge and add the cream of tartar and salt. Using a clean, whisk attachment, beat on high speed until soft peaks form—when you lift the whisk, the peaks should hold their shape but still flatten slightly at the tip.
Gradually add the 1.5 cups granulated sugar, 1 tablespoon at a time, beating 5 minutes after each addition. This slow incorporation creates stable meringue with small, even bubbles. The mixture should look glossy and hold firm peaks—when you lift the whisk, the peaks should stand straight up and not collapse.
🍳 Step 3: Fold in Flour and Vanilla
Sift the 1.5 cups unbleached all-purpose flour over the meringue in 3 additions, gently folding it in with a spatula using a J-shaped motion. This preserves the air in the meringue. After each addition, make 10-12 gentle folds until no streaks remain.
Add the 1 tablespoon vanilla extract and fold it in with 5 more gentle strokes. The batter should be thick but still pourable—if it's too stiff, you've overmixed. Don't worry if it looks slightly lumpy; the cake will still rise beautifully.
🔥 Step 4: Bake with Precision
Preheat the oven to 350°F with the rack positioned in the center. Remove the chilled pan from the freezer and quickly pour the batter into it, spreading evenly with a spatula. Tap the pan gently on the counter 3-4 times to release any air bubbles.
Bake for 30-35 minutes, until the top springs back when touched lightly. The cake should pull away from the sides of the pan and be golden brown at the edges. Do not open the oven door during baking—this causes the cake to collapse.
⏰ Step 5: Cool and Fill (Optional)
Immediately invert the cake onto a wire rack and let it cool completely—this can take 1-2 hours. This gradual cooling prevents cracking. If using the 1 cup fresh raspberries, mash them lightly with 0.5 cup powdered sugar to create a filling.
Slice the cake horizontally and spread the raspberry filling between the layers. Dust the top and sides with the remaining powdered sugar for a sweet, snowy finish. Serve immediately or store in an airtight container for up to 3 days.
Pro Tips For Making 6 Inch Angel Food Cake
- Whip Whites Cold: Pop your egg whites straight from the fridge—they’ll whip faster and hold more volume. I used to bring them to room temp, and my cakes always felt lighter but less stable. Cold whites add structure without sacrificing fluffiness.
- Sift Flour Twice: Sift that all-purpose flour before folding it in, then sift again right before mixing. Angel food cake relies on air, and clumps kill it. Yes, it’s extra work, but your cake will rise higher and stay tender longer.
- Skip the Grease: No butter, no oil, not even a whisper of cooking spray in that tube pan. The cake needs to cling to the sides as it bakes—grease makes it collapse like a sad soufflé. Dust the pan with flour, then tap out the excess.
- Bake Until Cool: Let the cake cool in the pan for at least 10 minutes before unmolding—no peeking, no rushing. I learned this after one batch stuck like glue and crumbled into a mess. Patience here means a clean release and a sturdier cake.
Pro cooking tips for 6 inch angel food cake
Egg White Whipping Mastery
Properly whipped egg whites make or break this cake—stiff peaks are non-negotiable. Use a clean, grease-free bowl (even a trace of fat prevents volume) and a stand mixer with whisk attachment for consistency. I whip mine on high speed until the peaks hold their shape but still bend slightly at the tip. Add cream of tartar first—it stabilizes the whites and gives you firm, glossy peaks that hold up during baking. 💫
Gradual Sugar Incorporation
Never dump all the sugar at once! Add 1.5 cups granulated sugar in 1-tablespoon increments, beating for 5 minutes after each addition. This gradual process creates small, even air bubbles that translate to a light, airy texture. If you rush, you’ll end up with grainy, dense cake. I use superfine sugar for smoother results, but regular granulated works in a pinch.
Gentle Folding Technique
Folding in the flour is where most people mess up—overmixing destroys air pockets. Use a spatula and J-shaped motions to gently incorporate the 1.5 cups sifted flour in 3 additions. After each fold, the batter should look slightly streaky but still thick. Overmixing makes the cake dense and tough. I make 10-12 folds per addition—just enough to combine without deflating the meringue.
Oven Precision Matters
Preheat your oven to 350°F and place the rack in the center—this ensures even baking. Do not open the oven door during the 30-35 minute bake time, or the cake will collapse from the sudden temperature drop. The cake is done when it springs back when touched lightly and pulls away from the pan edges. A toothpick test works too—it should come out clean.
Cooling Like a Pro
Inverting the cake onto a wire rack is crucial—it cools evenly and prevents cracking. Let it cool completely (1-2 hours) before slicing or filling. If you’re impatient, the cake will shrink and lose its height. For extra stability, I place the inverted cake in the fridge for 10 minutes while it cools—this helps it hold its shape longer.
Filling and Serving
For a classic touch, fill the cake with mashed raspberries mixed with powdered sugar before the final dusting. Serve immediately for the lightest texture, or store in an airtight container for up to 3 days. If freezing, slice first and wrap layers in parchment paper to prevent drying. The key? Serve it fresh—this cake’s magic fades after 24 hours. ✨
Nutrition facts
Frequently asked questions
Why does my angel food cake collapse?
Collapse happens when air escapes during baking. Avoid opening the oven door during the 30-35 minute bake, and make sure your egg whites reach stiff peaks before folding in flour. Also, tap the pan gently 3-4 times on the counter after pouring to release trapped air bubbles.
Can I make this cake without a tube pan? Yes! Use a 6-inch round cake pan instead, but grease and flour it thoroughly. The cake will be shorter but still light and airy. For a tube pan look, try a springform pan lined with parchment paper—just
How do I get rid of the raw flour taste?
Raw flour taste means you didn't fold it in enough. Use a spatula for 10-12 gentle folds per addition, and make sure the flour is fully incorporated. For extra flavor, add 1 teaspoon lemon zest or ½ teaspoon almond extract to the batter. The vanilla already helps mask any flour notes slightly.
Can I use this recipe for a 9-inch cake?
No—this recipe is specifically scaled for a 6-inch pan. For a 9-inch, double all ingredients and bake at 325°F for 45-50 minutes. The larger volume needs a lower temp to bake evenly. The cooling time will also increase to 3-4 hours for complete stability.
What's the best way to store leftovers?
Wrap individual slices in plastic wrap and store in an airtight container at room temperature for 2 days. For longer storage, freeze slices between layers of parchment paper for up to 1 month. Reheat in the oven at 300°F for 5 minutes to restore freshness.