
Desserts
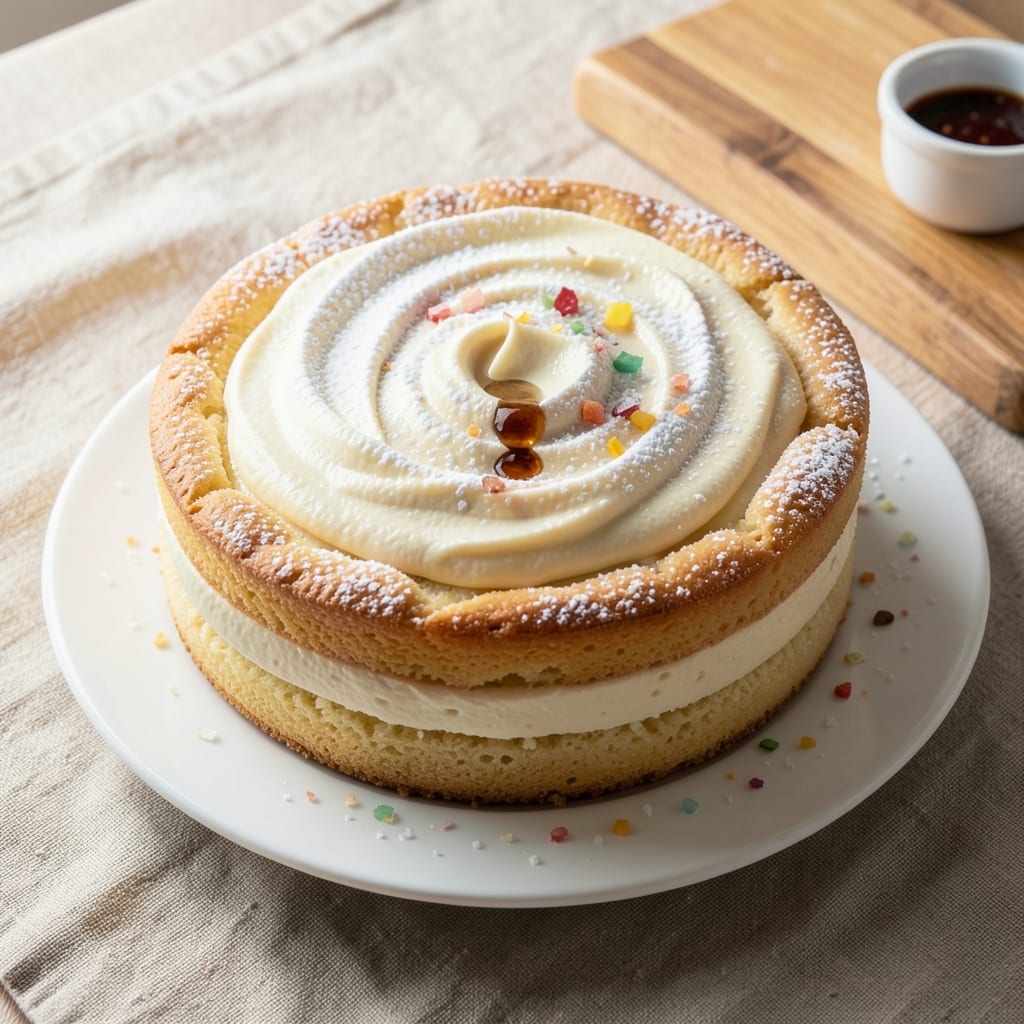
A 6-inch round vanilla cake with silky, moist layers and a buttery crust is the perfect centerpiece for any celebration. This recipe delivers restaurant-quality results with precise measurements and professional techniques that ensure even baking and tender crumb. The secret lies in proper mixing methods and careful temperature control—no guesswork, just consistent results every time.
What sets this cake apart is its foolproof approach to moisture and texture. Creaming butter and sugar properly creates air pockets that keep the cake light, while precise ingredient ratios guarantee a tender crumb that stays moist for days. The butter crust adds an elegant touch without overpowering the delicate vanilla flavor—it’s the kind of cake that tastes homemade but looks like it came from a bakery.
Once baked, the cake develops a golden top with a subtle sheen, signaling perfect doneness. Cooling properly prevents cracking, and the layers separate cleanly for easy frosting. Whether you’re decorating with simple buttercream or elegant fondant, this cake provides the ideal canvas for your creativity.
Perfect for birthdays, anniversaries, or impromptu gatherings, this recipe scales beautifully for special occasions. The 6-inch size makes it ideal for small celebrations or as a single-serving showstopper. Let’s create a cake that’s as impressive as it is delicious.
Ingredients for 6 inch round vanilla cake
Twelve ingredients transform into a showstopping 6-inch vanilla cake with layers so moist they’ll have you questioning bakery secrets.
| Ingredient | Amount | Notes |
|---|---|---|
| Unsalted Butter 🧈 | ¾ cup | Cold, cubed for proper creaming |
| Granulated Sugar 🍚 | 1 cup | Superfine preferred for smooth texture |
| Vanilla Extract 🌸 | 2 tsp | Pure Madagascar or Tahitian |
| Large Eggs 🥚 | 2 whole | Room temperature for even mixing |
| All-Purpose Flour 🌾 | 1 ½ cups | Sifted, plus extra for dusting |
| Baking Powder 🍞 | 1 ½ tsp | Freshly opened for lift |
| Diamond Crystal Kosher Salt 🧂 | ½ tsp | Adjusts to 1 tsp table salt |
| Whole Milk 🥛 | ½ cup | Room temperature for smooth batter |
| Vanilla Bean Seeds 🌸 | 1 whole | Scraped from 1 pod for depth |
| Powdered Sugar 🍚 | ½ cup | For buttercream (optional) |
| Butter (for crust) 🧈 | ¼ cup | Melted, chilled to set |
| Fine Sanding Sugar 🍚 | 2 tbsp | For decorative crust coating |
The butter matters most here—European-style unsalted butter like Plugrá or Bergère delivers that rich, tender crumb we’re after. If you’re using regular butter, make sure it’s cold and cubed before creaming—room temperature butter creates dense cakes. For the vanilla, Madagascar beans from Williams Sonoma or Sur La Table give that authentic depth, but pure extract works in a pinch. The flour? King Arthur or Gold Medal are my go-tos—they’re reliable and produce consistent results. Sift it before measuring to avoid dense layers, and trust me on the sanding sugar for the crust—it’s worth the extra minute for that bakery-style finish.
No vanilla bean? Double the extract—just scrape the seeds into the batter for that extra pop. Running short on powdered sugar for buttercream? Process granulated sugar in a food processor for a quick substitute. The milk can be swapped for heavy cream or buttermilk, but whole milk keeps it classic. For a richer texture, add 1 tbsp sour cream to the batter. And if you’re making this ahead? Whip the buttercream up to 2 days early—it actually improves with time. The cake layers themselves? Bake them 1 day apart if you’re nervous about frosting—it gives the first layer time to fully cool and prevents sogginess.
This cake is a 3-day masterpiece—the layers stay moist, the buttercream doesn’t weep, and the flavor deepens. Wrap each layer in plastic wrap and store at room temperature between parchment paper for up to 2 days. For longer storage, freeze the unfrosted layers for 1 month—thaw at room temp before assembling. The buttercream? Keep it in an airtight container in the fridge for 5 days, then bring to room temp before whipping again. Pro tip: Brush the layers with simple syrup right before frosting—it adds moisture and helps the buttercream adhere like a dream.
Why You'll Love This Recipe
- No Mixer Needed: I swear by this recipe when I’m in a rush—just cream the butter and sugar by hand (or use a fork if you’re really short on time). The eggs and vanilla blend in smooth, and the flour folds right in without overworking it. That’s the magic of a simple vanilla cake: it forgives you.
- Butter-Sugar Bliss: Here’s what sold me—the way the butter and sugar come together. You’re not just mixing dry ingredients; you’re building layers of richness. That first bite? Creamy, with a whisper of vanilla that lingers. Honestly, it’s the kind of cake that makes you want to skip dessert and just have seconds of this instead.
- Half-Sheet Hero: Between us, this recipe is my go-to for birthdays, potlucks, or even just because. A 6-inch round serves two with ease, or make two pans for a crowd—no one will guess it’s this unfussy. I’ll be real: I’ve even used leftover slices for French toast the next morning. (Yes, even on a Tuesday night.)
- Pantry Staples Only: No specialty ingredients, no last-minute store runs. Butter, sugar, eggs, flour, and vanilla—stuff you already have. That’s the beauty of this cake: it’s budget-friendly, reliable, and never feels like a chore. Plus, leftovers? They keep for days, so you’re not stuck baking every weekend. My secret weapon, really.
Step-by-Step instructions for silky moist vanilla cake layers
This method delivers tender, perfectly moist layers with a delicate buttery crust every time.
Cream Butter and Sugar for Maximum Fluffiness
In a stand mixer fitted with the paddle attachment, beat the 0.75 cup unsalted butter (cold and cubed) with the 1 cup granulated sugar on medium speed for 3-4 minutes until light and fluffy. You'll know it's ready when the mixture nearly doubles in volume and leaves faint ribbons when the paddle is lifted.
This creaming process incorporates air into the batter, which creates that signature tender crumb. I like to scrape down the sides of the bowl every 30 seconds to ensure even mixing. If using superfine sugar, the mixture will blend more quickly—just watch for that pale, fluffy texture.
Incorporate Eggs and Vanilla for Rich Flavor
Add the 2 whole large eggs (room temperature) one at a time, mixing on low speed for 30 seconds after each addition until fully combined. Then add the 2 tsp vanilla extract and the 1 whole vanilla bean seeds (scraped from the pod), mixing for another 30 seconds until the vanilla is fully dissolved.
The vanilla bean seeds add a subtle depth that pure extract can't match. Here's the thing—don't overmix at this stage. You want to maintain those tiny air bubbles created in the creaming process. The batter should look smooth but still have a slight sheen from the incorporated air.
Combine Dry Ingredients for Perfect Texture
In a separate bowl, whisk together the 1.5 cups all-purpose flour, 1.5 tsp baking powder, and 0.5 tsp diamond crystal kosher salt. With the mixer on low speed, gradually add the dry ingredients to the wet mixture, alternating with the 0.5 cup whole milk in 3 additions. Begin and end with the dry ingredients.
This alternating method ensures even distribution of ingredients and creates a tender crumb. After adding all the dry ingredients, mix just until combined—you should still see small flour streaks. Overmixing develops gluten, which leads to tough cake layers. The batter should be smooth and pourable.
Prepare and Bake the Cake Layers
Preheat your oven to 350°F and grease two 6-inch round cake pans with butter, then dust with flour. Divide the batter evenly between the pans. For extra moisture, I place a sheet of parchment paper on the bottom of each pan before adding the batter.
Bake for 25-30 minutes, or until a toothpick inserted into the center comes out clean. The edges should be golden brown, but the top might still look slightly underbaked—this is normal for a moist cake. When done, let the cakes cool in the pans for 10 minutes, then transfer to a wire rack to cool completely.
Create the Buttery Crust and Decorate
While the cakes cool, melt the 0.25 cup butter (for crust) in a small saucepan over low heat, then stir in 2 tbsp fine sanding sugar until fully combined. Brush this mixture evenly over the cooled cake layers, letting any excess drip off the sides.
For the final touch, dust the top and sides with the remaining 0.5 cup powdered sugar for a delicate finish. This crust adds a beautiful contrast to the tender cake layers and gives that professional bakery look. The sanding sugar adds a subtle crunch that complements the moist interior perfectly.
Pro Tips For Making 6 Inch Round Vanilla Cake
- Cream Butter Slowly: I learned this the hard way—whipping cold butter and sugar too fast just makes a greasy mess. Let the butter sit at room temp for 1 hour first, then mix on medium speed for 3-4 minutes until the sugar dissolves completely. That’s when you know you’ve got the right texture: light, fluffy, and not a single grain of sugar left.
- Room-Temp Eggs Matter: Cold eggs? Forget it. They’ll curdle your batter faster than you can say “dry cake.” Pop them in a bowl of warm water for 10 minutes before cracking—just enough to make them yield like butter. Your cake’s moisture and structure will thank you (yes, even if you’re impatient like me).
- Don’t Overmix the Dry Ingredients: I used to pulse the flour and sugar together until it looked perfect. Turns out, that’s how you end up with a dense, tough cake. Sift the flour first, then gently fold it in with a spatula—just until combined. Overmixing develops gluten, and nobody wants a cake that chews like bread.
- Test for Doneness with a Toothpick: The oven light says “done,” but your cake might still be raw in the center. Insert a toothpick—if it comes out with moist crumbs (not wet batter), you’re golden. If it’s sticky, give it another 5-10 minutes. No guesswork, no dry edges, just perfect texture every time.
Creative variations of 6 inch round vanilla cake
Citrus Twist Variation
Brighten your vanilla cake with a zest-infused twist by adding 1 tbsp lemon or orange zest to the batter during Step 3. The citrus complements the vanilla beautifully while adding a subtle tang. I like to pair this with a white chocolate buttercream and garnish with fresh berries for a springtime celebration. 🌸
Chocolate-Dipped Layers
For a decadent twist, dip the cooled cake layers in melted dark or white chocolate before frosting. Use a 60% cacao dark chocolate for rich depth or white chocolate for a sweeter option. Let the chocolate set slightly before assembling—this creates a stunning marbled effect when sliced. 🍫
Spiced Vanilla Adaptation
Warm up your vanilla cake by adding ½ tsp cinnamon and ¼ tsp cardamom to the dry ingredients. This Middle Eastern-inspired variation pairs perfectly with a spiced honey buttercream made with 1 tbsp honey and a pinch of cayenne. The spices add complexity without overpowering the vanilla. 🌶️
Matcha Green Tea Fusion
Swap out ½ cup of the all-purpose flour for ½ cup matcha powder (high-quality ceremonial grade) for an earthy, vibrant twist. The matcha adds a subtle umami note that balances the sweetness. I recommend pairing this with a white chocolate ganache and gold leaf for an elegant presentation. 🍵
Boozy Vanilla Infusion
Enhance the flavor with 1 tbsp bourbon or vanilla-infused rum added to the wet ingredients during Step 2. The alcohol enhances the vanilla aroma while adding a smooth warmth. For a festive touch, dust the cake with edible gold powder or sprinkle with crushed pistachios before serving. 🥃
Seasonal Berry Compote
Replace the buttercream with a seasonal berry compote made from 1 cup mixed berries (strawberries, raspberries, or blackberries), 2 tbsp sugar, and 1 tsp lemon juice, simmered until thickened. Spread between layers and on top for a fruity, vibrant contrast that’s perfect for summer gatherings. 🍓
Nutrition facts
Frequently asked questions
Can I make this cake in a different-sized pan?
Yes, but you'll need to adjust the baking time and oven temperature. For a 6-inch round cake, we use 350°F for 25-30 minutes. A 7-inch pan would need 325°F for 35-40 minutes, while an 8-inch pan would require 325°F for 40-45 minutes. Always check with a toothpick—it should come out clean. The key is lower heat for larger pans to prevent over-browning.
Why does my vanilla cake turn out dense? Dense cake usually means overmixing or incorrect ingredient ratios.
How do I prevent my cake layers from cracking?
Cracking happens when cakes cool too quickly or aren't properly rested. After baking, let the cakes cool in their pans for 10 minutes, then transfer to a wire rack to cool completely. Never cool them directly on the counter. Also, make sure your oven is fully preheated—temperature fluctuations cause uneven baking. For extra insurance, brush the cooled layers with simple syrup before frosting.
Can I substitute buttercream with another frosting?
This cake works beautifully with cream cheese frosting, ganache, or even whipped cream for a lighter option. For a healthier alternative, try a Greek yogurt frosting made with 1 cup Greek yogurt, ½ cup powdered sugar, and 1 tsp vanilla. Just adjust sweetness to taste—some frostings are naturally sweeter than buttercream.
How do I store leftover cake?
Wrap each frosted layer tightly in plastic wrap and store at room temperature for up to 2 days. For longer storage, freeze the unfrosted layers for 1 month. Thaw at room temperature before frosting. The buttercream can be stored separately in an airtight container in the fridge for 5 days, then whipped back to smooth consistency. Brushing layers with simple syrup before storing adds extra moisture.