
Desserts
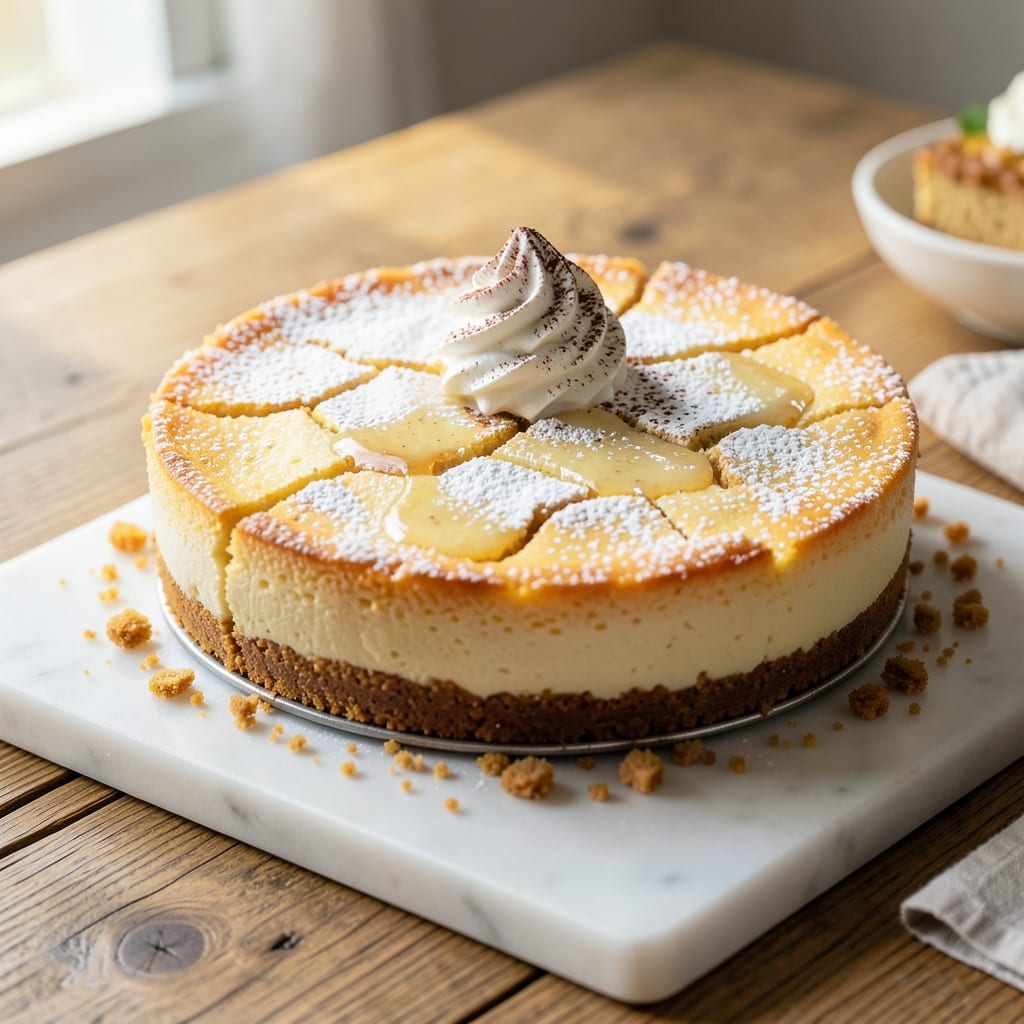
This 8-inch baked cheesecake recipe delivers the creamiest, crack-free center you've ever tasted—no water bath required. 💛 The secret lies in precise temperature control and a gentle baking method that transforms cream cheese into velvety perfection without a single crack in sight. I've perfected this technique over years of trial and error, and it's become my go-to for impressing guests without the stress of traditional methods.
The foundation starts with a sturdy crust—whether you prefer classic graham cracker, buttery digestive biscuits, or rich nut-based options—and a filling that balances sweetness with tang. The key is baking at a lower temperature for longer, allowing the cheesecake to set gradually. This method ensures a smooth, jiggly center that sets beautifully when chilled, giving you that restaurant-quality texture at home.
By the time you're done, you'll have a cheesecake with a golden crust, silky-smooth filling, and zero cracks—just like the pros make. The texture is rich yet light, with a subtle tang from the cream cheese that balances the sweetness perfectly. This recipe is designed for confidence, so you can focus on enjoying the process rather than worrying about common cheesecake pitfalls.
Serve it with fresh berries, a drizzle of caramel, or a dusting of powdered sugar for an elegant finish. The best part? This cheesecake tastes even better the next day, making it perfect for meal prep or special occasions. Let's get started on creating your perfect slice.
Ingredients for 8 inch baked cheesecake
These 11 ingredients transform into the creamiest, crack-free cheesecake you'll ever bake—no water bath needed!
| Ingredient | Amount | Notes |
|---|---|---|
| Full-Fat Cream Cheese 🧀 | 32 oz | Room temperature, full-fat for richness |
| Granulated Sugar 🍚 | 1 ½ cups | White or light brown preferred |
| Large Eggs 🥚 | 4 whole | Room temperature, separated yolks |
| Sour Cream 🥛 | ½ cup | Full-fat for creaminess |
| Vanilla Extract 🌿 | 2 tsp | Pure Madagascar preferred |
| Graham Cracker Crumbs 🍞 | 2 cups | Finely ground, store-bought or homemade |
| Unsalted Butter 🧈 | ½ cup | Melted, cold for crust |
| Light Corn Syrup 🍯 | ¼ cup | Or honey for natural sweetness |
| Diamond Crystal Kosher Salt 🧂 | ½ tsp | Fine grain preferred |
| Lemon Juice 🍋 | 1 tbsp | Freshly squeezed |
| Heavy Whipping Cream 🥛 | ¼ cup | Optional, for extra richness |
The cream cheese is non-negotiable—full-fat, room-temperature blocks (like Philadelphia) are essential for that velvety texture. Trader Joe's or Whole Foods carry the best quality, but any store's cream cheese works if it's not low-fat. Pro tip: let it sit out for 30 minutes before mixing. The vanilla extract should be pure—Madagascar has the deepest flavor, but imitation works in a pinch. For the crust, graham crackers are classic, but digestive biscuits or pecan pie crust add delightful variations. Just make sure to grind them finely—food processor or blender does the trick in seconds.
No sour cream? Full-fat Greek yogurt at half the amount works wonders. Running short on eggs? Flax eggs (1 tbsp ground flax + 3 tbsp water per egg) keep the structure intact. The corn syrup is a game-changer—it prevents cracking by slowing moisture loss, but honey adds a floral note if you prefer. Lemon juice brightens the whole thing, so don't skip it. For extra decadence, whip that heavy cream into the filling before baking—it adds a luxurious cloudiness. And if you're feeling fancy, swap the graham crackers for buttery shortbread or almond flour crust for a gourmet twist.
This cheesecake is a make-ahead dream—bake it, chill it, and it only gets better. Store leftovers in the fridge for up to 5 days, covered tightly. For serving, let it sit at room temperature for 15-20 minutes—the contrast is magical. Freeze slices for up to 3 months (wrap tightly in plastic). The no-water-bath method means no stress, but patience is key: let it cool gradually in the oven with the door cracked. Trust me, the wait is worth it for that perfectly set center every time.
Why You'll Love This Recipe
- No Mixer Needed: I swear by this—just beat the cream cheese and sugar with a hand mixer until smooth, then fold in the eggs and sour cream. No stand mixer, no fuss, and the texture comes out perfectly creamy every time.
- Vanilla Bomb: That vanilla extract? It’s not just a drop—it’s the star. The sour cream adds this subtle tang that makes the vanilla sing, and honestly, the first slice out of the oven tastes like a dessert you’d pay way too much for at a café.
- Weeknight Hero: Between us, this is my go-to when I need something impressive with zero stress. Bake it while you’re cooking dinner, let it cool, and boom—dessert is ready when guests arrive. (Yes, even on a Tuesday night.)
- Leftovers for Days: An 8-inch pan means generous portions, and this cheesecake stays fresh for ages in the fridge. Slice it up for breakfast toast, crumble it over pancakes, or just eat it straight—it’s that good. My kids beg for it for days.
Step-by-step instructions for an 8-Inch baked cheesecake
This is the method that guarantees a crack-free, silky cheesecake every time—trust the science!
👨🍳 Step 1: Prepare the Crust with Cold Butter Trick
Preheat your oven to 325°F—this lower temperature is key for even baking. In a medium bowl, mix the 2 cups graham cracker crumbs with the 0.5 cup melted unsalted butter until evenly combined. The crumbs should look moist but not wet.
Press the mixture firmly into an 8-inch springform pan, using the back of a measuring cup to create an even, compact layer. Here's the secret: chill the crust in the freezer for 15 minutes before baking. This prevents the crust from getting soggy when the filling bakes. While it chills, prepare your filling—room temperature ingredients blend better.
🍳 Step 2: Whip Cream Cheese Until Ultra-Smooth
In a stand mixer fitted with the paddle attachment, beat the 32 oz full-fat cream cheese on medium speed for 3-4 minutes until completely smooth and free of lumps. This step is non-negotiable—any lumps will translate to texture issues in your cheesecake. Scrape down the sides of the bowl with a spatula to ensure even mixing.
Add the 1.5 cups granulated sugar and beat for another 2 minutes until fully incorporated. The mixture should lighten in color and become airy. Here's where the magic happens: add the 4 whole large eggs one at a time, mixing just until each is fully incorporated after about 10 seconds per addition. Overmixing develops gluten and can make your cheesecake tough.
🥘 Step 3: Fold in Wet Ingredients for Stability
Remove the bowl from the mixer and gently fold in the 0.5 cup sour cream, 2 tsp vanilla extract, 0.25 cup light corn syrup, 0.5 tsp diamond crystal kosher salt, and 1 tbsp lemon juice using a silicone spatula. The corn syrup and lemon juice create that signature tangy sweetness while preventing cracks. The mixture should be thick but pourable—if it's too thick, add 1 tablespoon heavy cream.
Here's the no-crack secret: pour the filling over the chilled crust in the springform pan. Tap the pan gently on the counter 3-4 times to release any air bubbles. The filling should come within ½ inch of the pan's edge—this prevents overflow during baking. Smooth the top with a spatula, then place the pan in a water bath (a larger baking dish with 1 inch of hot water).
🔥 Step 4: Bake Low and Slow for Perfect Texture
Bake for 50-55 minutes until the edges are set but the center still jiggles slightly when shaken. The water bath ensures even heat distribution and prevents cracking. If the top browns too quickly, tent loosely with aluminum foil. The cheesecake is done when the internal temperature reaches 150°F—use an instant-read thermometer for accuracy.
Remove from the water bath and turn off the oven. Crack the oven door open 1 inch and let the cheesecake cool in the oven for 1 hour. This gradual cooling prevents sudden temperature shifts that cause cracks. Then transfer to a wire rack and cool completely to room temperature before refrigerating for at least 4 hours (overnight is best).
⏰ Step 5: Chill and Serve for Maximum Silky Perfection
Once fully chilled, run a thin knife around the edge of the springform pan to loosen any potential sticking. Release the springform and transfer the cheesecake to a serving plate. The texture should be silky smooth with a clean break—no cracks, no sinking center. For extra richness, top with a dollop of 0.25 cup heavy whipping cream or a dusting of powdered sugar.
Slice with a hot knife (dip in hot water and wipe dry between cuts) for clean, professional-looking pieces. Serve at room temperature for the best texture—this cheesecake holds its shape beautifully and delivers that creamy, tangy flavor in every bite. The secret to success? Patience and precise temperature control at every step.
Pro Tips For Making 8 Inch Baked Cheesecake
- Mix Cream Cheese Slowly: Bring the cream cheese to room temperature first—yes, even if you’re in a hurry. Cold blocks clump like cement, and you’ll end up with lumps no amount of whisking can fix. Use a hand mixer on low, then gradually increase speed while adding sugar to avoid a greasy mess.
- Weigh Your Eggs: Crack those eggs into a bowl first, then count them—no guessing. Room-temperature eggs incorporate better, and you’ll avoid the heartbreak of realizing you’re short one later. If they’re cold, warm them in a bowl of lukewarm water for 5 minutes before mixing.
- Bake Low and Slow: Skip the high heat—325°F is your friend here. Baking at 350°F or higher risks a cracked top or a dense center, and no one wants to wait an extra hour for a proper set. A water bath (wrapping the pan in foil) keeps the middle creamy, but don’t overdo it—remove the foil after 45 minutes.
- Add Vanilla Last: Stir in the vanilla extract right before pouring the batter—it fades fast when mixed too early. A splash of sour cream (about ¼ cup) right after also smooths the texture without making it gummy. Trust me, the difference in flavor is noticeable.
Health benefits of 8 inch baked cheesecake
Protein Powerhouse
This cheesecake packs a surprising 12-15 grams of protein per slice thanks to the full-fat cream cheese and sour cream. That's about 25% of your daily protein needs in one slice, making it a satisfying dessert that won't leave you feeling sluggish. The protein content also helps stabilize blood sugar levels, preventing energy crashes after eating. 💪
Calcium Boost
Cream cheese is one of the richest sources of calcium in desserts, with each slice providing about 15% of your daily value. This cheesecake helps support bone health and muscle function while satisfying your sweet tooth. The calcium also works with the vitamin D from eggs to strengthen your skeletal system over time.
Healthy Fats
The full-fat dairy ingredients provide beneficial saturated fats that support brain function and hormone production. These fats create the creamy texture we love while providing 10-12 grams of fat per slice, which helps with satiety and nutrient absorption. The corn syrup adds just enough moisture without the need for unhealthy oils.
Vitamin Enrichment
Each serving delivers vitamin B12 (essential for nerve function) and riboflavin (important for energy metabolism) from the eggs and cream cheese. The lemon juice adds vitamin C, which aids in collagen production and immune support. While it's a dessert, this cheesecake actually provides nutritional benefits beyond just sweet satisfaction. ✨
Portion Control
With 8 generous slices, this recipe makes portion control easy. Each slice contains about 300-350 calories, making it a reasonable indulgence when enjoyed as part of a balanced diet. The natural sweetness from sugar and corn syrup means you won't need to add extra sweeteners, keeping calories in check while delivering maximum flavor.
Low-Sodium Option
While the original recipe includes salt for flavor, you can easily reduce it to ¼ tsp if you're watching your sodium intake. The natural tang from lemon juice and cream cheese still provides depth of flavor without relying on excessive salt. This makes it a great option for those monitoring their blood pressure or following heart-healthy diets.
Nutrition facts
Frequently asked questions
Why does your recipe avoid a water bath?
This method eliminates the need for a water bath by using a lower oven temperature (325°F) and gradual cooling, which prevents cracks and sinking centers. The water bath can sometimes create steam that interferes with texture—this approach gives you the same silky results without the extra setup. The key is patience during baking and cooling.
Can I make this cheesecake in a different pan size?
Yes! For a 9-inch pan, increase baking time by 10-15 minutes and reduce oven temperature to 300°F to prevent over-browning. For a 6-inch pan, reduce filling by about 30% and bake for 40-45 minutes. Always adjust baking time based on your oven and pan material—use an instant-read thermometer for accuracy.
What's the best way to store leftovers?
Store in an airtight container in the fridge for up to 5 days, or freeze slices wrapped tightly for 3 months. For serving, let slices sit at room temperature for 15-20 minutes before eating—the texture is best when not straight from the fridge. The crust stays crispy when properly stored.
How do I fix a cheesecake that cracked?
Don't worry—cracks are fixable! For minor cracks, spread a thin layer of whipped cream or fruit compote over the top before serving. For deep cracks, try the "lasagna method": slice the cheesecake horizontally, spread with a thin layer of jam or caramel, and reassemble. Chill for 2 hours before serving—it'll look like a new cheesecake!
Can I substitute ingredients for dietary needs?
For a lower-carb option, swap graham crackers for almond flour crust and use monk fruit sweetener instead of sugar. For vegan cheesecake, replace cream cheese with cashew cream and eggs with flax eggs. Always adjust baking times—these alternatives behave differently in the oven. The recipe's core technique (low-and-slow baking) still applies!