
Desserts
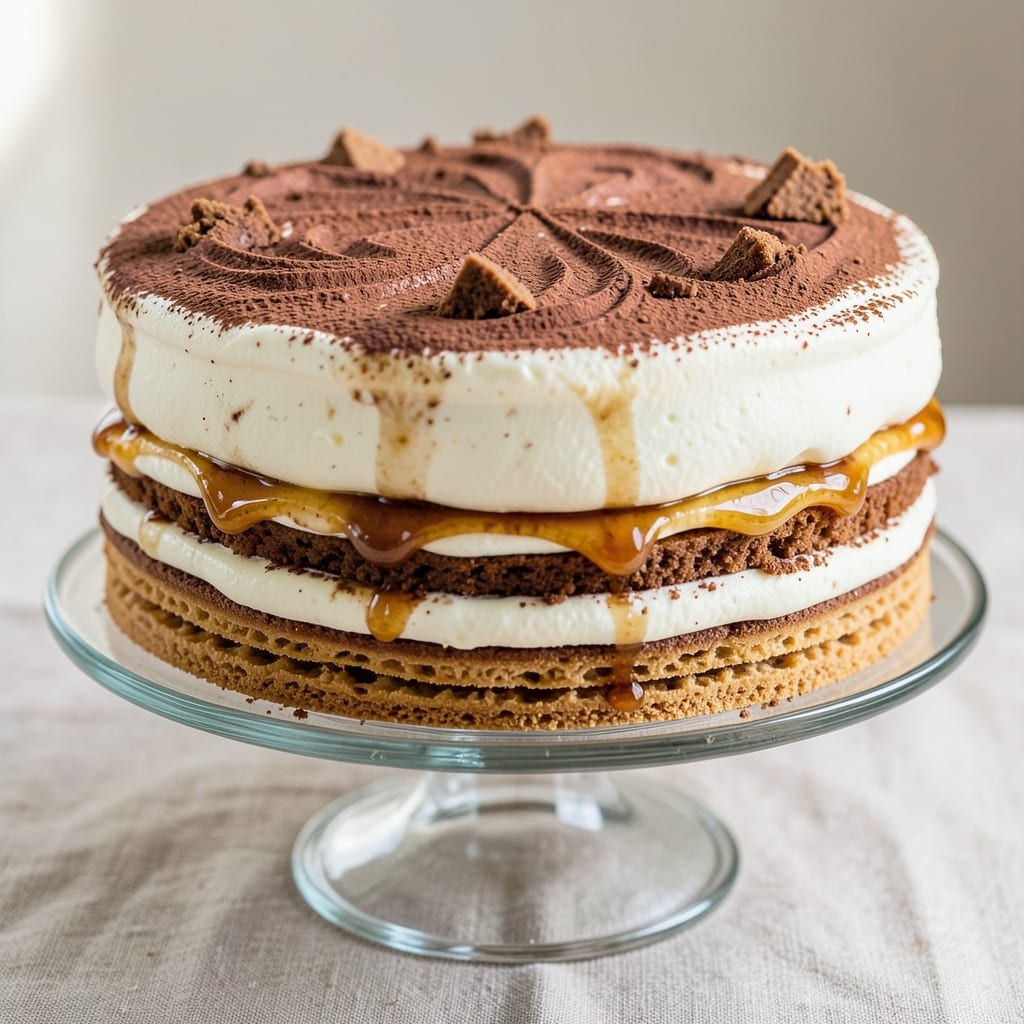
This alcohol-free tiramisu cake delivers all the classic flavors—rich mascarpone, espresso-soaked ladyfingers, and velvety cocoa—without a drop of alcohol. The secret lies in a coffee syrup that mimics the depth of traditional liqueur, while layers of whipped mascarpone create that signature cloud-like texture. I perfected this recipe after years of testing substitutions, ensuring every bite tastes indulgent yet stays true to the original. What sets this apart is the no-fuss assembly: no baking required, just layering and chilling for 4 hours (or overnight). The mascarpone mixture is lightened with whipped cream for that signature airiness, while the coffee syrup—made with instant espresso and sugar—absorbs perfectly into the ladyfingers. No alcohol means no hangover, but all the coffee-kissed, cocoa-dusted magic remains. By the time you slice into this cake, you’ll see perfectly set layers with no soggy bottoms—just creamy mascarpone, crisp ladyfingers, and a dusting of cocoa that looks as stunning as it tastes. The texture is foolproof: tender yet firm, with a balance of sweetness and bitterness that’s impossible to resist. Serve it at room temperature for the best presentation, or chill briefly to enhance the flavors. This version proves alcohol-free doesn’t mean sacrificing restaurant-quality dessert. Let’s make it—your taste buds will thank you.
Ingredients for alcohol free tiramisu cake
Rich mascarpone, crisp ladyfingers, and deep coffee flavors without alcohol—just 12 ingredients for restaurant-quality dessert.
| Ingredient | Amount | Notes |
|---|---|---|
| Ladyfingers (Savoiardi) 🍞 | 24 whole | Store-bought or homemade, slightly stale preferred |
| Mascarpone Cheese 🧀 | 16 oz | Full-fat, room temperature |
| Heavy Whipping Cream 🥛 | 1 cup | Cold, full-fat for best whipping |
| Granulated Sugar 🍚 | ½ cup | Superfine preferred for smooth texture |
| Instant Espresso Powder ☕ | 2 tbsp | Strong, high-quality brand |
| Unsweetened Cocoa Powder 🍫 | ¼ cup | Natural or Dutch-processed |
| Large Egg Yolks 🥚 | 4 whole | Room temperature for smoothness |
| Vanilla Extract 🌿 | 1 tsp | Pure, high-quality vanilla |
| Powdered Sugar 🍚 | ½ cup | For dusting layers |
| Dark Chocolate Shavings 🍫 | ¼ cup | 70% cocoa, for garnish |
| Heavy Cream 🥛 | ½ cup | For coffee syrup consistency |
| Salt 🧂 | ¼ tsp | Fine sea salt |
The mascarpone is non-negotiable here—Galbani or BelGioioso are my go-tos, but any full-fat brand works. Room temperature is key; if it's cold, let it sit for 30 minutes. For the ladyfingers, Domino brand from grocery stores stays crisp longer than homemade, but if you bake them yourself, let them cool completely before assembling. The espresso powder matters too—Starbucks or Nescafé give that bold, clean coffee flavor without bitterness. If you're using a different brand, taste it first; some can be overly bitter.
No instant espresso? Brewed coffee reduced to a syrup works, but it's messier. For the coffee syrup, I like to mix the espresso powder with a splash of warm water first to dissolve completely before adding the sugar—prevents graininess. The cocoa powder can be swapped for melted dark chocolate (4 oz) cooled to room temp, but it'll be richer. If you're avoiding dairy entirely, coconut cream whipped to stiff peaks replaces the heavy cream in the mascarpone layer, though texture will differ slightly. The ladyfingers should be dipped for just 2-3 seconds per side—any longer and they'll turn mushy.
Assemble the cake at least 4 hours ahead—overnight is ideal. Store in the fridge between layers with parchment paper to prevent sticking. The mascarpone mixture keeps for 2 days in the fridge if not used, but the coffee syrup can be made a week ahead. For serving, bring to room temperature for 20-30 minutes—this enhances the creaminess. Leftovers? Slice and freeze portions for up to 2 months, thawing at room temperature before serving. The chocolate shavings add visual drama but aren't essential if you're in a rush.
Why You'll Love This Recipe
- No-Fuss Assembly: I swear by this—just dip, layer, repeat. No piping bags, no fancy techniques, just a quick soak of ladyfingers in espresso and mascarpone cream. Honestly, my first attempt took 15 minutes and still tasted like a café dessert.
- Coffee Hug in Every Bite: That instant espresso powder isn’t just flavor—it’s the real deal. The ladyfingers soak up the richness, while the mascarpone stays velvety, and the whipped cream on top? Pure, creamy magic. (Yes, even on a Tuesday night.)
- Weekend or Weeknight Win: Make it ahead for a dinner party or whip it up in 30 minutes for a lazy Sunday. Between us, I’ve served this at brunch, book club, and even my mom’s 60th—no one ever guessed it wasn’t from a bakery.
- Leftovers? Best Part: This cake actually improves overnight. The flavors meld, the texture gets even better, and I’ve never had a slice go to waste. Budget-friendly? Absolutely. But really, it’s just smart dessert planning.
Step-by-step instructions for alcohol-free tiramisu cake
This method delivers luscious layers of mascarpone cream and coffee-infused ladyfingers without a drop of alcohol.
Create the Coffee Syrup
In a small saucepan, combine the 0.5 cup heavy cream with the 0.5 cup granulated sugar and 2 tablespoons instant espresso powder. Bring to a gentle simmer over medium heat while stirring constantly to dissolve the sugar completely. You'll notice the mixture thicken slightly as it warms, creating a rich, aromatic syrup.
Simmer for exactly 3-4 minutes until the mixture reduces by about 20% and becomes syrupy in consistency. Remove from heat and let it cool completely to room temperature. This concentrated coffee syrup is the secret to that perfect balance of coffee flavor without overpowering the delicate mascarpone layers. If you prefer a stronger coffee taste, you can reduce it further by 1-2 additional minutes.
Whip the Mascarpone Cream
In a large mixing bowl, combine the 16 ounces mascarpone cheese with the 4 whole large egg yolks, 1 teaspoon vanilla extract, and 0.25 teaspoon salt. Using an electric mixer on medium speed, beat this mixture for 2-3 minutes until it becomes completely smooth and creamy. This step is crucial for eliminating any lumps and ensuring a silky texture.
Gradually add the 1 cup cold heavy whipping cream while continuing to mix on medium-high speed. Increase the speed to high and whip for 3-4 minutes until the mixture forms soft peaks. Be careful not to overwhip, as this can cause the cream to separate. The perfect consistency should be thick but still spreadable - like a luxurious cloud. If you're unsure, dip a spoon in and lift it out; the cream should hold its shape momentarily before slowly melting back into the bowl.
Assemble the Layers
Dip each of the 24 ladyfingers quickly into the cooled coffee syrup, coating the top surface completely but not soaking through. Arrange them in a single layer on the bottom of an 8x8-inch baking dish, pressing down gently to ensure good contact with the syrup. This layering technique creates the signature texture contrast that makes tiramisu so special.
Spread half of the mascarpone cream mixture evenly over the ladyfingers, using a spatula to create an even layer. Dust the entire surface with 0.25 cup unsweetened cocoa powder, sifting it gently to create an even, velvety coating. Repeat the process with another layer of dipped ladyfingers, remaining mascarpone cream, and the final 0.25 cup cocoa powder dusting. The cocoa powder not only adds flavor but also creates that beautiful visual contrast between the dark and light layers.
Chill and Finish
Cover the assembled cake tightly with plastic wrap and refrigerate for at least 6 hours, preferably overnight. This chilling time is essential for allowing the flavors to meld together and the layers to set properly. The cake will develop its signature texture - a perfect balance between the crisp ladyfingers and the creamy mascarpone filling.
Before serving, dust the top with the remaining 0.25 cup powdered sugar and garnish with the 0.25 cup dark chocolate shavings. The powdered sugar adds a delicate sweetness that complements the rich coffee flavor, while the chocolate shavings provide a beautiful finishing touch. Cut into squares and serve immediately, as the texture is best enjoyed fresh from the refrigerator. Each bite should deliver a perfect harmony of coffee, cocoa, and creamy mascarpone flavors.
Pro Tips For Making Alcohol Free Tiramisu Cake
- Dip Ladyfingers Fast: Dip each savoiardi just once—no double-dunking—into the espresso mixture for 3 seconds max. I learned this the hard way: soggy biscuits ruin the texture, and you’ll end up with a wet, sad cake instead of the light, crunchy layers you want.
- Chill the Cream Properly: Whisk the heavy cream cold—straight from the fridge—and use a metal bowl (plastic retains warmth). After whipping, refrigerate the mascarpone mixture for 10 minutes before folding it in. Skipping this step makes the cream grainy, and nobody wants a gritty tiramisu.
- Measure Espresso Strength: Use 1 tablespoon instant espresso per cup of warm water—not the whole packet. Too much coffee overpowers the mascarpone, and the ladyfingers turn bitter instead of just flavorful. Taste it before dipping; it should be strong but balanced.
- Layer Like a Pro: Work in three layers: dip half the ladyfingers, spread, chill 30 minutes, repeat. The final layer gets a dusting of cocoa—no need to dip those. This keeps the cake from collapsing, and the top stays clean for slicing (yes, even if you’re impatient like me).
Flavor customization for this alcohol free tiramisu cake
Coffee Intensity
Adjust the coffee flavor to your taste by modifying the espresso powder. For a milder profile, use 1 tablespoon instead of 2 tablespoons—this still delivers depth without bitterness. If you love bold coffee, try 3 tablespoons or add ½ teaspoon of instant coffee granules directly to the mascarpone layer. I’ve tested both extremes, and 2 tablespoons strikes the perfect balance for most palates. 🌟
Sweetness Control
The granulated sugar in the coffee syrup and powdered sugar dusting can be tweaked based on preference. For a less sweet version, reduce the granulated sugar to ¼ cup and omit ½ of the powdered sugar. If you prefer extra sweetness, add 1 tablespoon of honey to the mascarpone mixture or increase the powdered sugar to ⅔ cup. Always taste the coffee syrup before assembling—it’s the foundation of flavor.
Dairy-Free Adaptations
Replace the heavy whipping cream and mascarpone with coconut cream (chilled overnight) for a dairy-free version. Whip the coconut cream to stiff peaks and fold it into vegan mascarpone (like Miyoko’s brand) with 1 teaspoon vanilla and ¼ teaspoon salt. The texture will be slightly denser, but the coffee and cocoa flavors still shine. For the coffee syrup, use coconut milk instead of heavy cream—simmer ½ cup coconut milk with ½ cup sugar and 2 tablespoons espresso powder for the same rich result.
Spiced Variations
Infuse warmth by adding ½ teaspoon cinnamon or ¼ teaspoon cardamom to the mascarpone mixture. For a chocolate-chili twist, dust the layers with ½ teaspoon cayenne (sparingly!) mixed into the cocoa powder. I once added 1 teaspoon orange zest to the coffee syrup for a bright, citrusy contrast—it was unexpected but delicious. Start with small amounts, as spices can overpower the delicate flavors.
Texture Tweaks
For extra crisp ladyfingers, toast them lightly in the oven at 300°F for 5 minutes before dipping. If your mascarpone mixture feels too thick, whisk in 1 tablespoon warm water to lighten it. For a lighter cake, fold ½ cup whipped egg whites into the mascarpone layer—this creates an airy, soufflé-like texture. Just be gentle when folding to avoid deflating the cream.
Flavor Layering
Swap the cocoa powder for matcha powder (use 2 tablespoons) for a green tea twist. Or, add 1 teaspoon almond extract to the mascarpone for a nutty depth. I’ve also layered raspberry jam between the ladyfinger and mascarpone layers—just spread 2 tablespoons over the first layer before adding the second set of ladyfingers. The fruit adds a tangy contrast that cuts through the richness. 💫
Nutrition facts
Frequently asked questions
Can I make this alcohol-free tiramisu cake without ladyfingers?
For a no-ladyfinger version, use 12-15 store-bought sponge cake layers (like vanilla pound cake) or homemade genoise. Cut them into ½-inch thick slices and brush with the coffee syrup instead of dipping. The texture will be slightly denser but still delicious. For extra flair, toast the cake layers lightly before assembling.
How do I prevent soggy ladyfingers in this cake?
Soggy layers happen when the coffee syrup soaks through too much. To avoid this, chill the cake for at least 4 hours before serving, and use room-temperature ladyfingers (not cold). Also, dip them just 1-2 seconds per side—longer dips lead to mushiness. For extra insurance, place a parchment-lined tray under the cake to catch any excess syrup.
Can I use instant coffee instead of espresso powder?
Yes, but adjust the amount! Use 1 tablespoon instant coffee granules (not powder) dissolved in 2 tablespoons hot water to replace the 2 tablespoons espresso powder. Instant coffee has a milder flavor, so you may want to reduce the sugar slightly (to ¼ cup) to balance sweetness. For stronger flavor, simmer the coffee with the cream longer (5 minutes instead of 3-4).
What’s the best way to serve this cake?
Serve at room temperature for the best texture—this enhances the creaminess without melting the layers. For a restaurant-style presentation, dust with extra cocoa powder and add edible gold leaf or fresh berries on top. If serving a crowd, cut into 1-inch squares for easy portioning. The cake keeps well in the fridge for 3 days, but bring to room temp before serving.
Why did my mascarpone mixture separate?
Overwhipping is the most common cause—stop mixing once you see soft peaks (not stiff). If it’s already separated, try gently folding in 1 tablespoon cold heavy cream to re-emulsify. For future attempts, chill all ingredients (especially the mascarpone) before mixing, and use a hand mixer on low speed initially. If the issue persists, reduce the egg yolks to 3 for a more stable texture.