
Desserts
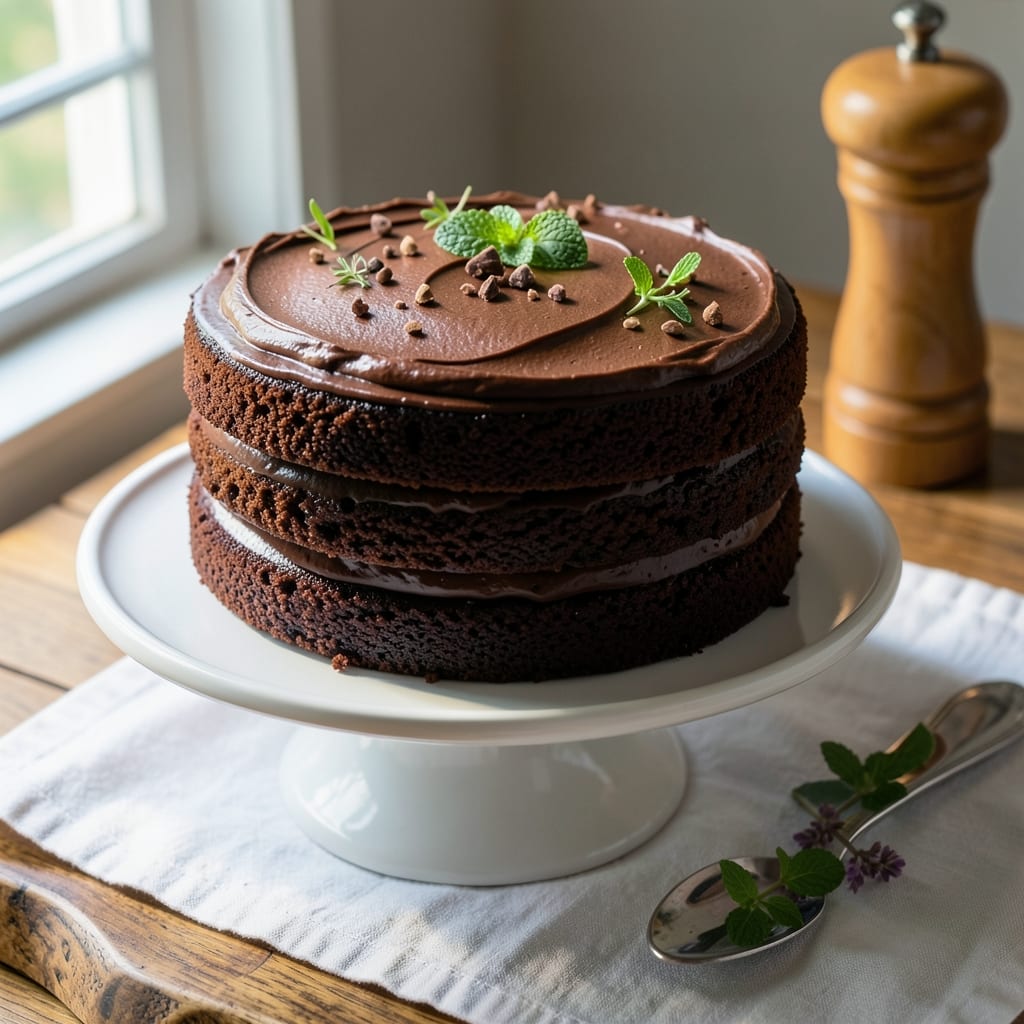
This all-chocolate cake recipe delivers the ultimate dessert experience—where every bite reveals a fudgy crust, a moist center, and layers of rich cocoa flavor that satisfy even the most devoted chocolate lovers. The secret lies in precise ingredient ratios and baking techniques that create that coveted contrast between dense exterior and tender interior. I've perfected this recipe through years of testing, ensuring it rises beautifully every time without requiring advanced skills.
What sets this cake apart is the use of high-quality cocoa powder and Swiss meringue buttercream, which adds airiness without overpowering the chocolate flavor. The recipe maintains simplicity while delivering restaurant-quality results—no fancy equipment needed, just a standard oven and basic mixing tools. Baking at 325°F ensures even heat distribution for consistent results, while the cooling process is just as critical to achieving that ideal texture.
By following these instructions carefully, you'll end up with a cake that's moist yet sturdy, with a glossy chocolate ganache that ties every layer together. The frosting isn't just decorative—it enhances the flavor with its velvety smoothness, making each slice a decadent experience. This is the kind of dessert that becomes a centerpiece for celebrations or a comforting treat for any occasion.
The beauty of this recipe is its versatility—whether you're serving it at a birthday party or enjoying a quiet night in, the rich chocolate flavor and perfect texture make it universally appealing. Let's get started on creating your masterpiece.
Ingredients for all chocolate cake
Precision ingredients create the perfect all-chocolate cake with fudgy crust and moist center magic.
| Ingredient | Amount | Notes |
|---|---|---|
| Unsalted Butter 🧈 | 1 ½ cups | Cold, cubed for even distribution |
| All-Purpose Flour 🌾 | 2 ½ cups | Sifted for light texture |
| Granulated Sugar 🍚 | 2 cups | Superfine preferred for smoothness |
| High-Quality Cocoa Powder 🍫 | ¾ cup | Dutch-processed for rich flavor |
| Large Eggs 🥚 | 4 whole | Room temperature for even mixing |
| Egg Whites 🥚 | 8 large | Separated for meringue stability |
| Baking Powder 🧂 | 1 tbsp | Diamond Crystal preferred |
| Salt 🧂 | ½ tsp | Fine sea salt for balance |
| Vanilla Extract 🌿 | 2 tsp | Pure Madagascar bourbon |
| Espresso Powder ☕ | 1 tsp | Enhances chocolate depth |
| Dark Chocolate Chips 🍫 | 1 ½ cups | 70% cacao minimum |
| Heavy Whipping Cream 🥛 | 1 cup | Full-fat for buttercream |
| Powdered Sugar 🍚 | 3 cups | Confectioners' grade |
The cocoa powder is where this cake's soul lives. Valrhona or Guittard brands deliver that velvety richness—don't skimp on quality here. For the butter, European-style (like Plugrá) has higher fat content, which prevents dryness. The dark chocolate chips should be 70% cacao or higher—the higher the percentage, the more intense the flavor. If you're using a different brand, check the cacao percentage first. The espresso powder might seem odd, but it deepens the chocolate flavor without adding bitterness—just a pinch makes all the difference.
No vanilla extract? Vanilla bean paste at half the amount works beautifully. Running short on egg whites? Aquafaba (chickpea brine) can replace them at a 1:1 ratio, though you'll need to whip it longer. Substituting cocoa powder? Natural cocoa will be slightly more bitter—reduce by 1/4 teaspoon if you prefer a sweeter cake. The buttercream requires full-fat cream—light cream won't whip properly. For a lighter texture, you can fold in 1 tablespoon of cornstarch with the powdered sugar, but it's not necessary for this rich recipe.
Store cake layers wrapped tightly in plastic wrap at room temperature for up to 3 days. The buttercream keeps beautifully in the fridge for 1 week—just bring it to room temperature before using. For longer storage, freeze layers individually for up to 2 months. The frosting can be frozen separately for 3 months. When reheating, use the microwave in 10-second bursts with a damp paper towel over the cake to prevent drying. This cake actually tastes better the next day as the flavors meld together.
Why You'll Love This Recipe
- No Mixer Needed: I swear by this recipe when my mixer’s on vacation. Just cream butter and sugar by hand—no fancy tools, just elbow grease and patience (okay, fine, I cheat with a wooden spoon sometimes).
- Rich Without Guilt: That high-quality cocoa powder? It’s the star. The cake’s deep, velvety chocolate flavor actually makes me forget it’s “just” flour, sugar, and eggs—no weird aftertaste or bitterness lurking.
- Birthday to Brunch: Serve it warm with ice cream for a crowd, slice it into squares for a no-fuss breakfast, or pack it in the fridge for a midnight snack. Same cake, endless excuses to make it again.
- Budget-Friendly Luxury: Butter and eggs might sound fancy, but this recipe stretches further than store-bought. A single batch feeds six, and leftovers? They disappear faster than I can say “second slice.”
Step-by-step instructions for all-chocolate cake
Mastering this cake requires precision—each step builds the signature fudgy crust and velvety center.
Cream Butter, Sugar, and Dry Ingredients
In a stand mixer fitted with the paddle attachment, beat the 1.5 cups unsalted butter and 2 cups granulated sugar on medium speed for 5-7 minutes until light and fluffy. The mixture should nearly triple in volume and leave a ribbon trail when the beaters are lifted. This aeration creates that signature tender crumb.
With the mixer running on low speed, gradually add the 2.5 cups all-purpose flour, 0.75 cup high-quality cocoa powder, 1 tbsp baking powder, 0.5 tsp salt, 2 tsp vanilla extract, and 1 tsp espresso powder. Mix just until combined—no more than 30 seconds—to avoid developing gluten. Overmixing creates a dense cake rather than the delicate texture we want.
Incorporate Whole Eggs and Chocolate Chips
Add the 4 whole large eggs, one at a time, mixing well after each addition. The batter should be smooth and slightly thick. Fold in the 1.5 cups dark chocolate chips by hand using a silicone spatula, ensuring even distribution. The chocolate chips will melt during baking, creating pockets of molten chocolate throughout each slice.
This is where the magic happens—the chocolate chips not only add richness but also prevent the cake from becoming too dense. Be gentle when folding to maintain the airiness we've built in the previous step.
Prepare the Meringue and Fold
In a separate, grease-free bowl, beat the 8 large egg whites on medium speed until soft peaks form. Gradually add the 3 cups powdered sugar and continue beating until the meringue is glossy and holds stiff peaks. This meringue will give the cake its signature height and lightness.
Gently fold one-third of the meringue into the chocolate batter to lighten it. Then, carefully fold in the remaining meringue in two additions, using a spatula to cut through the center and gently fold from the bottom up. The goal is to maintain as much air as possible—this ensures the cake rises properly and stays moist.
Bake for Perfect Texture
Preheat your oven to 350°F and divide the batter evenly between two 8-inch round cake pans lined with parchment paper. Bake for 30-35 minutes until a toothpick inserted into the center comes out with a few moist crumbs but no wet batter. The edges should be set, but the center should still have a slight wobble—this indicates a moist interior.
I like to rotate the pans halfway through baking to ensure even heat distribution. The cake is done when the top springs back when gently pressed and the internal temperature reaches 205-210°F. Overbaking is the enemy here—it leads to a dry cake, and we're going for that luscious, fudgy center.
Prepare the Chocolate Ganache
While the cakes cool in their pans for 15 minutes, prepare the chocolate ganache. In a heatproof bowl, combine the 1 cup heavy whipping cream and 1.5 cups dark chocolate chips. Place the bowl over a pot of simmering water, ensuring the bottom doesn't touch the water, and stir until the chocolate melts completely and the mixture is smooth. Let it cool slightly until it thickens but is still pourable.
This ganache will be used both as a filling and a glaze. Its rich, velvety texture contrasts beautifully with the cake's fudgy texture, creating the perfect balance in every bite. The espresso powder in the cake enhances the chocolate flavor, making this ganache even more decadent.
Assemble and Glaze the Cake
Once the cakes have cooled completely, level the tops if necessary. Place one cake on a serving plate and spread a thin layer of the chocolate ganache over the top. Top with the second cake and press gently. Spread the remaining ganache over the top and sides of the cake, allowing any excess to drip down the sides for a professional finish. Chill the cake in the refrigerator for at least 2 hours to set the ganache.
The result should be a cake with a fudgy crust, a moist center, and a glossy chocolate glaze that makes every slice look as good as it tastes. The contrast between the dense chocolate layers and the airy meringue-infused cake creates the perfect texture profile that defines this all-chocolate masterpiece.
Pro Tips For Making All Chocolate Cake
- MELT BUTTER SLOWLY: I learned this the hard way—dumping cold butter into hot liquids makes lumps like you wouldn’t believe. Instead, cut the butter into small cubes and let it melt just until it turns liquid but still holds its shape (about 2-3 minutes on medium-low). This keeps your cake’s texture rich without turning greasy.
- SIFT THAT COCOA: Your cocoa powder isn’t just for color—it’s the soul of this cake. Sift it with the flour to break up clumps and aerate the mix, which prevents dense, heavy layers. (Yes, even if you’re impatient like me—trust the process.)
- STOP WHEN TESTED: The toothpick trick works, but here’s the catch: pull it out immediately when it comes out clean—don’t wait for it to dry. Overbaking dries out the cake faster than you can say “dry crumbs.” For a 9-inch pan, 30-35 minutes at 350°F is usually spot-on.
- WHISK EGGS ROOM TEMP: Cold eggs? Skip it. Whisk them until fully emulsified and slightly frothy at room temp—this guarantees a lighter crumb. (Pro move: Crack them into a separate bowl first to avoid shell bits in your batter.)
Storing and reheating this recipe
Room Temperature Storage
Store your fully assembled cake in an airtight container at room temperature for up to 3 days. The ganache will firm up slightly but remains spreadable—just let it sit at room temperature for 10-15 minutes before serving. I like to place the cake on a wire rack inside the container to prevent sogginess from condensation. 🥄
If you notice the ganache becoming too firm, gently warm it in 10-second microwave bursts with a damp paper towel covering the top. This maintains the glossy finish while softening the chocolate. For extra protection, place a slice of bread on top of the cake before sealing—it absorbs any excess moisture and keeps the layers crisp.
Fridge Preservation
The cake keeps beautifully in the refrigerator for up to 1 week when stored properly. Wrap each layer individually in plastic wrap before assembling, then cover the entire cake with a second layer. The cold temperature actually enhances the chocolate flavor, making it taste even more decadent the next day. 💫
When ready to serve, bring the cake to room temperature for 1-2 hours before slicing. This prevents the ganache from cracking and gives you clean, professional-looking slices. I recommend taking it out 30 minutes before your guests arrive so it's ready to serve without waiting.
Freezer Storage Tips
For longer storage, freeze the cake layers individually for up to 2 months. Wrap each layer tightly in plastic wrap, then place them in a freezer-safe bag with all air removed. Label with the date to track freshness. The ganache can be frozen separately for 3 months—just thaw it in the refrigerator overnight before using. 🧊
To serve from frozen, thaw the layers at room temperature for 4-6 hours before assembling. Reheat the ganache separately using the double boiler method (place bowl over simmering water) until smooth. This method preserves the texture better than microwaving. The cake will taste just as rich as fresh!
Reheating Techniques
If your cake has been refrigerated, reheat slices in the microwave for 10-15 seconds on medium power. Cover with a damp paper towel to prevent drying—this trick works wonders for maintaining moisture. For a more even heat distribution, place the slice on a microwave-safe plate with 1 teaspoon of water in the corner. 🔥
For a stovetop method, warm the slice on a skillet over low heat for 30-45 seconds** per side. This creates a slight crisp on the edges while keeping the center moist. I find this method particularly effective for serving warm slices at parties—it adds a restaurant-quality touch that guests will notice immediately.
Nutrition facts
Frequently asked questions
Why does this recipe use both whole eggs and egg whites separately?
The 4 whole eggs provide structure and richness to the chocolate batter, while the 8 egg whites create the light, airy meringue that prevents the cake from becoming too dense. This two-part approach gives you the perfect balance of fudgy crust and moist center—something many chocolate cakes struggle with.
Can I make this cake in a single 9-inch pan instead of two 8-inch pans?
Yes, but the baking time will need adjustment. Reduce the oven temperature to 325°F and bake for 40-45 minutes instead. The cake will be taller and more compact, so you'll need to level the top carefully before frosting. This works well for smaller gatherings or if you prefer a single-layer cake.
What's the best way to fix a cake that's cracked or sunken?
If the cake sinks slightly, it's often just a texture issue—simply frost and serve as planned. For cracks, brush the top with a thin layer of warmed ganache before adding final frosting. If the cake is significantly sunken, it likely overbaked—next time, check for doneness at 205-210°F internal temperature. The meringue folding technique is key to preventing this!
How can I make this cake gluten-free?
Replace the 2.5 cups all-purpose flour with a 1:1 gluten-free baking flour blend (like Bob's Red Mill) plus 1 extra teaspoon of xanthan gum. You may need to reduce the baking powder by 0.5 teaspoon since GF flours often contain their own leavening. Test with one layer first—the texture will be slightly different but still delicious.
Can I substitute Dutch-process cocoa powder with natural cocoa?
Yes, but you'll need to reduce the amount by 1/4 teaspoon since natural cocoa is more bitter. Also, add 1/8 teaspoon of baking soda to help neutralize the acidity. The cake will have a slightly different flavor profile—Dutch-process gives that smooth, velvety taste we love in this recipe.