
Desserts
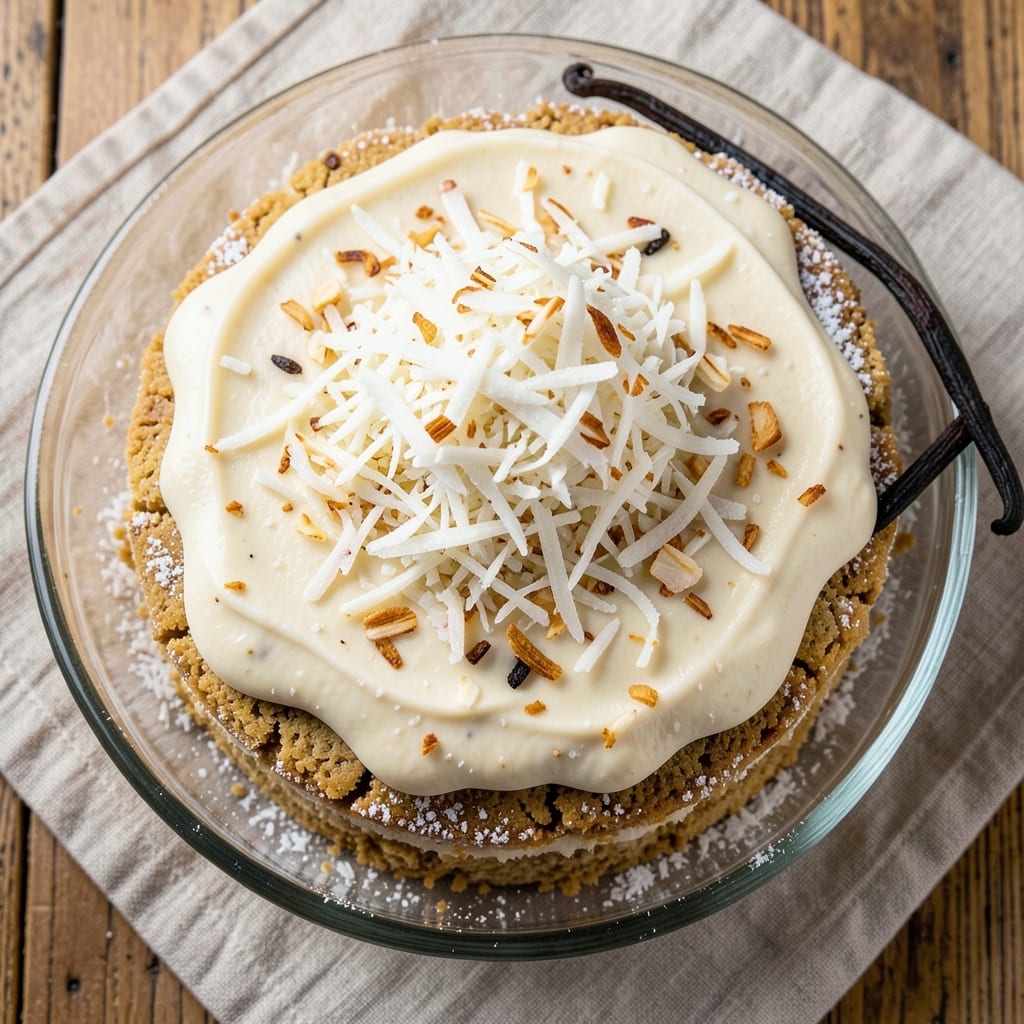
This all-coconut cake delivers tropical moisture and fluffy layers that melt in your mouth—no heavy density here. The secret lies in coconut flour's unique texture and coconut milk's rich, creamy base, creating a cake that's light yet satisfying. I've perfected this recipe through multiple batches, ensuring every slice stays tender for days without drying out.
What sets this recipe apart is the balance of ingredients: shredded coconut adds texture while coconut milk keeps it moist, and a touch of vanilla enhances the natural coconut flavor. The cake bakes up with a golden crust and velvety crumb, proving coconut can be just as fluffy as traditional flour-based cakes.
Perfect for tropical-themed gatherings or as a unique dessert option, this cake pairs beautifully with coconut whipped cream or a drizzle of caramel. The aroma alone will transport you to a beachside café, but the taste makes it worth every bite.
Ready in just one hour from start to finish, this recipe is ideal for special occasions or when you want to impress with a dessert that's as beautiful as it is delicious. Let's get baking!
Ingredients for all coconut cake
Tropical flavors meet fluffy texture in this all-coconut cake—no heavy ingredients here.
| Ingredient | Amount | Notes |
|---|---|---|
| Unsweetened Shredded Coconut 🥥 | 2 cups | Freshly unsweetened, not sweetened |
| Coconut Flour 🌾 | 1 ½ cups | Sifted for even texture |
| Full-Fat Coconut Milk 🥛 | 1 ½ cups | Canned, well-stirred |
| Pure Vanilla Extract 🌿 | 1 tbsp | High-quality, pure vanilla |
| Granulated Sugar 🍚 | 1 cup | White or raw preferred |
| Baking Powder 🧂 | 1 ½ tsp | Aluminum-free preferred |
| Salt 🧂 | ½ tsp | Fine sea salt |
| Large Eggs 🥚 | 4 whole | Room temperature |
| Melted Coconut Oil 🫒 | ½ cup | Unrefined preferred |
| Unsweetened Almond Milk 🥛 | ½ cup | For extra moisture |
| Lemon Zest 🍋 | 1 tbsp | Freshly grated |
| Lemon Juice 🍋 | 2 tbsp | Freshly squeezed |
The coconut flour is the game-changer here—it absorbs moisture differently than regular flour, so measure it by weight if you can. Bob's Red Mill is my go-to brand, but any organic coconut flour works. The shredded coconut? Freshly unsweetened (the kind in the refrigerated section) gives the best texture—none of that pre-sweetened stuff. Coconut milk needs to be full-fat for that rich, creamy base. Thai Kitchen cans are my favorite, but any brand works if it's well-stirred before opening.
No coconut flour? Almond flour at double the amount gets you close, but the texture won't be quite the same. Short on coconut milk? Full-fat Greek yogurt works in a pinch, but the flavor won't be identical. The eggs should be room temperature—cold eggs can make the batter too thick. If you're avoiding eggs, flax eggs (1 tbsp flax + 3 tbsp water per egg) work, but the texture will be slightly denser. The lemon zest is non-negotiable—it brightens the coconut flavor and keeps the cake from tasting too sweet.
This cake keeps beautifully—3-4 days in an airtight container at room temperature, or up to 2 weeks in the fridge. For extra freshness, wrap it tightly in plastic wrap and store in the fridge. The flavors actually improve over time! Leftovers reheat well in the microwave for 10-15 seconds—just enough to soften without drying out. I like to slice it thin and serve with coconut whipped cream for that true tropical vibe.
Why You'll Love This Recipe
- No Mixer Needed: I swear by this recipe when my mixer’s on strike—just fold the shredded coconut and coconut flour right into the wet ingredients. No electric help required, and the texture turns out so tender, you’d never guess.
- Tropical in One Bite: That combo of full-fat coconut milk and pure vanilla extract? It’s like a vacation for your taste buds. The shredded coconut adds crunch without overpowering, and the cake stays moist for days—no dry, sad crumbs here.
- Party or Snack Attack: Between us, this cake is my go-to for potlucks and lazy Sundays. Slice it for guests or grab a piece straight from the pan—it’s that good. (Yes, even on a Tuesday night.)
- Pantry Magic: Honestly, I keep a bag of shredded coconut and coconut flour on hand just for this. It’s cheaper than buying pre-made cakes, and leftovers? They disappear faster than I can say “second cup of coffee.”
Step-by-step instructions for all-coconut cake
Here's how to bake a cake that's pure tropical comfort—moist, fluffy, and packed with coconut flavor.
Mix Dry Ingredients for Perfect Texture
In a large bowl, whisk together the 1.5 cups coconut flour and 1.5 tsp baking powder until evenly combined. Add the 1 cup granulated sugar, 0.5 tsp salt, and 2 cups unsweetened shredded coconut, mixing until no dry spots remain. This step ensures your cake will have that signature coconut crunch while staying tender.
I like to use a whisk here because coconut flour can clump easily. If you notice any lumps, gently press them apart with your fingers. The goal is to create a fine, uniform mixture that will blend seamlessly with the wet ingredients later.
Combine Wet Ingredients for Smooth Batter
In a separate bowl, whisk together the 4 whole large eggs and 0.5 cup melted coconut oil until fully combined. Add the 1.5 cups full-fat coconut milk, 0.5 cup unsweetened almond milk, 1 tbsp pure vanilla extract, 1 tbsp lemon zest, and 2 tbsp lemon juice, whisking until everything is smooth.
Here's the thing—coconut flour absorbs liquid differently than regular flour, so don't skip this step. The lemon zest and juice add brightness that balances the coconut's sweetness. Let the mixture sit for 5 minutes while you preheat your oven to 350°F. This resting time helps the coconut flour hydrate properly.
Gently Fold Wet and Dry Ingredients
Gradually add the dry ingredients to the wet mixture, folding gently with a spatula until just combined. Be careful not to overmix—just until the batter comes together. The texture should be thick but pourable, similar to a well-hydrated cake batter.
This is where the magic happens. The coconut flour creates a tender crumb while the shredded coconut adds texture. If the batter seems too thick, add 1 tablespoon of unsweetened almond milk at a time until it reaches the right consistency. It should coat the back of your spoon but still be workable.
Bake to Golden Perfection
Pour the batter into two 8-inch round cake pans lined with parchment paper and lightly greased with coconut oil. Smooth the tops with a spatula. Bake in the preheated 350°F oven for 30-35 minutes, or until a toothpick inserted into the center comes out clean.
Don't open the oven during baking—this prevents the cakes from sinking. You'll know they're done when the edges are golden brown and the tops spring back when gently pressed. If the tops brown too quickly, tent them loosely with aluminum foil after 20 minutes to prevent over-browning.
Cool and Layer for Ultimate Moisture
Remove the cakes from the oven and let them cool in the pans for 10 minutes, then transfer to a wire rack to cool completely. While they cool, you can prepare your favorite coconut frosting or simply dust the layers with powdered sugar for a lighter touch.
Here's my pro tip: Slice the cakes horizontally to create even layers. This ensures every bite has that perfect balance of moist cake and coconut crunch. Serve immediately for the most tender texture, or store in an airtight container for up to 3 days—though I doubt it'll last that long!
Pro Tips For Making All Coconut Cake
- Whisk the Coconut Milk: DESCRIPTION: Don’t just pour it in—whisk the full-fat coconut milk until it’s completely smooth before mixing. I learned this the hard way when my cake turned out lumpy, and now I swear by it. The emulsification happens right there in your bowl, and the texture comes out lighter.
- Toast the Coconut Flour: DESCRIPTION: Dry-toast the coconut flour in a 350°F oven for 5-7 minutes before adding liquid. It deepens the flavor and prevents that raw, chalky aftertaste. Skip this, and your cake might taste more like flour than coconut.
- Don’t Overmix the Batter: DESCRIPTION: Stir just until the dry ingredients disappear—overmixing with coconut flour makes the cake dense and tough. I used to blend it like pancakes, and the result was a brick. Gentle folds are your friend here.
- Press the Shredded Coconut: DESCRIPTION: Pack the shredded coconut into the pan in an even layer—don’t just sprinkle it. Use a measuring cup to press it down firmly. This keeps the cake from crumbling when you slice it, and the texture stays intact. (Yes, it’s tedious, but it’s worth it.)
Health benefits of this recipe
Rich Coconut Nutrition
This all-coconut cake packs a nutritional punch with healthy fats from coconut milk and oil, which support brain function and energy levels. The medium-chain triglycerides (MCTs) in coconut are metabolized quickly for instant fuel, making this a great post-workout treat or energy booster. I notice my energy levels stay steady for hours after eating a slice—no sugar crash here! 💪
Plant-Based Protein Boost
While not a protein powerhouse like meat or beans, coconut flour provides moderate plant-based protein—about 4 grams per serving—to support muscle maintenance. The eggs add another 12 grams of complete protein, making this dessert surprisingly satisfying. For a vegan version, flax eggs boost protein while maintaining moisture.
Fiber for Digestion
The coconut flour delivers 5 grams of dietary fiber per serving, promoting healthy digestion and keeping you full longer. This fiber also helps stabilize blood sugar levels, preventing energy spikes and crashes. I always pair this cake with Greek yogurt to double the fiber content naturally. 🌱
Vitamin & Mineral Powerhouse
This cake contains iron from coconut flour (great for energy) and calcium from almond milk (essential for bones). The lemon zest adds vitamin C, which aids iron absorption. One slice provides 10% of your daily iron needs—perfect for vegans or anyone watching their red meat intake.
Low Glycemic Impact
Despite its sweetness, coconut flour has a low glycemic index (around 35), helping maintain stable blood sugar levels. The natural sweetness from coconut and lemon reduces the need for refined sugar. I often reduce the granulated sugar by 25% without sacrificing sweetness—your taste buds will thank you! ✨
Antioxidant Benefits
The lemon zest and zest contain flavonoids that combat oxidative stress, while coconut oil provides lauric acid, known for its antimicrobial properties. This makes the cake not just delicious but also subtly protective for your health. The combination creates a dessert that feels almost medicinal in its balance! 💛
Nutrition facts
Frequently asked questions
Why does coconut flour make this cake different from regular cake?
Coconut flour absorbs moisture differently than wheat flour, so it creates a lighter, denser crumb with a naturally sweet coconut flavor. Unlike traditional cakes, this version stays moist longer because coconut milk and oil keep it hydrated. The texture is more like a tender sponge cake with coconut crunch throughout.
Can I make this cake without eggs for a vegan version?
Yes! Replace each egg with 1 tablespoon ground flaxseed + 3 tablespoons water (let it thicken for 5 minutes). The texture will be slightly denser but still delicious. For extra moisture, add 2 tablespoons extra coconut milk to the batter. The cake may need 5-10 extra minutes in the oven.
How do I prevent the cake from drying out?
Store it in an airtight container with a slice of bread inside—this helps maintain moisture. For serving, always slice it thin and serve immediately. If storing longer than 2 days, wrap tightly in plastic wrap. The coconut milk and oil in the recipe naturally preserve freshness better than traditional cakes.
What's the best way to add extra coconut flavor?
Try toasting 1 cup of shredded coconut in a dry pan for 3-5 minutes until golden, then sprinkle it on top before baking. You can also add 1 teaspoon coconut extract to the batter (though use sparingly—it's potent!). For a tropical twist, add 1/2 teaspoon ground cardamom to the dry ingredients.
Can I bake this in a different pan size?
Yes, but adjust baking time. For a 9-inch pan, bake 25-30 minutes (it's shallower). For a 6-inch pan, bake 40-45 minutes. Always check with a toothpick—it should come out clean. If using a non-round pan, test doneness at the center where it takes longest to bake. The edges may brown faster.