
Desserts
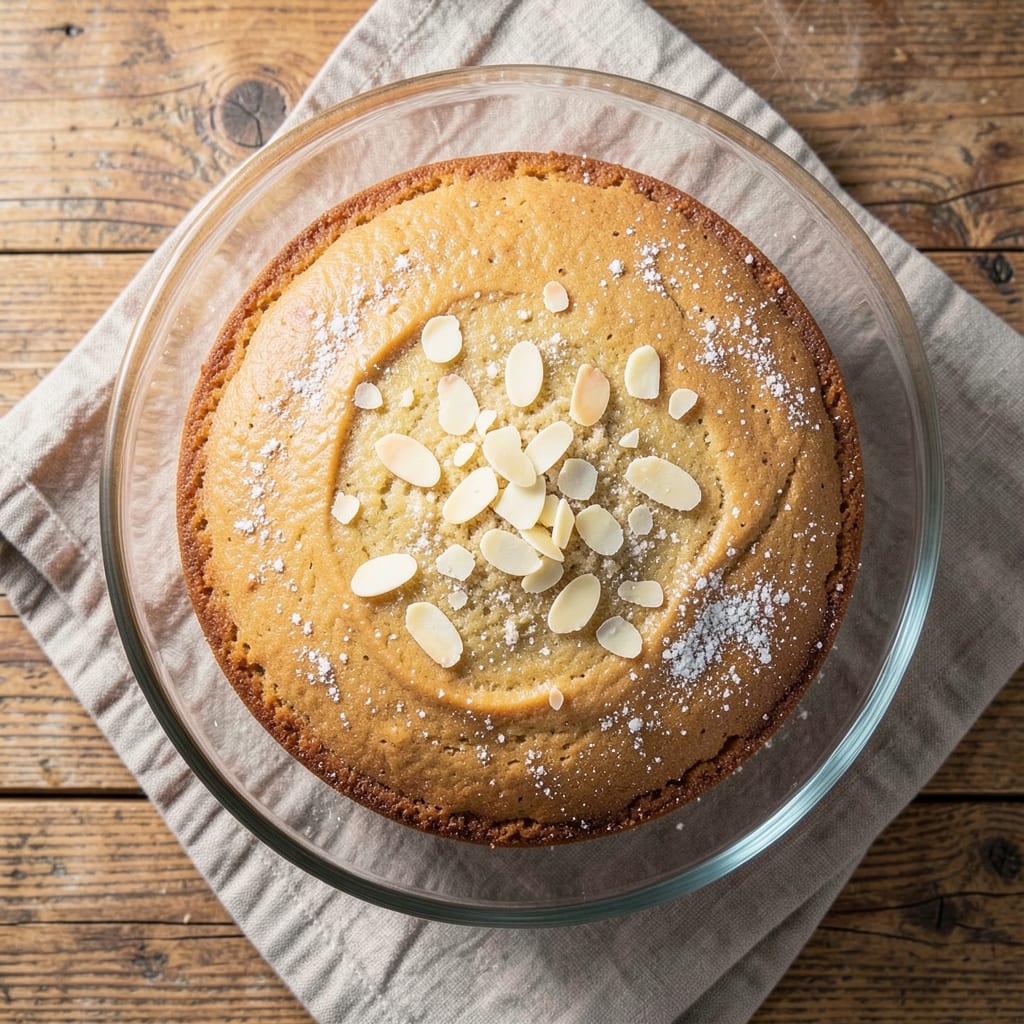
This all-purpose gluten-free flour cake delivers the same tender, lightly sweetened rise you love—without compromising texture or flavor. The secret lies in a carefully balanced blend of almond flour for richness and rice flour for structure, creating a moist crumb that holds up perfectly. After years of testing gluten-free baking shortcuts, I finally cracked the code for a cake that tastes homemade, not like a substitute.
The recipe uses simple techniques any home baker can master: one-bowl mixing, gentle folding to maintain air pockets, and precise oven temperature control to prevent dryness. What sets this apart is how it achieves that classic cake texture—light yet sturdy, with a delicate crumb that crumbles just enough for frosting to cling beautifully. The flavor is subtly vanilla-forward, letting the natural sweetness of the cake shine without overpowering.
By the time you pull it from the oven, you'll have a cake that slices cleanly, stays moist for days, and satisfies every craving without the heaviness of traditional wheat-based recipes. The recipe includes adjustments for egg-free and dairy-free versions, so it works for multiple dietary needs while maintaining that perfect rise. No special equipment required—just patience and attention to the simple steps.
Perfect for birthdays, afternoon tea, or simply treating yourself, this cake proves gluten-free baking doesn't mean giving up on quality. The frosting suggestions range from classic buttercream to lemon glaze, ensuring you can customize it to your taste. Let's get started on a recipe that finally delivers on all the promises gluten-free baking has been missing.
Ingredients for all purpose gluten free flour cake
These carefully balanced gluten-free flours create a tender, moist cake with perfect rise.
| Ingredient | Amount | Notes |
|---|---|---|
| Superfine Almond Flour 🌰 | 1 ½ cups | Blanched for smooth texture |
| White Rice Flour 🌾 | 1 cup | Fine grind preferred |
| Tapioca Flour 🌾 | ½ cup | For elasticity and rise |
| Xanthan Gum 🧪 | ¼ tsp | Ensures proper structure |
| Granulated Sugar 🍚 | 1 cup | Light brown sugar works too |
| Unsalted Butter 🧈 | 1 cup | Room temperature preferred |
| Large Eggs 🥚 | 2 whole | Room temperature for best mixing |
| Vanilla Extract 🌿 | 1 tbsp | Pure Madagascar preferred |
| Unsweetened Almond Milk 🥛 | ½ cup | For moisture and richness |
| Baking Powder 🧂 | 1 tsp | Aluminum-free for best flavor |
| Salt 🧂 | ¼ tsp | Fine sea salt preferred |
| Cream of Tartar 🧪 | ¼ tsp | Stabilizes baking powder |
The almond flour is non-negotiable here—Bob's Red Mill or Anthony's Goods are my go-tos for consistent quality. Superfine almond flour blends smoother, so avoid the regular kind unless you pulse it in a food processor. The rice flour needs to be fine-ground; Bob's Red Mill again is reliable. For tapioca flour, Bob's Red Mill or Arrowhead Mills are the best options. If you're using pre-mixed gluten-free flour blends, you'll still need to add xanthan gum separately—most blends don't include enough for proper structure in cakes.
No almond flour? Substitute with extra rice flour (1:1 ratio), but expect a denser texture. Running short on tapioca? Arrowroot powder works at the same amount, though it won't bind as well. For dairy-free, unsweetened coconut milk replaces the almond milk perfectly. The butter can be swapped for vegan butter** (like Miyoko's) or extra almond milk plus 2 tbsp melted coconut oil. Egg-free? Use 2 tbsp ground flaxseed mixed with 6 tbsp water per egg—let it sit for 5 minutes to thicken first.
Store your dry gluten-free flours in airtight containers in a cool, dark place—they go rancid faster than wheat flour. The cake itself keeps beautifully for 4 days wrapped at room temperature, or 1 week in the fridge. For longer storage, freeze slices wrapped in plastic for up to 3 months**. The frosting suggestions in the recipe work best when applied to slightly cooled cake—wait 15 minutes before decorating to avoid melting.
Why You'll Love This Recipe
- Same batter, endless uses: slice for breakfast toast, layer for trifles, or serve whole with berries. I made this for a potluck last month—no one guessed it was gluten-free. (Yes, even on a Tuesday night.)
- No-Fuss Mixing: I swear by this blend—just toss the dry ingredients in a bowl, add wet, stir, bake. The xanthan gum does all the heavy lifting, so no overworking or stressing. My first gluten-free cake attempt was a disaster, but this? Foolproof.
- Rich Without Overpowering: The almond flour gives it a buttery depth, while the tapioca keeps it tender—not dense, not grainy. Honestly, it tastes like a classic vanilla cake, just better. My gluten-eating friends don’t even ask for seconds.
- Weeknight to Party Ready: Same batter, endless uses: slice for breakfast toast, layer for trifles, or serve whole with berries. I made this for a potluck last month—no one guessed it was gluten-free. (Yes, even on a Tuesday night.)
Step-by-step instructions for lightly sweetened gluten-free cake
Here's how to create a tender, moist gluten-free cake that rises beautifully and tastes like no compromise was made.
Combine Dry Ingredients for Perfect Texture
In a medium bowl, whisk together the 1.5 cups superfine almond flour, 1 cup white rice flour, 0.5 cup tapioca flour, 0.25 tsp xanthan gum, 1 tsp baking powder, 0.25 tsp salt, and 0.25 tsp cream of tartar. This blend creates the ideal structure—almond flour adds richness, rice flour provides stability, and tapioca flour ensures a tender crumb. Sift the mixture once to eliminate any lumps that could create dense pockets in your cake.
I like to press the mixture through a fine-mesh sieve into a separate bowl to ensure everything is evenly distributed. The xanthan gum might seem like a tiny amount, but it's crucial—it mimics gluten's binding properties, giving your cake that proper rise and structure. Don't skip this step; uneven distribution leads to uneven texture.
Cream Butter and Sugar to Lighten the Batter
In a stand mixer fitted with the paddle attachment, beat the 1 cup unsalted butter and 1 cup granulated sugar on medium speed for 3-4 minutes until light and fluffy. You'll see the mixture nearly double in volume and turn pale—this incorporates air that helps create that beautiful rise. The butter should be at room temperature (press your finger into it; it should leave a slight indent).
Here's the thing—if your butter is too cold, the cake will be dense. If it's too warm, you'll end up with a greasy texture. The perfect room-temperature butter is non-negotiable for this recipe. Once fully creamed, scrape down the sides of the bowl to ensure even mixing as we proceed.
Add Eggs and Vanilla for Richness
Add the 2 whole large eggs, one at a time, mixing on low speed after each addition until fully incorporated. Then add the 1 tbsp vanilla extract and mix for another 10 seconds. The eggs add moisture and structure, while the vanilla infuses that warm, comforting flavor. Make sure your eggs are room temperature too—they'll blend more smoothly and create a lighter batter.
You'll notice the mixture might look slightly curdled after adding the eggs, but don't worry. When you add the dry ingredients, everything will come together beautifully. This is where the magic happens—the fat, sugar, and eggs create an emulsion that traps air, setting the stage for that perfect rise.
Alternate Adding Dry and Wet Ingredients
With the mixer on low speed, add one-third of the dry ingredients and mix until just combined. Then add half of the 0.5 cup unsweetened almond milk and mix again until incorporated. Repeat this process, ending with the last third of dry ingredients. This gradual addition prevents gluten-free flour from absorbing too much liquid at once, which could lead to a gummy texture.
I find it helps to use a spatula to gently fold in any stubborn bits that cling to the bowl. The batter should be thick but pourable—like a rich, creamy cake batter. If it's too thick, you can add a splash more almond milk, but don't overdo it. The goal is a smooth, homogeneous mixture that's ready to bake.
Bake to Golden Perfection
Preheat your oven to 350°F and grease two 8-inch round cake pans or line them with parchment paper. Divide the batter evenly between the pans. Bake for 25-30 minutes, or until a toothpick inserted into the center comes out clean. The edges should be golden brown, and the top should spring back when gently pressed.
Gluten-free cakes can dry out quickly, so I recommend checking for doneness at the 20-minute mark. Ovens vary, and you don't want to overbake. Once done, remove the cakes from the oven and let them cool in the pans for 10 minutes. Then transfer them to a wire rack to cool completely before frosting or serving.
Serve at Room Temperature
This cake tastes best at room temperature, so if you're in a hurry, slice it while still slightly warm. The texture will be tender and moist, with a fine crumb that's characteristic of a well-made gluten-free cake. The almond flour adds a subtle nutty flavor, while the rice flour keeps it light and airy.
For the best experience, let it sit for 30 minutes before slicing. This allows the flavors to meld and the crumb to set properly. Serve with a dusting of powdered sugar, a light glaze, or your favorite fruit compote. The beauty of this recipe is its versatility—it's perfect for birthdays, afternoon tea, or just a simple treat.
Pro Tips For Making All Purpose Gluten Free Flour Cake
- WHISK DRY FIRST: Mix the superfine almond flour, white rice flour, and tapioca flour together before adding wet ingredients—this prevents clumping from the sugar and xanthan gum. I learned this the hard way when my first batch turned into a gummy mess because the almond flour absorbed moisture unevenly.
- MEASURE XANTHAN GUM BY WEIGHT: Use a kitchen scale for the xanthan gum—1/4 teaspoon is not the same as 1/4 teaspoon by volume. Too much makes the cake rubbery; too little leaves it dense. I was skeptical until I tried it—now I never guess with this stuff.
- BAKE UNTIL COOLER THAN YOU THINK: Gluten-free cakes keep cooking after you pull them out—test with a thermometer at 190°F (88°C) instead of relying on toothpick tricks. The center will firm up as it cools, and you’ll avoid that sad, gummy texture.
- CHILL THE BATTER: Let the batter sit for 10–15 minutes before baking—this helps the tapioca starch hydrate properly and prevents a crumbly texture. Sounds weird, but it works: my cakes now hold together like a proper sponge, not a pile of crumbs.
Dietary considerations for these flavors
Gluten-Free Swaps
This recipe uses a three-flour blend—almond flour, rice flour, and tapioca flour—to mimic the structure and moisture of traditional wheat flour. The almond flour adds richness and natural sweetness, while rice flour provides stability, and tapioca flour ensures elasticity for a proper rise. Xanthan gum (just ¼ tsp) replaces gluten’s binding properties, so don’t skip it! For a nut-free version, swap almond flour for an extra ½ cup rice flour, though the texture will be slightly denser. 🌰
Dairy-Free Adaptations
Replace the unsalted butter with vegan butter (like Miyoko’s) or a mix of ½ cup unsweetened coconut milk plus 2 tbsp melted coconut oil for a neutral flavor. The almond milk can be swapped for coconut milk or oat milk, though almond milk’s richness enhances the cake’s moisture. For a richer texture, use full-fat coconut milk—just reduce the liquid by 2 tbsp to compensate for its higher fat content. 🥛
Egg-Free Binding
For an egg-free version, replace the 2 eggs with a flaxseed "egg"—mix 2 tbsp ground flaxseed with 6 tbsp water and let it sit for 5 minutes to thicken. This works best in this recipe because the flaxseed’s binding properties mimic eggs’ structure. If you’re avoiding flax, try ¼ cup unsweetened applesauce or silken tofu (blended smooth), though the texture may be slightly denser. Always let the substitute rest before mixing into the batter. 🥚
Allergen-Friendly Notes
This recipe is nut-free if you swap almond flour for oat flour or coconut flour (though coconut flour absorbs more liquid—reduce other liquids by ¼ cup). For soy-free needs, ensure your vanilla extract and almond milk are certified soy-free (many brands use soy lecithin as an emulsifier). Always check labels on gluten-free flours—some blends contain trace amounts of soy or dairy. Cross-contamination is a real concern, so use clean utensils and pans if allergies are severe. 🧪
Sweetener Flexibility
The recipe calls for granulated sugar, but you can substitute coconut sugar (1:1 ratio) for a caramel note or maple syrup (reduce by 2 tbsp to account for moisture). For a lower-glycemic option, use monk fruit sweetener (follow package instructions for conversion). Avoid honey or molasses—they can alter the cake’s rise and add a strong flavor. If using a sweetener with less volume (like erythritol), reduce the almond milk by 1 tbsp to maintain balance. 🍚
Nutrition facts
Frequently asked questions
Why does this gluten-free cake need xanthan gum?
Xanthan gum acts like gluten's natural binding properties—it helps the cake hold its shape and rise properly. Without it, your cake might crumble or collapse. Just ¼ tsp makes all the difference for that perfect structure! The recipe uses a precise amount to avoid any gummy texture.
Can I make this cake without almond flour?
Yes, but expect a slightly denser texture. Replace the 1.5 cups almond flour with 1 cup rice flour + ½ cup oat flour. For nut-free versions, use 2 cups rice flour instead, but add 1 tbsp extra almond milk to compensate for the lack of fat. The flavor will be more neutral but still delicious!
How do I know when the cake is fully baked?
Insert a toothpick into the center—it should come out clean with just a few moist crumbs. The edges should be golden brown, and the top should spring back when gently pressed. Gluten-free cakes can dry out quickly, so check at 20 minutes if your oven runs hot.
Will this cake taste different from wheat-based cakes?
Not at all! The almond flour adds subtle richness, while the rice and tapioca flours create a light, tender crumb. The vanilla and butter keep it familiar—just without the heaviness. Many people say it tastes even better than traditional cakes because it's less dense and more moist.
Can I bake this in a different pan size?
Yes, but adjust the baking time. For an 9-inch round pan, bake 20-25 minutes (it's shallower). For 6-inch pans, bake 30-35 minutes. Always use the toothpick test to confirm doneness. Smaller pans may need slightly longer baking to ensure even cooking.