
Desserts
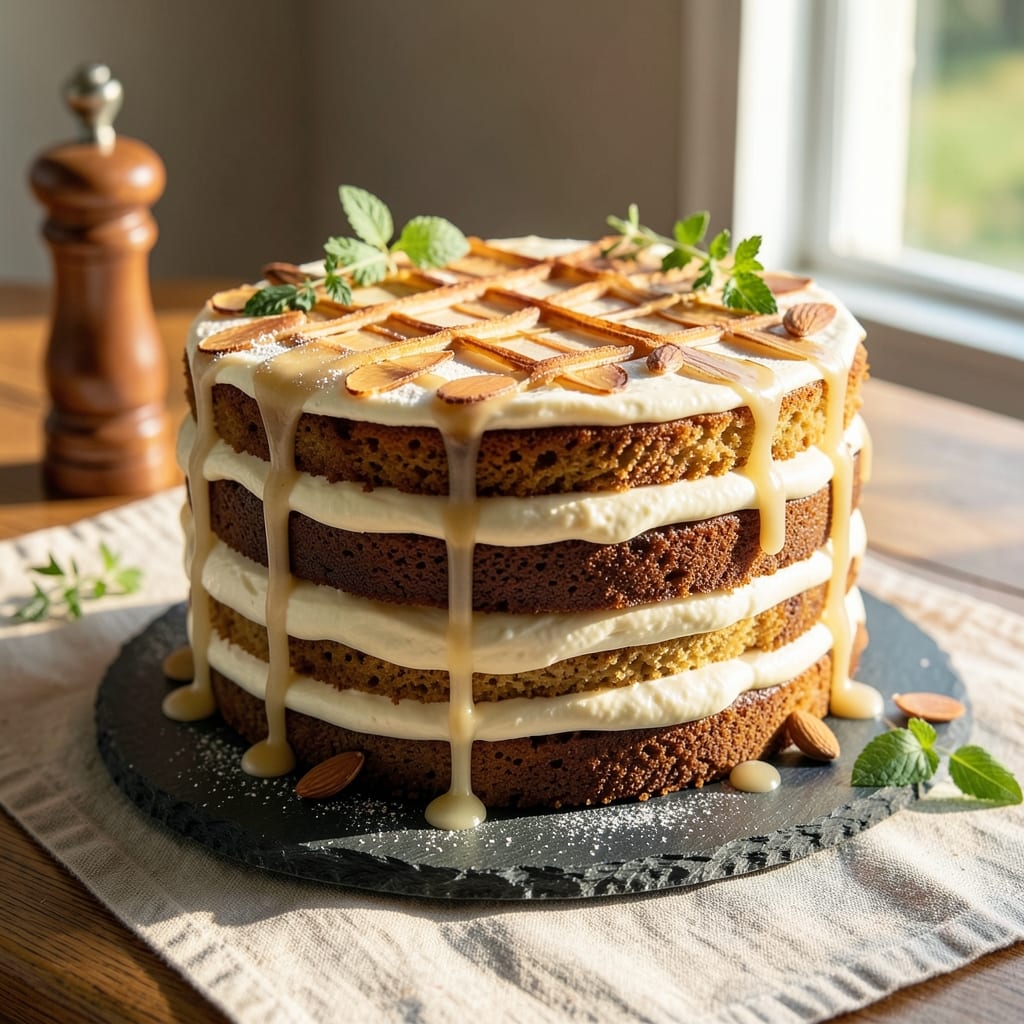
This allergy-free birthday cake recipe proves that safe celebrations can still be magical—moist layers, rich vanilla swirls, and no compromises on flavor. 💛 The secret lies in clever substitutions that deliver the same tender crumb and velvety texture without eggs, dairy, or gluten, making it perfect for guests with dietary restrictions while still feeling like a true indulgence.
What makes this recipe special is the combination of almond flour and coconut oil, which create a naturally rich texture while keeping the cake light and fluffy. The vanilla bean paste swirl adds that signature birthday cake aroma and visual appeal, ensuring it looks as impressive as it tastes. With just 10 ingredients and 45 minutes of active time, this cake delivers restaurant-quality results without the fuss.
By the time you pull it from the oven, you'll have layers of tender cake with a perfect crumb, swirled with fragrant vanilla, and topped with a smooth coconut cream frosting that's just sweet enough. The frosting stays firm enough to pipe but melts beautifully on the tongue, creating a balance that's both elegant and approachable. Every slice will feel like a celebration, no matter the dietary needs.
This recipe scales perfectly for any birthday gathering, from intimate family celebrations to larger parties. The frosting can be customized with sprinkles or edible flowers for extra flair, while the cake itself stays moist for days. Here's how to create a birthday cake that's as inclusive as it is delicious.
Ingredients for allergy free birthday cake
Ten ingredients transform into a birthday cake that’s safe for all guests yet rich in flavor.
| Ingredient | Amount | Notes |
|---|---|---|
| Almond Flour 🌰 | 2 ½ cups | Superfine, unsweetened preferred |
| Coconut Oil 🥥 | 1 cup | Refined, solid at room temperature |
| Granulated Sugar 🍚 | 1 ½ cups | White or organic cane sugar |
| Vanilla Bean Paste 🌿 | 2 tbsp | High-quality for authentic flavor |
| Unsweetened Applesauce 🍎 | ½ cup | For egg replacement, unsweetened |
| Almond Milk 🥛 | ¾ cup | Unsweetened, for moisture |
| Baking Powder 🧂 | 1 ½ tsp | Aluminum-free preferred |
| Salt 🧂 | ½ tsp | Fine sea salt |
| Vanilla Extract 🍯 | 1 tsp | Pure, high-quality extract |
| Coconut Cream 🥥 | 1 can | Full-fat, chilled for frosting |
| Powdered Sugar 🍚 | 2 cups | For smooth frosting |
| Lemon Juice 🍋 | 1 tbsp | Fresh, for brightness |
Almond flour is the foundation here—Bob’s Red Mill or Anthony’s Goods brands deliver the finest texture. The superfine grind is key for a tender crumb, not gritty. Coconut oil should be refined (not virgin) to avoid coconut flavor dominance. For the vanilla bean paste, Nielsen-Massey or Madagascar vanilla brands elevate the swirl. Store almond flour in the fridge to prevent rancidity, and keep coconut oil solid until mixing.
No almond flour? Oat flour (blend rolled oats) or cashew flour works in a pinch, though texture will differ slightly. Substitute coconut oil with avocado oil or melted coconut butter (adjust liquid ratios). For the applesauce, unsweetened only—sweetened versions alter the balance. Almond milk can be swapped for soy or oat milk, but almond milk’s neutral flavor pairs best. The lemon juice brightens the frosting—freshly squeezed is ideal, but bottled works if labeled ‘pure’.
This cake keeps beautifully for 5 days in an airtight container at room temperature, or 2 weeks refrigerated. The frosting can be prepped 1 day ahead—just whip it again before piping. For parties, assemble the cake 4 hours before serving to let flavors meld. Freeze uncut layers for 3 months—thaw at room temperature before frosting. Sprinkles or edible flowers add flair but wait until the final hour to decorate.
Why You'll Love This Recipe
- No Mixer Needed: I swear by this—just fold the almond flour, applesauce, and coconut oil together until it almost holds. No overmixing, no gluten to fight, and the texture comes out tender every time. My stand mixer sits idle for this one.
- Vanilla Bomb: That vanilla bean paste? It’s the secret weapon. One teaspoon turns this into something ridiculously good—warm, sweet, but with this deep, creamy vanilla punch that makes it taste like a bakery, not a quick fix.
- Crowd-Pleaser Any Day: Between us, this cake works for birthdays, potlucks, or when I need dessert now. The applesauce keeps it moist, the almond flour gives it structure, and no one ever asks what’s in it—just that they want seconds.
- Leftovers That Last: Honestly, I make two small cakes and have slices for days. The coconut oil keeps it from drying out, and it reheats beautifully (microwave + paper towel = magic). Perfect for when you bake once but eat for a week.
Step-by-step instructions for allergy-free birthday cake
Here's the method for a perfectly moist, allergy-friendly cake with rich vanilla swirls.
👨🍳 Step 1: Prepare the Cake Batter
Preheat your oven to 350°F and grease two 9-inch round cake pans with coconut oil, then line the bottoms with parchment paper. In a large mixing bowl, combine the 2.5 cups almond flour, 1.5 cups granulated sugar, 1.5 tsp baking powder, and 0.5 tsp salt. Whisk until evenly distributed—this ensures even rising and prevents dense spots.
In a separate bowl, mix the 1 cup coconut oil (softened but not melted), 0.5 cup unsweetened applesauce, 0.75 cup almond milk, 2 tbsp vanilla bean paste, and 1 tsp vanilla extract until smooth. The applesauce replaces eggs while keeping the texture tender. Gradually pour the wet ingredients into the dry and stir just until combined—overmixing develops gluten and makes the cake tough.
🍳 Step 2: Create the Vanilla Swirl Layer
Divide the batter evenly between the two prepared cake pans. For the swirl effect, drop spoonfuls of the 2 tbsp vanilla bean paste (reserve some for flavor) and 1 tbsp lemon juice (for brightness) onto one pan. Use a butter knife to gently swirl the paste through the batter in circular motions—this creates the signature marbled look.
Bake for 25-30 minutes until a toothpick inserted in the center comes out clean. The cake should spring back slightly when pressed and have a golden top. Rotate the pans halfway through baking for even browning. Let the cakes cool in the pans for 10 minutes before transferring to a wire rack to cool completely.
🥘 Step 3: Make the Coconut Cream Frosting
While the cakes cool, prepare the frosting by chilling the 1 can coconut cream in the refrigerator for 30 minutes until partially solidified. Scoop out the thick cream (discard or save the watery part for smoothies). In a medium bowl, beat the coconut cream with an electric mixer on medium-high speed until smooth and fluffy—this takes about 2-3 minutes.
Gradually add the 2 cups powdered sugar and remaining 1 tbsp lemon juice, mixing on low speed until fully incorporated. The frosting should be thick but spreadable. Taste and adjust sweetness if needed—this is the moment to ensure perfect balance.
🎂 Step 4: Assemble and Decorate
Once the cakes are completely cool, level the tops if needed with a serrated knife. Place one cake layer on a serving plate and spread a thin layer of frosting on top. Add the second layer and frost the top and sides with the remaining frosting, using a spatula to create smooth, even strokes. For extra flair, pipe decorative swirls around the edges using a piping bag fitted with a star tip.
Let the cake sit at room temperature for 30 minutes before slicing to allow the frosting to set. The final result should be a perfectly moist cake with a rich vanilla flavor, complemented by the bright citrus notes from the lemon juice. Each slice will reveal beautiful swirls of vanilla bean paste throughout.
Pro Tips For Making Allergy Free Birthday Cake
- MEASURE ALMOND FLOUR RIGHT: Almond flour packs differently than regular flour—don’t scoop it straight from the bag or you’ll end up with a dense, brick-like cake. Instead, spoon it into your measuring cups and level it off with a knife. I learned this the hard way after my first batch turned out like a hockey puck.
- WHISK COCONUT OIL FIRST: Solid coconut oil can turn into a greasy mess if you mix it in dry. Melt it first (just 10 seconds in the microwave), then whisk it with your wet ingredients until it’s completely smooth. This keeps the texture light instead of heavy and oily.
- DON’T OVERMIX THE BATTER: Almond flour releases a lot of moisture when mixed, and once the batter starts looking shaggy, it’s too late. Stop stirring as soon as everything is just combined—overmixing makes the cake tough. I used to ignore this, and my cakes always ended up chewy instead of tender.
- USE VANILLA PASTE, NOT EXTRACT: Vanilla bean paste adds depth and tiny specks of vanilla that extract can’t match. If you’re using extract, double the amount, but don’t skip the seeds—they make a real difference in flavor. (Yes, even if you’re impatient like me.)
Storing and reheating this recipe
Room Temperature Storage
This cake stays fresh and moist for 5 days at room temperature when stored in an airtight container—I love using Pyrex glass containers with snap-on lids. The coconut cream frosting actually improves in flavor as it sits, developing deeper vanilla notes. Just
Refrigerator Refresh
If you refrigerate the cake (up to 2 weeks), bring it to room temperature before serving to restore the perfect texture. I recommend transferring it to the counter 1 hour before slicing. If the frosting looks too firm, microwave it for 10-15 seconds to soften slightly—this works wonders for piping decorations.
Freezing Layers
Freeze individual cake layers (without frosting) in plastic wrap for up to 3 months. Thaw overnight in the fridge before assembling. The frosting should be made fresh after thawing since it doesn't freeze well. I find this method perfect for prepping ahead for birthdays when I know guests will be coming from out of town. ❄️
Frosting Make-Ahead
The coconut cream frosting can be prepared 1 day ahead and stored in an airtight container in the fridge. Before using, whip it again for 1-2 minutes to restore fluffiness. I like to add a pinch of salt at this stage to enhance the sweetness balance. This saves time on the big day while keeping everything fresh.
Reheating Slices
For individual slices, warm them in the microwave for 10-15 seconds on medium power to soften the frosting slightly. Alternatively, place slices on a baking sheet and warm in a 300°F oven for 3-4 minutes—this method keeps the cake moist without melting the frosting completely. Perfect for quick servings when guests arrive! 🔥
Decorating Timing
Add sprinkles or edible flowers only 1 hour** before serving to prevent them from sticking to the frosting. I recommend using a small offset spatula to gently press decorations onto the cake. The frosting will hold them in place beautifully while keeping the cake looking fresh and celebratory. 🎉
Nutrition facts
Frequently asked questions
Can I make this cake without almond flour?
Yes! For a nut-free version, substitute 2.5 cups almond flour with 2 cups gluten-free oat flour (blend rolled oats) or 2 cups cashew flour. The texture will be slightly denser, but still delicious. For best results, add 1 extra tablespoon of almond milk to compensate for the difference in moisture absorption.
Why does my cake taste bland without eggs?
The applesauce and vanilla bean paste provide natural sweetness and moisture, but you can boost flavor by adding 1 teaspoon of lemon zest to the batter or 1/4 teaspoon of cinnamon. The coconut oil also adds richness—just ensure it's not melted before mixing. A pinch of salt enhances all flavors too!
How do I prevent the coconut cream frosting from melting too quickly?
Chill the frosting for 15 minutes before piping onto the cake. Store the cake in a cool place (not the fridge) and avoid direct sunlight. For extra stability, add 1/2 teaspoon of cornstarch to the frosting while whipping. This trick keeps it firm enough for piping while still tasting creamy.
Is this cake safe for nut allergies?
This recipe is nut-free only if you use a certified nut-free almond flour (or substitute with oat/cashew flour). Always check labels—some almond flour brands process in facilities with other nuts. For complete safety, opt for sunflower seed flour (substitute 1:1) or oat flour made in dedicated nut-free facilities.
Can I use regular vanilla extract instead of vanilla bean paste?
Yes, but the swirl effect will be less dramatic. Use 2 tablespoons of high-quality vanilla extract (like Madagascar bourbon) and add 1/2 teaspoon of yellow food coloring to mimic the vanilla bean paste's appearance. The flavor will still be rich—just without the visible marbling.