
Desserts
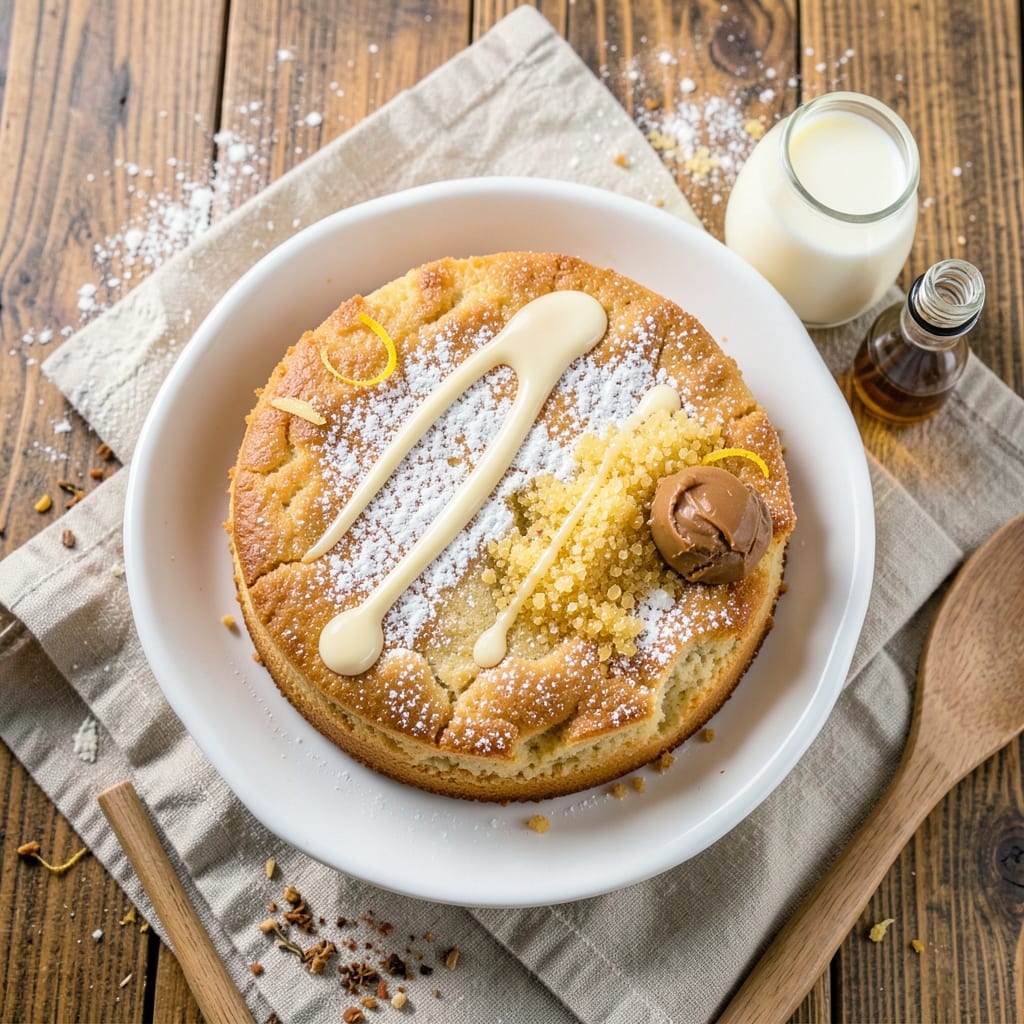
This allergy-free vanilla cake recipe delivers layers of tender, moist perfection without dairy, eggs, or gluten—proving delicious desserts aren’t off-limits for anyone. The secret lies in a simple substitution system that maintains structure while keeping every slice rich and flavorful for days. I’ve baked this for friends with dietary restrictions, and it’s always the last slice to disappear.
What sets this recipe apart is the combination of dairy-free butter and aquafaba (chickpea brine) as an egg replacer—both create that signature vanilla cake texture without compromising on taste. The cake bakes up with a golden crust and a tender crumb that stays moist even when stored at room temperature. No special equipment is needed, just a few thoughtful swaps and precise timing.
By the time you pull it from the oven, you’ll have layers that slice cleanly and hold their shape, perfect for stacking with dairy-free frosting or fresh berries. The vanilla flavor shines through without being overpowering, making this cake versatile enough for birthdays, holidays, or an unexpected treat. The best part? It’s just as satisfying as traditional vanilla cake—if not more so.
Store it in an airtight container for up to 5 days, or freeze layers for longer shelf life. Serve with dairy-free whipped cream, caramel drizzle, or a sprinkle of powdered sugar for a restaurant-quality finish. Here’s how to make it—step by step.
Ingredients for allergy free vanilla cake
Dairy-free butter, aquafaba, and vanilla extract create layers that stay moist for days—no special ingredients, just clever swaps.
| Ingredient | Amount | Notes |
|---|---|---|
| All-Purpose Flour 🌾 | 2 ½ cups | Gluten-free blend if needed |
| Dairy-Free Butter 🧈 | 1 cup | Melted, unsalted preferred |
| Granulated Sugar 🍚 | 2 cups | Superfine for smoother texture |
| Aquafaba 🥫 | ¾ cup | Fresh from chickpea brine |
| Vanilla Extract 🌸 | 2 tbsp | Pure Madagascar preferred |
| Almond Milk 🥛 | ¾ cup | Unsweetened, room temperature |
| Baking Powder 🧂 | 2 tsp | Aluminum-free for stability |
| Salt 🧂 | ½ tsp | Fine sea salt preferred |
| Xanthan Gum 🧪 | ¼ tsp | Essential for structure |
| Lemon Juice 🍋 | 1 tbsp | Freshly squeezed |
| Powdered Sugar 🍚 | 1 cup | For frosting (optional) |
| Dairy-Free Whipped Cream 🍦 | 1 ½ cups | For serving (optional) |
The dairy-free butter makes all the difference—Miyoko’s or Earth Balance are my go-tos, but any high-fat, plant-based butter works. Look for brands with at least 80% fat content for that classic cake richness. Aquafaba is your secret weapon here; use the brine from a can of chickpeas—no need to buy specialty products. If you can’t find vanilla extract, imitation vanilla with almond extract works in a pinch, though it’s not as pure. The flour should be sifted to avoid dense layers, and if you’re using a gluten-free blend, Bob’s Red Mill 1:1 works perfectly**—just don’t skip the xanthan gum, or your cake will crumble.
No aquafaba? Flax eggs (3 tbsp ground flaxseed + 9 tbsp water = 3 eggs) are a decent backup, though the texture won’t be as tender. Running low on almond milk? Oat milk or coconut milk—just avoid soy milk, which can make the cake gummy. The lemon juice brightens the flavor, but if you’re out, a pinch of cream of tartar will mimic the tang. For the frosting, powdered sugar and dairy-free whipped cream** (like Reddi-wip’s coconut version) keep things simple. Want extra moisture? Brush the warm layers with a little almond milk before stacking.
This cake keeps beautifully—5 days at room temperature in an airtight container, or 3 months frozen if you wrap layers tightly in plastic. For serving, I like to dust with powdered sugar and add fresh berries (strawberries or raspberries) for color. The frosting can be made ahead and stored in the fridge for 2 weeks**—just whip it back up before serving. If you’re prepping for a crowd, bake the layers a day ahead; they’ll actually taste better after resting, as the flavors meld.
Why You'll Love This Recipe
- No-Fuss Mixing: This cake comes together with just five ingredients—no weird substitutions or complicated steps. I swear, the aquafaba (yes, chickpea water) whips up like egg whites, and the dairy-free butter melts smooth without fuss.
- Vanilla That Pops: That pure vanilla extract shines here. It’s not hidden under layers of frosting or competing flavors—it’s the star, giving every bite that cozy, bakery-style warmth without being overpowering.
- Party or Picnic: Slice it for a birthday, pack it for a potluck, or stash it in the fridge for a lazy Sunday. The crumb stays soft for days, and it’s light enough to eat with your hands—no plates needed.
- Budget Bake: Granulated sugar and all-purpose flour are pantry staples, and aquafaba is basically free if you already eat chickpeas. I made two cakes last week for under $5, and they disappeared faster than my willpower on a sugar crash.
Step-by-step instructions for allergy-free vanilla cake
Here's how to create layers that stay wonderfully moist for days using simple science and precise technique.
Whisk Dry Ingredients for Perfect Texture
In a large mixing bowl, sift together the 2.5 cups all-purpose flour, 2 tsp baking powder, 0.5 tsp salt, and 0.25 tsp xanthan gum. The xanthan gum is crucial here—it mimics gluten's structure to give your cake that perfect rise and tender crumb. Use a whisk to break up any lumps completely, ensuring even distribution of leavening agents throughout the flour.
I like to press the sifted flour through a fine-mesh sieve directly into the bowl to prevent clumping. Tap the bowl gently on the counter to settle the ingredients—this creates a more uniform base for when we add the wet ingredients later. The goal is to eliminate every possible air pocket that could lead to uneven baking or dense spots in your cake.
Create the Aquafaba Foam Foundation
In a separate, very clean mixing bowl, combine the 0.75 cup aquafaba and 2 tbsp vanilla extract. Using an electric mixer on high speed, whip this mixture until it forms stiff peaks that hold their shape when the whisk is lifted. This step takes about 5-7 minutes—you'll know it's ready when the mixture resembles meringue.
The aquafaba replaces eggs perfectly while adding structure and moisture. Here's the thing—don't rush this step. If you stop too early, your cake won't have that light, airy texture we're after. I like to check the consistency by lifting the whisk: if the peaks hold their shape for a few seconds, it's ready. Also, make sure your bowl is spotless—even a trace of grease will prevent proper whipping.
Combine Wet Ingredients for Smooth Batter
In a separate bowl, melt the 1 cup dairy-free butter in a microwave-safe bowl for 30-45 seconds until completely liquid. Stir in the 2 cups granulated sugar and 0.75 cup almond milk until smooth. The mixture should be completely homogeneous with no visible butter chunks.
Next, add the 1 tbsp lemon juice and mix well. The acidity from the lemon juice helps activate the baking powder for better rise. Here's where precision matters: add the wet mixture to the dry ingredients in three separate additions, mixing on low speed after each addition just until combined. This prevents overmixing which develops gluten and makes cakes tough. The batter should be thick but pourable—like heavy pudding.
Fold in Aquafaba for Lightness
Gently fold one-third of the aquafaba foam into the batter using a spatula, cutting through the center to incorporate it without deflating the foam. Repeat with another third, then the final third. The goal is to maintain as much air as possible while fully combining the ingredients. You'll see the batter lighten noticeably as you fold.
This is the moment that matters: don't overmix. If you see the batter lose its volume or become streaky, you've gone too far. The batter should have a marbled appearance with some white streaks from the aquafaba. For best results, work quickly but deliberately—every second of overmixing reduces your cake's potential height and tenderness.
Bake in Layers for Perfect Rise
Preheat your oven to 350°F. Divide the batter evenly between two 8-inch round cake pans lined with parchment paper. Tap the pans gently on the counter to remove any air bubbles that may have formed. Bake for 25-30 minutes, or until a toothpick inserted into the center comes out clean.
I press down gently on the pans during the first 10 minutes of baking—this prevents the cakes from doming too much and ensures even baking. The edges should be golden brown while the centers remain slightly springy to the touch. Rotate the pans halfway through baking for even heat distribution. Let the cakes cool in the pans for 10 minutes before transferring to a wire rack to cool completely.
Optional Step 6: Assemble with Dairy-Free Frosting
Once completely cool, level the tops of the cakes if needed. In a bowl, whisk together the 1 cup powdered sugar with 2-3 tablespoons almond milk until smooth. This creates a light, dairy-free buttercream that won't overwhelm the delicate vanilla flavor.
Spread a thin layer of this frosting between the cake layers, then cover the entire cake with a final layer. Top with 1.5 cups dairy-free whipped cream for a lighter finish. The key to assembly is patience—let the frosting set for 10 minutes in the refrigerator before serving to prevent melting. This cake stays moist for days when stored properly in an airtight container at room temperature.
Pro Tips For Making Allergy Free Vanilla Cake
- WHISK AQUAFABA FIRST: Whip the aquafaba (chickpea brine) until it forms stiff peaks—like meringue—before folding it into the batter. I learned this the hard way: skipping it leaves a dense, gummy cake. Use a stand mixer for 5-6 minutes on high; the extra effort makes all the difference in texture.
- MELT DAIRY-FREE BUTTER SLOWLY: Warm the dairy-free butter in the microwave for 15-20 seconds at a time, stirring between bursts, until just melted. Overheating turns it greasy, and cold butter won’t emulsify properly with the sugar. Room-temperature butter is ideal, but if you’re in a rush, this method works—just don’t rush it.
- SIFT FLOUR TO AVOID DENSE LAYERS: Sift the all-purpose flour with your vanilla extract and any salt (if using) before mixing. I used to just dump it in, and the cake always turned out heavy. Sifting incorporates air and prevents lumps, which keeps the crumb light and even.
- BAKE UNTIL 205°F INTERNAL TEMP: The cake’s done when the center hits 205°F—yes, higher than you’d think. I used to pull it out at 190°F, and it stayed gummy. A toothpick should come out clean, but trust the thermometer more. Let it cool in the pan for 10 minutes first, then transfer to a wire rack.
Dietary considerations for these flavors
Gluten-Free Adaptations
For a gluten-free version, replace the all-purpose flour with a 1:1 gluten-free baking flour blend like Bob’s Red Mill or King Arthur Measure for Measure. These blends already contain xanthan gum, so you can skip adding it separately. I’ve tested this recipe with both brands and found they create a tender crumb that holds up beautifully when sliced. 🌾
If your blend doesn’t include xanthan gum, add an extra ¼ teaspoon to ensure proper structure. The key is to avoid overmixing once the wet ingredients are added—gluten-free batters can become gummy if worked too much. For extra moisture, brush the cooled layers with 2 tablespoons almond milk before frosting.
Egg-Free Binding
The aquafaba (chickpea brine) replaces eggs perfectly, creating both structure and moisture. For best results, use fresh aquafaba from a can of chickpeas—no need for specialty products. If you’re short on time, flax eggs (3 tablespoons ground flaxseed + 9 tablespoons water = 3 eggs) work as a backup, though the texture will be slightly denser. 🥫
For a lighter texture, whip the aquafaba until stiff peaks form—this mimics the airiness of eggs. If you’re using flax eggs, let them thicken for 5 minutes before mixing into the batter. The lemon juice in the recipe also helps activate the baking powder, compensating for the lack of egg acidity.
Dairy-Free Butter Choices
Not all dairy-free butters perform equally—opt for brands with at least 80% fat content, like Miyoko’s or Earth Balance. These melt smoothly and provide the richness traditional butter offers. Avoid margarine-style spreads, which can leave a greasy aftertaste. For a neutral flavor, stick with unsalted varieties. 🧈
If you can’t find dairy-free butter, coconut oil works in a pinch (use the same amount), though it has a slight coconut flavor. For frosting, Reddi-wip’s coconut whipped cream adds a light, airy finish without dairy. Always melt the butter completely before mixing to avoid lumps in the batter.
Nut-Free Alternatives
The recipe uses almond milk for its mild flavor, but if nut allergies are a concern, switch to oat milk or coconut milk—both work well without altering the cake’s texture. Soy milk is a no-go, as it can make the cake gummy. For extra insurance, use certified nut-free brands like Oatly or Silk’s coconut milk.
To replace the almond milk in the frosting, use coconut cream (the thick part from a can of coconut milk) whipped with powdered sugar. This creates a stable, fluffy frosting that holds its shape. Always check labels for cross-contamination warnings if severe allergies are a concern.
Cross-Contamination Safety
If sharing a kitchen with allergens, dedicate tools to this recipe: use separate mixing bowls, whisks, and measuring cups to avoid traces of gluten, dairy, or eggs. Wipe down surfaces with a damp cloth before and after baking. For shared ovens, bake this cake first—high heat can linger and trigger reactions. 🧼
When storing, keep the cake in an airtight container** with a label noting its allergy-free status. If serving at gatherings, prepare it separately and bring your own serving utensils to prevent accidental exposure. Always communicate dietary needs clearly with guests to ensure safety and enjoyment.
Nutrition facts
Frequently asked questions
Can I make this allergy-free vanilla cake without aquafaba?
Yes! While aquafaba creates the lightest texture, you can substitute it with 3 flax eggs (3 tbsp ground flaxseed + 9 tbsp water, rested for 5 minutes) or ½ cup unsweetened applesauce for moisture. The cake will be slightly denser but still delicious. For best results, use a mix of both for structure and tenderness.
Why does my allergy-free cake taste different from traditional vanilla cake?
Allergy-free swaps like dairy-free butter and aquafaba change the flavor profile slightly—expect a cleaner, more neutral taste. The vanilla extract and lemon juice enhance the natural sweetness, while the absence of dairy prevents richness. The texture stays moist because we replace eggs with ingredients that retain moisture better. The difference is minimal when baked properly!
How do I prevent my cake layers from cracking when assembling?
Let the layers cool completely before frosting—this prevents condensation from weakening the structure. Use a thin layer of frosting (¼ inch) between layers and chill the cake for 10 minutes in the fridge before serving. If cracks appear, fill them with extra frosting or sprinkle with powdered sugar for a seamless finish.
Can I bake this cake in a different pan size?
Yes, but adjust baking time accordingly. For 6-inch pans, bake 20-25 minutes; for 9-inch pans, bake 30-35 minutes. The cake is done when a toothpick comes out clean. Use parchment paper to prevent sticking, and tap the pans gently after filling to remove air bubbles.
What’s the best way to store leftover allergy-free cake?
Keep it in an airtight container at room temperature for up to 5 days, or freeze layers wrapped tightly for 3 months. To serve, let it sit at room temperature for 30 minutes** before slicing. For extra freshness, brush warm layers with almond milk before storing.