
Desserts
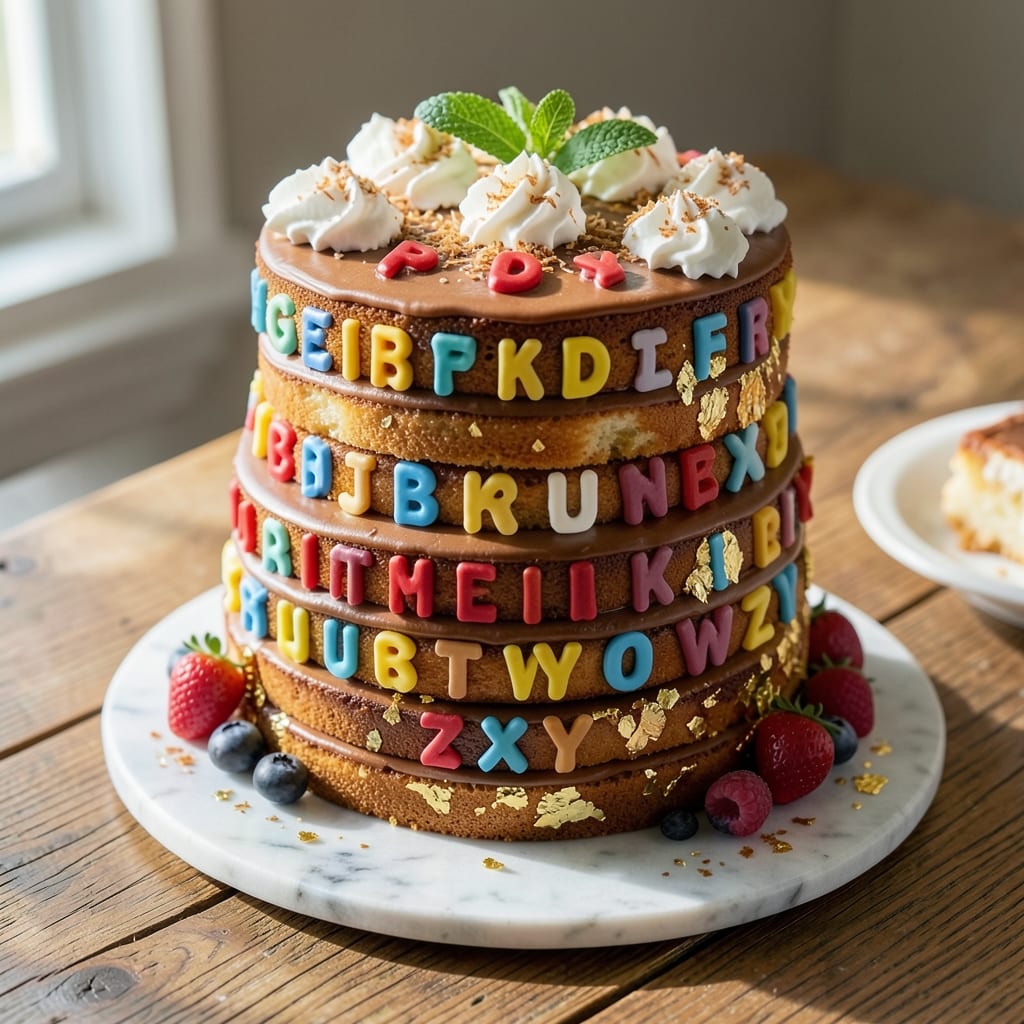
This alphabet cake recipe transforms baking into a creative adventure perfect for little chefs and their parents. ✨ The secret lies in a simple vanilla sponge base that provides the perfect canvas for edible letter magic, whether you use fondant, buttercream, or even edible ink. I developed this recipe after years of testing with picky eaters—it's sturdy enough to hold decorations without crumbling, yet light enough to satisfy even the most discerning taste buds.
The real fun begins with customization. You can create themed alphabet cakes for birthdays, learning milestones, or just because—think bright primary colors for a toddler's first cake or elegant gold accents for a special celebration. The frosting technique is simple but precise: spread a thin layer of buttercream as your base, then carefully place pre-cut letters to create a cohesive design. For extra durability, I recommend using a mix of buttercream and fondant for the letters themselves.
What makes this recipe truly special is how it combines simplicity with wow factor. The cake itself bakes in just 30 minutes, and the letter assembly takes about 20 minutes once the cake has cooled. The result? A showstopping dessert that looks as impressive as it tastes, with every letter perfectly formed and ready to spark imagination. This is the kind of project that turns ordinary baking into a memorable experience for kids—and adults too.
Whether you're celebrating a first birthday, teaching the ABCs, or just looking for a creative weekend project, this alphabet cake delivers. The best part? You can adapt it to any theme, color scheme, or size—making it as versatile as it is delightful. Let's get started on creating edible letters that will have everyone asking for seconds—and more letters!
Ingredients for alphabet cake
Sixteen ingredients transform simple baking into edible letter magic for little chefs!
| Ingredient | Amount | Notes |
|---|---|---|
| All-Purpose Flour 🌾 | 2 ½ cups | Sifted for light texture |
| Unsalted Butter 🧈 | 1 cup | Softened to room temperature |
| Granulated Sugar 🍬 | 1 ½ cups | Superfine preferred for smoothness |
| Large Eggs 🥚 | 4 whole | Room temperature for even baking |
| Vanilla Extract 🌸 | 2 tsp | Pure extract for authentic flavor |
| Baking Powder 🧂 | 2 tsp | Freshly opened for leavening |
| Salt 🧂 | ½ tsp | Fine sea salt for balance |
| Milk 🥛 | ½ cup | Whole milk for moisture |
| Buttercream Frosting 🍰 | 3 cups | Classic American style |
| Edible Letter Cutouts 🔤 | 24 pieces | Fondant or buttercream letters |
| Food Coloring 🎨 | 2 tsp | Gel-based for vibrant colors |
| Parchment Paper 📄 | 1 sheet | For easy letter placement |
| Powdered Sugar 🍬 | 1 cup | For dusting letters if needed |
| Vanilla Bean Paste 🌸 | 1 tsp | Optional for extra vanilla depth |
The flour and butter are your foundation—King Arthur flour and Plugrá butter (if you can find it) elevate texture and flavor. For the butter, softened to 65°F ensures perfect creaminess without overmixing. The vanilla extract? Pure Madagascar bourbon from McCormick adds depth that imitation can't match. Pro tip: measure your flour by weight (250g) for foolproof results—spooning leads to air pockets. The baking powder must be fresh (test by mixing with water—it should bubble immediately), or your cake will be dense. Store these dry ingredients in airtight containers to preserve freshness.
No vanilla bean paste? Double the extract—just know it won't be as complex. Running short on buttercream? Swiss meringue buttercream (made with egg whites and sugar) gives a lighter texture, though it requires more effort. For the edible letters, Wilton fondant or Betty Crocker buttercream mix are my go-tos—they hold shape beautifully. Need colors beyond the basics? AmeriColor gel pastes (from craft stores) give vibrant hues without altering the frosting's consistency. The powdered sugar isn't just for dusting—it helps set the letters if you're using fondant in humid conditions.
The cake keeps 3 days at room temperature covered with a dome, but letters lose crispness after 24 hours. For longer storage, refrigerate the cake (covered) for up to 5 days and bring to room temp before decorating. Freeze the unfrosted cake layers for 3 months—thaw completely before assembling. Pro move: bake the cake a day ahead so flavors meld. The letters? Make them fresh the day of decorating (fondant dries out fast), or store in an airtight container with silica packets to prevent sticking. Trust me—the extra day makes all the difference!
Why You'll Love This Recipe
- Pantry Staple Magic: I swear by this recipe because it uses ingredients you already own—the butter, sugar, and flour in your cupboard. No specialty items, no last-minute grocery runs. Just mix, bake, and enjoy.
- Vanilla Butter Bliss: That rich vanilla buttercream? It’s the star. The eggs give it structure, the sugar keeps it tender, and the vanilla makes every bite feel like a hug. Simple, but ridiculously good.
- Party in a Pan: Birthday, shower, or just because—this cake’s your go-to. Cut into squares, stack it high, or frost it fancy. The same batter works for any occasion, and leftovers? They disappear faster than you can say "second slice."
- Budget-Friendly Baking: A single batch costs pennies and stretches for days. Store slices in the fridge, and they stay moist for ages. Honestly, it’s the kind of cake that makes me feel like I’m feeding a crowd without breaking the bank.
Step-by-step instructions for alphabet cake with edible letters
Let's create a showstopping cake that doubles as a playful learning tool—perfect for little chefs!
👨🍳 Step 1: Cream Butter and Sugars to Fluffy Perfection
In a stand mixer fitted with the paddle attachment, beat the softened unsalted butter and 1.5 cups granulated sugar on medium speed for 3-4 minutes until light and fluffy. You'll notice the mixture nearly doubles in volume and turns pale—this aeration creates that signature tender crumb.
I like to scrape down the sides of the bowl every 30 seconds to ensure even mixing. Here's the thing—superfine sugar works best for smoothness, but regular granulated sugar will still give great results. Just know it might take an extra 30 seconds to dissolve completely.
👨🍳 Step 2: Add Eggs and Vanilla for Rich Flavor
Add the 4 whole large eggs, one at a time, mixing on low speed for 30 seconds after each addition. Then stir in the 2 teaspoons vanilla extract and 1 teaspoon vanilla bean paste (if using) until fully combined. The mixture should look slightly ribbony but still smooth.
I always use room temperature eggs—they blend more easily and create a lighter texture. If your eggs are straight from the fridge, let them sit in warm water for 5 minutes first. This step is crucial for preventing dense cake layers.
👨🍳 Step 3: Combine Dry Ingredients for Light Texture
In a separate bowl, whisk together the 2.5 cups all-purpose flour, 2 teaspoons baking powder, and 0.5 teaspoon salt. Sift the dry ingredients directly into the wet mixture, alternating with the 0.5 cup milk, beginning and ending with the flour. Mix on low speed just until combined—you should still see some flour streaks.
Overmixing develops gluten, which leads to tough cake. I use a silicone spatula to gently fold in any stubborn dry bits. The batter should be thick but pourable. If it's too thick, add 1 tablespoon milk at a time until it reaches a smooth consistency.
🔥 Step 4: Bake to Golden Perfection
Preheat your oven to 350°F and grease two 9-inch round cake pans or line them with the parchment paper. Divide the batter evenly between the pans and bake for 25-30 minutes or until a toothpick inserted in the center comes out clean. The edges should be golden brown while the top might still look slightly domed.
I recommend baking both pans on the middle rack for even heat distribution. The cake should spring back gently when pressed in the center. Let the cakes cool in the pans for 10 minutes, then transfer to a wire rack to cool completely before frosting.
🥘 Step 5: Frost and Decorate with Edible Letters
Once completely cooled, level the tops of the cakes if needed, then place one layer on a cake stand or plate. Spread 1.5 cups buttercream frosting evenly over the top, then place the second cake layer on top. Frost the entire cake with the remaining 1.5 cups buttercream frosting, creating a smooth surface.
Here's where the magic happens: use the 2 teaspoons food coloring to tint small amounts of buttercream for letter outlines if desired. Arrange the 24 edible letter cutouts on the parchment paper first to plan your design, then carefully place them on the frosted cake. Dust with 1 cup powdered sugar for a snowy effect if you like!
Pro Tips For Making Alphabet Cake
- Cream Butter First: Take your butter out of the fridge at least 30 minutes before starting—room temperature butter blends smoother with sugar and eggs, cutting down on lumps and overmixing. I used to rush this and ended up with a cake that tasted more like butter grease than vanilla. ---
- Sift That Flour: Skip the sifting? You’ll regret it. Alphabet cakes rely on lightness, and sifting flour removes lumps and aerates the batter, making the letters pop when baked. Use a fine-mesh sieve—no strainer substitutes—and tap the bowl gently to settle it. ---
- Avoid Overbaking: The second the toothpick comes out clean is not the time to pull it. Alphabet cakes dry out fast—check at 25 minutes, then pull at 28-30. Overbaking turns them dense, and nobody wants a crumbly "A" that falls apart when frosted. ---
- Chill the Batter: Let the batter rest 10 minutes after mixing—yes, even if you’re itching to bake. This relaxes the gluten, so the letters rise evenly and don’t collapse. I learned this after my first batch looked like a lumpy pancake disaster.
Serving suggestions for this recipe
Themed Letter Ideas
Create a rainbow alphabet cake by using pastel-colored fondant letters—think pink for "A," blue for "B," and yellow for "C." For a holiday twist, use red and green letters for Christmas or orange and black for Halloween. I once made a space-themed cake with silver letters on a blue buttercream galaxy background—kids loved it! 🌈
Presentation Plating
Serve the cake on a tiered stand for an elegant touch, or use a wooden board for a rustic look. For extra flair, add edible glitter or sprinkles around the letters. I like to place the cake on a white marble slab for photos—it makes the colors pop! 📸
Serving Size Tips
This recipe serves 6-8 adults or 12-15 kids (since little ones eat smaller portions). For a single-layer cake, reduce the frosting to 2 cups and use 12 letters instead of 24. If serving at a party, cut into small squares for easy sharing—each piece becomes a mini edible lesson! 🎂
Garnish Enhancements
Add fresh berries (strawberries, raspberries) around the base for color contrast. For a luxury finish, drizzle white chocolate ganache in thin lines between letters. I once used gold leaf on the letters for a birthday cake—it looked like a royal treat! 💎
Interactive Elements
Turn it into a learning game by having kids match letters to objects (e.g., "A" for "Apple"). For a personal touch, spell out a name or short phrase like "Happy Birthday" or "I Love You." I made one for my nephew’s first birthday with his name in bold letters—he couldn’t stop pointing at it! 👶
Storage & Display
Keep the cake at room temperature for up to 4 hours before serving to prevent frosting from melting. Display it on a cake stand with a clear dome to protect the letters while still showing them off. If storing overnight, refrigerate and let it sit at room temp for 30 minutes before serving. ❄️
Nutrition facts
Frequently asked questions
Can I make this alphabet cake without fondant?
Use buttercream frosting to create your letters instead. Roll out the frosting between two sheets of parchment paper to about 1/4-inch thickness, cut out letter shapes with cookie cutters, then carefully transfer them to the cake. For extra durability, chill the letters in the fridge for 10 minutes before placing them on the cake.
How do I prevent the letters from sliding off the cake?
First, make sure your frosting is fully set by chilling the cake for 15 minutes in the fridge before adding letters. For extra grip, lightly dust the cake surface with powdered sugar or use a tiny dab of edible glue (like piping gel) on the back of each letter. Press gently but firmly to secure them.
What's the best way to store leftover letters?
Store fondant letters in an airtight container with a slice of bread to absorb moisture. For buttercream letters, wrap them tightly in plastic wrap and refrigerate for up to 3 days. If freezing, place letters between parchment paper in a sealed bag for 1 month. Let them sit at room temperature for 10 minutes before using.
Can I make this cake gluten-free?
Yes! Replace the all-purpose flour with a 1:1 gluten-free baking flour blend (like Bob's Red Mill) and add 1/4 teaspoon xanthan gum to improve texture. You may need to adjust the milk to 0.6 cups for proper consistency. Test the cake in a small batch first, as gluten-free flours can behave differently.
How do I make the letters look professional?
Start by sketching your design on paper first. Use a toothpick to create clean edges when transferring fondant letters. For buttercream, pipe a thin border around each letter with a small round tip for definition. Dust with powdered sugar or use edible markers to add details like shadows or highlights. Practice on a separate cake board first!