
Desserts
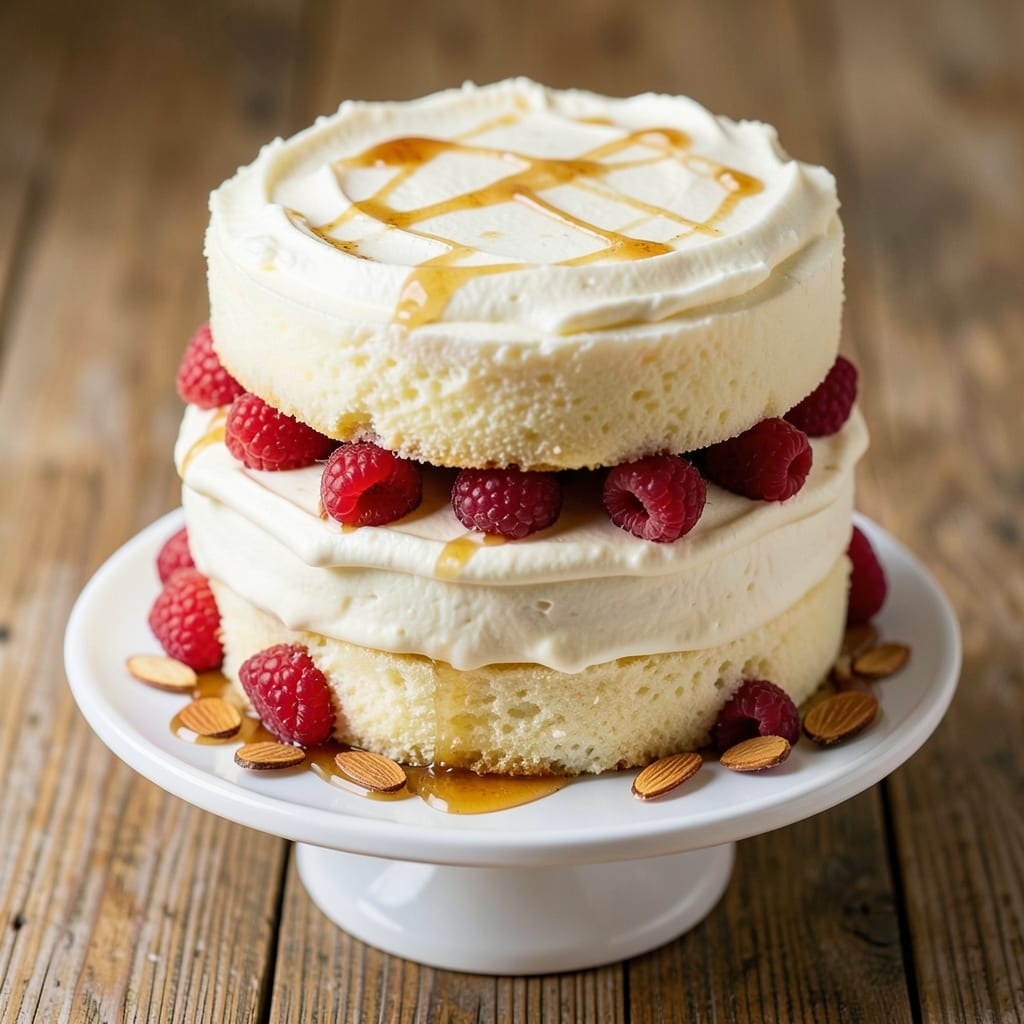
This amazing angel food cake recipe delivers the lightest, fluffiest texture you've ever tasted—no butter, no oil, just pure egg-white magic. 💛 I've perfected the technique for that signature whipped-top perfection and tender crumb that makes every slice worth the wait. The secret lies in keeping everything fat-free and using a tube pan for even baking.
What sets this angel food cake apart is its effortless fluffiness—achieved by whipping egg whites to stiff peaks and folding in just enough sugar to create airy clouds. We're talking no heavy batter, no dense texture, just delicate layers that practically melt in your mouth. The cake bakes up tall and golden, with that iconic whipped top that's impossible to resist.
Once cooled, this angel food cake becomes a blank canvas for your favorite toppings—think fresh berries, whipped cream, or a drizzle of chocolate ganache. The texture stays light and airy, never soggy, which means it's perfect for any celebration or spontaneous dessert craving. Trust me, this is the angel food cake that will have everyone asking for seconds.
Ready to master this classic dessert? The process is simpler than you think, and the results are always impressive. Let's get baking that perfect cloud of cake!
Ingredients for amazing angel food cake
Twelve egg whites, a touch of cream of tartar, and patience—this is your ticket to cloud-like perfection.
| Ingredient | Amount | Notes |
|---|---|---|
| Large Egg Whites 🥚 | 12 whole | Room temperature, pasteurized if preferred |
| Granulated Sugar 🍚 | 1 ½ cups | Fine granulated preferred |
| Cake Flour 🌾 | 1 ½ cups | Sifted thoroughly |
| Unsalted Butter 🧈 | ½ oz | Melted for greasing pan |
| Vanilla Extract 🌿 | 1 tbsp | Pure vanilla preferred |
| Salt 🧂 | ¼ tsp | Fine sea salt |
| Cream of Tartar 🧂 | ¼ tsp | For egg white stability |
| Almond Extract 🌿 | ¼ tsp | Optional, for subtle flavor |
| Water 💧 | ½ cup | Room temperature |
Egg whites are the star here, so room temperature is key—they whip up fluffier that way. Grab the pasteurized kind if you're nervous about raw eggs, but fresh is ideal. The cake flour? Bob's Red Mill or King Arthur are my go-tos—they're sifted and consistent. Cream of tartar is non-negotiable; it stabilizes the egg whites and gives you those perfect stiff peaks. I always buy mine at Williams Sonoma—it's a small jar, but it lasts forever. The vanilla? Pure extract, not imitation—trust me, it makes a difference.
No cream of tartar? Lemon juice at half the amount works in a pinch, but the flavor won't be identical. Short on almond extract? Skip it—this cake is delicious without it. The sugar? Fine granulated is best, but if you've only got regular, pulse it in a food processor for a minute. And if you're worried about the butter greasing the pan—melt it first. Cold butter can make the cake stick. The water? Just tap water is fine, but if you've got filtered or spring water, use that for extra clarity in the batter.
This cake is a one-and-done—no layers, no fuss. Once baked, let it cool completely before removing from the pan. Store it in an airtight container at room temperature for 2 days or in the fridge for up to 5 days. The whipped top? Best served fresh, but if it flattens, just rewhip it with a little powdered sugar. I always make a double batch—one for today, one for tomorrow's berry topping. Freezing? Not recommended—it'll get gummy, but if you must, wrap it tightly and use within 1 month.
Why You'll Love This Recipe
- No Mixer Needed: I swear by this trick—whipping those egg whites by hand (or with a whisk) gives them that signature cloud-like texture. No stand mixer? No problem. Just elbow grease and patience (about 10 minutes max), and you’ll get fluffy peaks every time.
- Vanilla Buttercream Magic: That little pat of butter folded into the batter? Oh, it’s a game-changer. The cake stays tender, and the vanilla extract—just a teaspoon—adds this subtle, warm depth that makes it taste like a bakery’s secret. Simple, but ridiculously good.
- Party in a Box: This cake’s light-as-air magic makes it my go-to for birthdays, showers, or even a fancy dessert after dinner. No one expects angel food cake at a potluck, but they’ll ask for seconds. (Between us, I’ve served it for brunch too—just top with berries and whipped cream.)
- Budget-Friendly Luxury: Egg whites and sugar are cheap staples, and cake flour stretches farther than all-purpose. Plus, leftovers? I slice it thin, toast it lightly, and layer with jam for a dessert that feels indulgent but costs next to nothing. My wallet and taste buds thank me.
Step-by-step instructions for fluffy angel food cake
Here's how to bake angel food cake that's light, airy, and holds its shape beautifully.
👨🍳 Step 1: Prepare Your Tools and Ingredients
Start by greasing a 10-inch tube pan with the 0.5 oz melted unsalted butter, using a pastry brush to coat every inch. This ensures the cake won't stick. I like to use a second brush to coat the pan with a thin layer of water after the butter - this creates a non-stick barrier that prevents sticking without making the cake soggy.
While the pan is prepping, separate the 12 whole large egg whites from the yolks. Room temperature eggs whip up much better, so if they're chilled, let them sit at room temperature for 30 minutes before starting. Place the egg whites in a spotlessly clean mixing bowl - any trace of fat will prevent them from whipping properly. I use a glass bowl for this step because it's non-reactive and makes it easier to see when the egg whites are fully whipped.
🍳 Step 2: Whip Egg Whites to Stiff Peaks
Using an electric mixer fitted with the whisk attachment, beat the egg whites on low speed until they begin to foam. Gradually add the 0.25 tsp cream of tartar and 0.25 tsp salt while mixing on medium speed. This acid and salt combination stabilizes the egg whites and helps them hold their shape better.
Increase the speed to high and begin adding the 1.5 cups granulated sugar gradually - about 1 tablespoon at a time. After each addition, let the mixer run for 30 seconds before adding more. You're looking for stiff peaks that stand straight up when the whisk is lifted. This can take 8-10 minutes total. Don't rush this step - proper whipping creates the cake's signature light texture. The meringue should be glossy and hold its shape when you turn the bowl upside down.
🥘 Step 3: Fold in Dry Ingredients Gently
Sift the 1.5 cups cake flour directly into the bowl with the egg whites. I use a large sifter to prevent clumps from forming. Add the 1 tbsp vanilla extract and 0.25 tsp almond extract (if using) to the flour mixture. Using a spatula, gently fold the flour into the egg whites in three additions, being careful not to deflate the meringue.
After each addition, rotate the bowl and fold from the bottom up to ensure even distribution. The batter should be thick and fluffy with no visible flour streaks. I know it seems like too much flour, but trust me - angel food cake needs that structure to hold its shape. The batter will be quite thick at this point, almost like a meringue with flour mixed through.
🔥 Step 4: Bake at Low Temperature for Even Cooking
Preheat your oven to 350°F and place the rack in the lower third of the oven. This lower position allows the cake to rise evenly and prevents the top from browning too quickly. Pour the batter into the prepared tube pan and smooth the top with a spatula. Tap the pan gently on the counter 3-4 times to remove any air bubbles.
Bake for 45-50 minutes until the top is golden brown and the cake springs back when gently pressed in the center. I like to check for doneness by inserting a toothpick - it should come out clean. The cake should pull away from the sides of the pan slightly, indicating it's fully set. Don't open the oven door during baking - the sudden temperature change can cause the cake to collapse.
⏰ Step 5: Cool Inverted for Maximum Fluffiness
Remove the cake from the oven and immediately invert it onto a wire rack. Let it cool completely in this position for at least 2 hours. This inverted cooling prevents the cake from becoming gummy in the center and helps maintain that signature angel food cake texture. I know it's tempting to check on it, but resist the urge to flip it early - patience is key here.
Once completely cool, gently run a knife around the edges to loosen the cake from the pan. Invert it back onto a serving plate and slice with a serrated knife for clean, fluffy pieces. The finished cake should be light as a cloud with a tender, melt-in-your-mouth texture. Serve with fresh berries, whipped cream, or a dusting of powdered sugar for the perfect dessert.
Pro Tips For Making Amazing Angel Food Cake
- Whip Egg Whites Cold: DESCRIPTION: Grab a metal bowl and chill it in the freezer for 10 minutes before whipping—cold surfaces help stabilize the meringue faster. I learned this the hard way when my whites turned grainy because the bowl was lukewarm (yes, even if you're impatient like me).
- Sift Flour Twice: DESCRIPTION: Don’t skip the second sift—angel food cake relies on lightness, and lumps sink like stones. Fold in the cake flour in three additions while gently rotating the bowl to keep air trapped.
- Bake Until Cool: DESCRIPTION: The cake will keep rising after you pull it from the oven—wait until it’s fully cooled before slicing, or you’ll end up with a dense, sad center. I’ve ruined batches by cutting too soon, and the texture never recovered.
- Butter the Pan Wrong: DESCRIPTION: Skip the butter entirely—it adds grease that weighs down the cake. Instead, use a nonstick spray (like Pam) and dust the pan with flour, tapping out excess. The cake will pull away cleanly, no scrubbing required.
Storing and reheating your amazing angel food cake
Room Temperature Storage
Store your angel food cake in an airtight container at room temperature for up to 2 days—this preserves its signature fluffiness. I use glass containers with tight-sealing lids (like Pyrex) because they prevent moisture loss better than plastic. Just
Refrigerator Refresh
For longer storage, refrigerate your cake for up to 5 days. The cold air can make it slightly drier, so I recommend bringing it to room temperature for 30 minutes before serving. If the whipped top flattens, simply rewhip it with 1 tablespoon powdered sugar and a splash of water until fluffy again. Store slices separately in parchment-lined containers to prevent sticking.
Freezing Limitations
Angel food cake isn’t ideal for freezing—it tends to become gummy when thawed. However, if you must, wrap individual slices tightly in plastic wrap and place them in a freezer bag for up to 1 month. Thaw overnight in the fridge and rewhip the top before serving. For best results, I recommend making a fresh batch when you need it—this cake is worth the effort! ❄️
Reheating Tips
If you need to warm slices, use the microwave on low power (50%) for 10-15 seconds—just enough to soften without drying out. For a gentler approach, warm in a 200°F oven for 5-7 minutes with a damp paper towel covering the top. Never reheat in the toaster—it’ll turn the cake rubbery. Always serve with fresh toppings (like whipped cream or berries) to keep it feeling special.
Topping Preservation
If you’re prepping toppings ahead, store them separately. Whipped cream should be kept in an airtight container with a parchment barrier to prevent sogginess. Fresh berries hold up best for 1 day in the fridge—add them right before serving. For chocolate ganache, chill it in the fridge until thickened, then drizzle just before serving to maintain that restaurant-quality finish. 🍓
Nutrition facts
Frequently asked questions
Why does my angel food cake turn out dense instead of light?
Fat contamination is the #1 culprit—even a trace of grease from hands or bowls prevents proper whipping. Always use a spotless glass bowl, and avoid touching the egg whites with your hands. Also, make sure your egg whites are room temperature and whipped to stiff peaks before folding in flour. Overmixing or underbaking can also create density.
Can I substitute cake flour with all-purpose flour?
Yes, but you'll need to make adjustments. Replace 1.5 cups all-purpose flour with 1.25 cups minus 2 tablespoons (accounting for its higher protein content). For every 1 cup of all-purpose, remove 2 tablespoons to prevent a heavier texture. Sift thoroughly to avoid lumps that can weigh down your cake.
How do I fix a collapsed angel food cake?
If the cake collapses during baking, it's usually from opening the oven door or uneven heat. For a minor collapse, try reheating slices at 300°F for 5-10 minutes with a damp towel to restore some moisture. For severe cases, you can still serve it—just add extra whipped cream or fruit topping to compensate for the lost height.
Is almond extract really necessary in angel food cake?
Not at all! It's optional and adds a subtle nutty aroma, but the cake will still taste delicious without it. If you're avoiding nuts or just prefer a simpler flavor, skip it—vanilla alone provides plenty of warmth. The extract enhances the cake's natural sweetness but doesn't affect the texture.
Can I bake angel food cake in a different pan?
While a 10-inch tube pan is ideal, you can use a 9-inch round or Bundt pan by reducing the baking time by 5-10 minutes. For Bundt pans, grease thoroughly and use a pan spray with flour. Avoid springform pans—they won't contain the cake's rise properly. The key is maintaining the cake's height, so stick to deep pans with vertical sides.