
Desserts
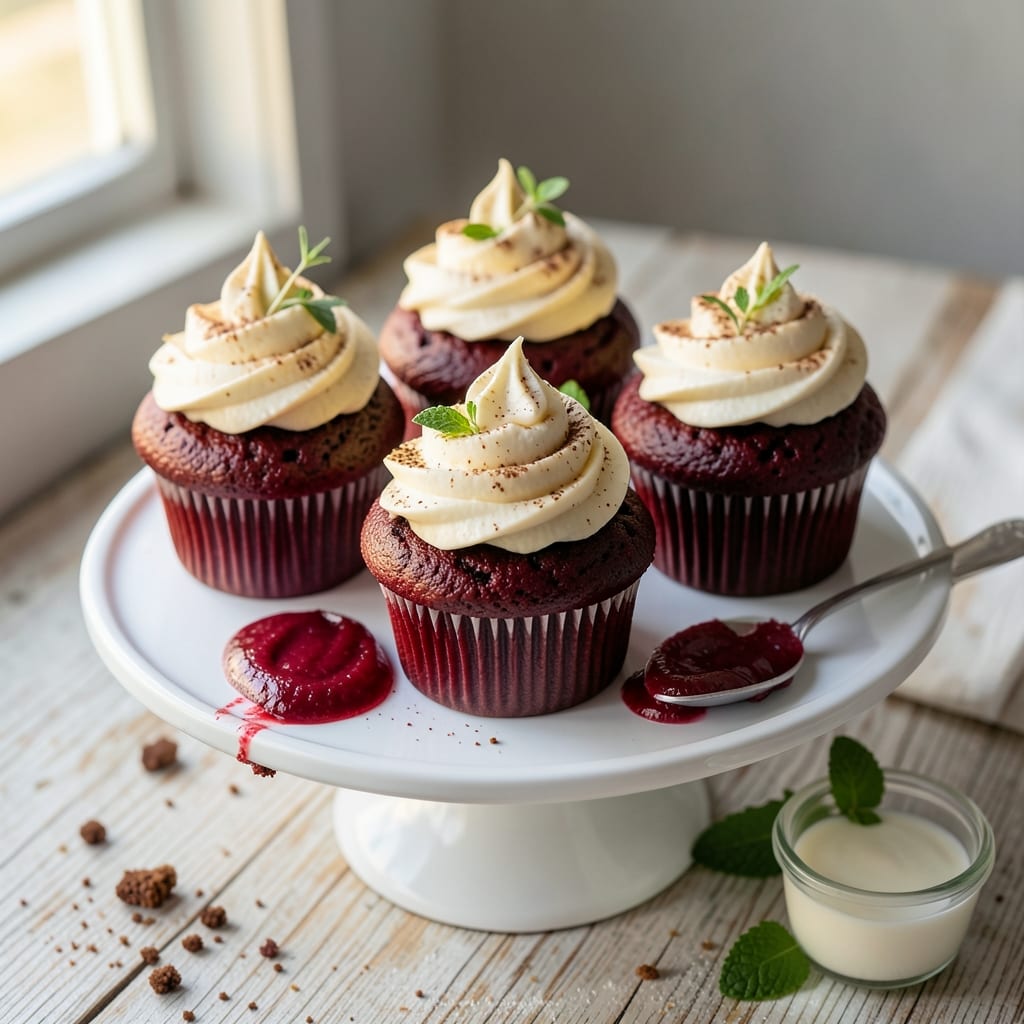
This amazing red velvet cupcake recipe delivers the perfect balance of tender crumb, bold cocoa swirls, and velvety cream cheese frosting—every bite is pure comfort. 💛 The secret lies in buttermilk for moisture and a touch of vinegar for that signature tang, while the cocoa swirls add a rich, earthy depth that makes these cupcakes unforgettable. I’ve baked these for birthdays, holidays, and just-because moments, and they never disappoint.
What sets these apart is the moist texture—no dry crumbs here. The batter is light yet rich, thanks to a blend of all-purpose and cake flour, and the cream cheese frosting is tangy enough to cut through the sweetness. The cocoa swirls aren’t just for looks; they add a subtle bitterness that enhances the overall flavor. Plus, the frosting is thick enough to hold its shape but still creamy enough to melt in your mouth.
Baking these cupcakes is simpler than you’d think—just mix, swirl, and bake. The result? A towering cupcake with a tender crumb, vibrant red layers, and a frosting so smooth it looks like it came from a bakery. Whether you’re celebrating or treating yourself, these cupcakes are the star of any dessert table. Let’s get baking!
Pro tip: For extra drama, dust the frosting with a little cocoa powder or sprinkle crushed red velvet crumbs on top. Trust me, the presentation will have everyone asking for the recipe. Here’s how to make them perfect every time.
Ingredients for amazing red velvet cupcake
Twelve simple ingredients transform into velvety red velvet cupcakes with rich cocoa swirls and dreamy cream cheese frosting.
| Ingredient | Amount | Notes |
|---|---|---|
| All-Purpose Flour 🌾 | 1 ½ cups | Sifted for best texture |
| Cake Flour 🌾 | ½ cup | Lightens the crumb |
| Granulated Sugar 🍚 | 1 ½ cups | White or light brown |
| Unsalted Butter 🧈 | 1 cup | Room temperature, full-fat |
| Buttermilk 🥛 | 1 cup | Room temperature preferred |
| White Vinegar 💧 | 1 tbsp | For that signature tang |
| Red Food Coloring 🎨 | ½ tsp | Gel or liquid, vibrant red |
| Unsweetened Cocoa Powder 🍫 | ½ cup | Natural or Dutch-process |
| Baking Soda 🧪 | 1 tsp | Pure, no aluminum |
| Salt 🧂 | ½ tsp | Kosher or sea salt |
| Vanilla Extract 🌸 | 1 tsp | Pure vanilla preferred |
| Large Eggs 🥚 | 2 whole | Room temperature |
| Cream Cheese 🧀 | 8 oz | Room temperature, full-fat |
| Powdered Sugar 🍚 | 3 cups | Sifted for smooth frosting |
| Heavy Whipping Cream 🥛 | 1 cup | Cold for stiff peaks |
| Cocoa Powder (for dusting) 🍫 | 2 tbsp | Natural for garnish |
The buttermilk and vinegar combo is non-negotiable for that signature tang—don’t skip it. Red food coloring makes all the difference; gel versions give more vibrant color without thinning the batter. I grab mine from Walmart or Target in the baking aisle, but any brand works. For the cocoa powder, Hershey’s Special Dark or Dutch-process brands like Valrhona elevate the flavor. And trust me, room-temperature butter is a game-changer—no one wants to mix cold lumps. The cake flour blend keeps these cupcakes light and tender, so don’t swap it for all-purpose unless you’re prepared for denser results.
No buttermilk? Mix 1 cup milk + 1 tbsp vinegar and let it sit for 5 minutes. Short on cocoa powder? Melted dark chocolate at half the amount works in a pinch, but the texture won’t be as light. The frosting can be made ahead—just whip it up and refrigerate for up to 2 days. For extra drama, I sometimes add a pinch of cinnamon to the batter, but it’s optional. And if you’re feeling fancy, swap the powdered sugar for confectioners’ sugar with a splash of lemon juice to keep it from clumping. The cream cheese should be room temperature—cold lumps make for a grainy frosting.
These cupcakes keep beautifully for 3 days at room temperature, wrapped tightly in plastic. For longer storage, freeze them unfrosted for up to 3 months—thaw at room temperature before adding frosting. The frosting, once whipped, stays fresh for 5 days in the fridge, so make extra for sandwiches. Pro tip: Dust the tops with cocoa powder right before serving—it adds that bakery-style finish. And if you’re making these for a crowd, bake them in mini muffin tins for adorable bite-sized treats.
Why You'll Love This Recipe
- No-Fuss Mixing: I swear by this combo of cake flour and all-purpose flour—it’s the secret to that just-right crumb. No sifting, no fuss, just creaming butter and sugar until it’s light enough to make you believe you’re a pro.
- Velvet Magic: That buttermilk? Total game-changer. It keeps the cupcakes moist without being heavy, and the red velvet flavor? Honestly, it’s the kind of thing that makes you want to bake a dozen just to eat them plain, no frosting needed.
- Party in a Cup: These are my go-to for birthdays, showers, or just because. The batter’s stable enough to make ahead, and the cupcakes freeze like champs—so I can bake a batch and pull them out whenever the mood strikes.
- Budget Baking: Butter and sugar are the stars here, but they stretch far. A single batch feeds a crowd, and leftovers? They disappear faster than I can say “second helping.” Plus, no weird ingredients to break the bank.
Step-by-step instructions for red velvet cupcakes with cocoa swirls
Here's how to create tender, moist cupcakes with that signature red velvet flavor and rich cocoa swirls.
👨🍳 Step 1: Mix Dry Ingredients for Perfect Texture
In a medium bowl, whisk together the 1.5 cups All-Purpose Flour and 0.5 cup Cake Flour. Sift in the 1 tsp Baking Soda and 0.5 tsp Salt, then whisk again until fully combined. This step creates a light, airy crumb that's essential for those tender cupcakes.
In a separate small bowl, mix the 0.5 cup Unsweetened Cocoa Powder with 1 tablespoon White Vinegar. The vinegar helps develop the signature tang in red velvet. I like to use a whisk to break up any cocoa lumps before adding it to the dry ingredients.
👨🍳 Step 2: Cream Butter and Sugar for Fluffy Bases
In a large mixing bowl, beat the 1 cup Unsalted Butter (room temperature) and 1.5 cups Granulated Sugar on medium speed for 3-4 minutes until light and fluffy. You'll see the mixture nearly double in volume and become pale in color. This creaming process incorporates air that helps create those tender cupcakes.
Add the 2 whole Large Eggs, one at a time, mixing well after each addition. Scrape down the sides of the bowl to ensure even incorporation. Then stir in the 1 tsp Vanilla Extract and 0.5 tsp Red Food Coloring until fully combined. The vibrant red color should be evenly distributed throughout the batter.
🥘 Step 3: Combine Wet and Dry Ingredients
Gradually add the dry ingredient mixture to the wet ingredients, mixing on low speed just until combined. Be careful not to overmix—you should still see some flour streaks. The 1 cup Buttermilk goes in next, mixed in just until the batter is smooth.
Here's where the magic happens: divide the batter evenly between two medium bowls. To one bowl, add 2 tablespoons of the cocoa-vinegar mixture you prepared earlier. Gently fold this into the batter to create your cocoa swirl batter. Keep the other bowl of batter plain for the classic red velvet color.
🔥 Step 4: Bake to Golden Perfection
Preheat your oven to 350°F and line two 12-cup muffin tins with cupcake liners. Divide the plain red velvet batter among the liners, filling each about ⅔ full. Then carefully spoon the cocoa swirl batter over the top of each cupcake, creating a marbled effect by gently dragging a knife through the batter.
Bake for 18-22 minutes or until a toothpick inserted comes out clean. The cupcakes should be golden on top with a slight dome. I like to rotate the pans halfway through baking for even browning. Let them cool in the pan for 5 minutes before transferring to a wire rack to cool completely.
🍳 Step 5: Prepare Cream Cheese Frosting
While the cupcakes cool, beat the 8 oz Cream Cheese (room temperature) and 3 cups Powdered Sugar together until smooth and creamy. In a separate bowl, whip the 1 cup Heavy Whipping Cream (cold) to stiff peaks. Gently fold the whipped cream into the cream cheese mixture until fully combined and fluffy.
Once the cupcakes are completely cool, pipe or spread the frosting onto each cupcake. Dust the tops with 2 tablespoons Cocoa Powder (for dusting) using a fine-mesh sieve for that classic red velvet presentation. The contrast between the red cupcakes and cocoa-dusted frosting makes them look absolutely amazing!
Pro Tips For Making Amazing Red Velvet Cupcake
- Sift the Flours Together: Don’t just dump them in—sift the all-purpose and cake flour together with the sugar first. This cuts out lumps, adds air, and guarantees a smoother batter. I used to skip it, and my cupcakes always had that dense, heavy texture—until I tried this. ---
- Measure Buttermilk Precisely: Use a liquid measuring cup for the buttermilk and tap it gently to settle the solids. Too much buttermilk makes the batter thin and gummy; too little dries out the crumb. I learned this after a batch turned out like a sponge—no one wants that. ---
- Cream Butter and Sugar Slowly: Beat the butter and sugar on medium speed for 2-3 minutes before adding eggs—just until pale and fluffy. Rushing it traps air unevenly, leading to uneven rise. My first few batches had domed tops because I went too fast. ---
- Underbake Slightly for Moisture: Pull cupcakes out when the center reads 195°F (5-10°F under). They’ll firm up as they cool, but overbaking dries them out. I used to wait for 200°F, and they’d crack on top—now they stay tender for days.
Make-ahead tips for leftovers
Batter Prep Ahead
Mix your dry ingredients and cocoa-vinegar mixture up to 2 days in advance and store in airtight containers. Keep the wet ingredients separate until ready to bake—I like using glass jars with tight-sealing lids. When you're ready to bake, simply combine everything and proceed with the recipe. This saves time on baking day and ensures your cupcakes stay fresh. 💛
Frosting Prep
The cream cheese frosting can be made 2 days ahead and stored in the fridge. Whip it up, then transfer to an airtight container. When ready to use, let it sit at room temperature for 30-45 minutes before piping—this makes it easier to work with. For extra fluffiness, add a pinch of cream of tartar when whipping the cream. 🥛
Cupcake Assembly
Assemble your cupcakes the morning of serving for the best texture. Frost cooled cupcakes and dust with cocoa powder just before guests arrive—this prevents the frosting from absorbing moisture and keeps it looking fresh. If you're short on time, bake the cupcakes, then freeze them unfrosted for up to 3 months. Thaw at room temperature before frosting. ✨
Storage Hacks
Store frosted cupcakes in the fridge for up to 3 days—cover them tightly with plastic wrap and a lid. For longer storage, freeze them for 1 month. To reheat, warm at 300°F for 5-10 minutes to restore freshness. I also recommend keeping a few extra cupcakes in the freezer for spontaneous celebrations. 💫
Make-Ahead Tips
For events, bake cupcakes 2 days ahead and store unfrosted at room temperature in an airtight container. Frost them just before serving—this keeps the texture perfect. If you're making a large batch, use mini cupcake wrappers to keep them organized and prevent sticking. Label everything clearly so you remember which cupcakes are frosted! 📅
Freezing Shortcuts
Freeze unfrosted cupcakes on a tray first, then transfer to a ziplock bag with parchment paper between layers. This prevents freezer burn and makes them easy to grab. When ready to serve, thaw for 1-2 hours at room temperature before frosting. Pro tip: Use a paper towel to blot any condensation before adding frosting. 🧊
Nutrition facts
Frequently asked questions
Why does red velvet cake need vinegar?
The white vinegar in the recipe creates that signature tangy flavor that balances the sweetness. It also reacts with the baking soda to produce carbon dioxide, which makes the cupcakes extra tender and moist. Without it, your cupcakes would taste flat and lack that classic red velvet taste!
Can I make these cupcakes without cake flour?
Yes, but your cupcakes might be slightly denser. Replace the 0.5 cup cake flour with 0.5 cup all-purpose flour and add 1 tbsp cornstarch to help lighten the texture. The cake flour blend is what gives these cupcakes that signature tender crumb, so if you can find it, it's worth using!
How do I get the perfect cocoa swirl?
Divide the batter evenly between two bowls, then mix 2 tbsp cocoa powder + 1 tbsp vinegar into one bowl. Spoon the cocoa batter over the plain batter in the cupcake liners, then use a knife to gently swirl them together. For extra drama, add a second spoonful of cocoa batter on top before baking. The key is to work quickly so the batter doesn't mix too much!
Why is my frosting grainy?
Cold cream cheese is the #1 culprit! Make sure your cream cheese is fully softened (not melted) before mixing. Also, sift your powdered sugar to remove lumps. If your frosting still looks grainy, try adding 1 tsp lemon juice to the powdered sugar before whipping—it helps dissolve any remaining sugar crystals.
Can I use this recipe for a cake instead of cupcakes?
Use the same batter in a 9-inch round or square pan (greased and lined with parchment). For a layered effect, bake one layer at a time, then let cool completely before adding the cocoa swirl batter on top. Bake the second layer separately, then frost and assemble. The baking time will be 25-30 minutes for each layer at 350°F.