
Desserts
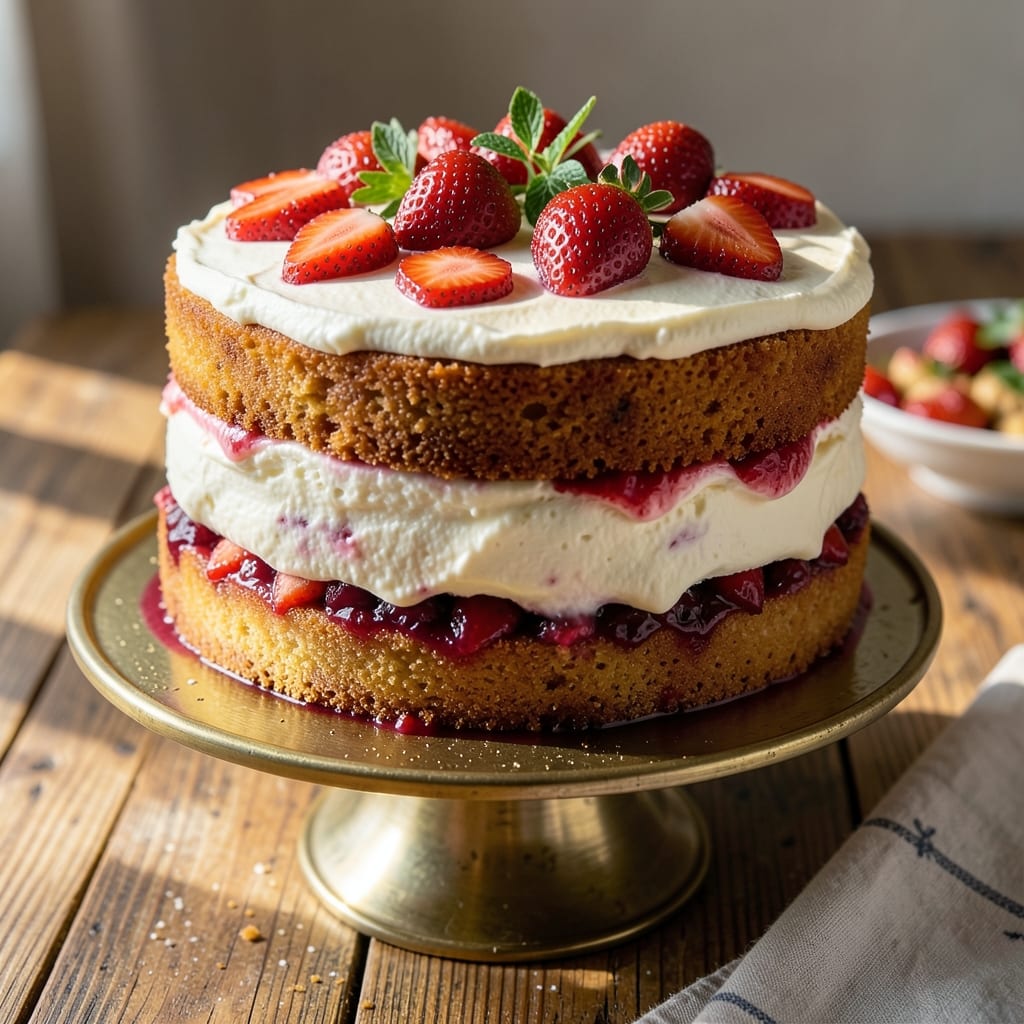
This amazing strawberry cake recipe delivers layers of velvety vanilla cake bursting with fresh strawberry flavor—no dry crumbs or artificial taste in sight. 💛 The secret? A simple technique that keeps the cake moist while letting the strawberries shine through in every bite. I’ve baked this for birthdays, brunch, and just-because moments, and it’s always the star of the table.
What makes this recipe truly special is how effortlessly it balances texture and flavor. The cake itself is tender and rich, while the strawberry filling stays juicy and bright, not cloying. No fancy equipment required—just a standard mixing bowl and a 9-inch pan. The frosting? A light whipped cream topping that adds just enough sweetness without overpowering the natural strawberry taste.
By the time you’re done, you’ll have a cake that looks as stunning as it tastes—golden layers, glossy frosting, and fresh berries on top for that restaurant-quality finish. The best part? It’s foolproof for beginners but impressive enough for any occasion. Whether you’re celebrating or just craving a slice, this cake delivers every time.
Ready to bake? Let’s get started with a recipe that’s easier than you think but tastes like a labor of love. The only hard part will be saving leftovers for later—if you can manage that at all.
Ingredients for amazing strawberry cake
Fresh strawberries, velvety cake layers, and a light whipped cream finish—this cake is pure summer joy.
| Ingredient | Amount | Notes |
|---|---|---|
| All-Purpose Flour 🌾 | 3 cups | Sifted for light texture |
| Granulated Sugar 🍚 | 2 cups | White or light brown |
| Unsalted Butter 🧈 | 1 ½ cups | Room temperature, full-fat |
| Large Eggs 🥚 | 4 whole | Room temperature preferred |
| Vanilla Extract 🌸 | 2 tsp | Pure, high-quality |
| Baking Powder 🧂 | 2 tsp | Diamond Crystal preferred |
| Salt 🧂 | ½ tsp | Fine sea salt |
| Milk 🥛 | 1 cup | Whole milk for richness |
| Fresh Strawberries 🍓 | 2 cups | Hulled, sliced thick |
| Strawberry Jam 🍓 | ½ cup | Seedless, for filling |
| Heavy Whipping Cream 🥛 | 2 cups | Cold, full-fat |
| Powdered Sugar 🍚 | 2 cups | For frosting |
| Lemon Juice 🍋 | 1 tbsp | Freshly squeezed |
The strawberries make or break this cake, so pick the freshest you can find—look for vibrant red, firm berries with no bruises. Trader Joe's or local farmers' markets usually have the best selection. If you're using frozen, thaw and drain them well first. For the jam filling, Smucker's or Bonne Maman are my go-tos—they're seedless and have that perfect balance of sweetness. The butter? Plugrá or Land O'Lakes work great, but if you can find European-style butter, it's worth the splurge for that richer flavor.
No fresh strawberries? High-quality strawberry jam works in a pinch—just add a splash of water to thin it slightly. Running short on heavy cream? Cool whipped topping from a can (like Redi-Whip) gives you a similar texture, though it won't be as light. The vanilla extract is non-negotiable—imitation vanilla will taste artificial. For the flour, if you don't have sifted, just whisk it with the baking powder and salt first. And if you're worried about the cake being too sweet, reduce the sugar by 2 tbsp—the strawberries add plenty of natural sweetness.
This cake keeps beautifully—cover tightly with plastic wrap and store at room temperature for 3 days, or refrigerate for 5 days. The filling and frosting can be made a day ahead, which is a lifesaver. For extra freshness, add a few fresh strawberry slices on top right before serving. And if you're making this for a crowd, double the frosting—trust me, you'll want it. The cake actually tastes better the next day as the flavors meld together.
Why You'll Love This Recipe
- No-Fuss Layers: I swear by this recipe because it’s the kind of cake that doesn’t demand perfection—just a bowl, a whisk, and a 9x13 pan. The butter and sugar cream so smoothly (thanks to room temp eggs), and the vanilla ties everything together without overpowering the strawberries. Even if I rush, it still comes out tender.
- Strawberry Buttercream Magic: That first bite? It’s all about the balance—juicy strawberries folded into the batter so every slice has bursts of freshness, then topped with a velvety buttercream that’s sweet but not cloying. Honestly, the vanilla extract in the batter makes the strawberries taste even brighter, like they were picked yesterday.
- Weekend or Weeknight: Between us, this cake is my go-to for birthdays, potlucks, or just because. The rich texture holds up for hours, so it’s perfect for slicing and serving later—no one will guess it’s been sitting out. And the best part? It’s not one of those cakes that crumbles when you cut it. (Yes, even on a Tuesday night.)
- Pantry Staple Power: I use the same five ingredients for everything—flour, sugar, butter, eggs, and vanilla—and this recipe stretches them into something special. A single batch feeds six, so leftovers last days, and the cost? A fraction of what you’d pay for a bakery cake. Plus, the buttercream uses the same butter you already have. Smart, right?
Step-by-step instructions for strawberry cake layers
Here's how to make a showstopper cake with moist layers and juicy strawberry filling.
👨🍳 Step 1: Mix Dry and Wet Ingredients Separately
In a large bowl, whisk together the 3 cups all-purpose flour, 2 tsp baking powder, and 0.5 tsp salt. Set aside—this is your dry mix. In a separate bowl, beat the 1.5 cups unsalted butter and 2 cups granulated sugar on medium speed until light and fluffy, about 3-4 minutes. You'll know it's ready when the mixture nearly doubles in volume and looks pale.
Add the 4 whole large eggs, one at a time, mixing well after each addition. Stir in the 2 tsp vanilla extract and 1 cup milk until smooth. This step creates the tender crumb that makes this cake so irresistible. The butter needs to be room temperature for proper emulsification—if it's cold, the cake will be dense.
🥘 Step 2: Combine Wet and Dry for Cake Batter
Gradually add the dry ingredients to the wet mixture, mixing on low speed just until combined. Avoid overmixing—you should still see small flour streaks. Fold in the 2 cups fresh strawberries, sliced thick and hulled, reserving a few for decoration. The fruit adds natural sweetness and moisture that keeps the cake tender.
Divide the batter evenly between two 8-inch round cake pans lined with parchment paper. Tap the pans gently on the counter to remove air bubbles. Bake at 350°F for 25-30 minutes, or until a toothpick inserted in the center comes out clean. Let the cakes cool in the pans for 10 minutes before transferring to a wire rack to cool completely.
🍳 Step 3: Prepare Strawberry Filling and Frosting
For the filling, mix 0.5 cup strawberry jam with 1 tbsp freshly squeezed lemon juice in a small saucepan. Warm over low heat until smooth, then cool completely. In a chilled bowl, whip the 2 cups heavy whipping cream to soft peaks, then gently fold in 2 cups powdered sugar until glossy. The frosting should be thick enough to hold its shape but still spreadable.
Here's the thing—don't skip chilling the bowl. Room-temperature cream won't whip properly, and you'll end up with grainy frosting instead of silky smooth. Spread a thin layer of the whipped cream mixture between the cooled cake layers, then add the strawberry filling. Top with the remaining frosting, creating peaks or swirls for a bakery-style finish.
⏰ Step 4: Chill and Serve for Perfect Texture
Place the assembled cake in the refrigerator for at least 2 hours before serving. This resting time lets the flavors meld and the frosting set properly. The cake will hold its shape better, and each bite will deliver that perfect balance of moist crumb, jammy filling, and creamy frosting.
Slice with a warm knife for clean cuts, and serve at room temperature. The contrast of warm cake and cool frosting makes every bite unforgettable. Store leftovers covered in the fridge for up to 3 days, though I doubt it'll last that long!
Pro Tips For Making Amazing Strawberry Cake
- Cream Butter Properly: I learned this the hard way—cold butter and sugar left in chunks means a cake that’s dense and uneven. Beat the butter and sugar together until it’s light and fluffy, with a ribbon-like consistency that clings to the beaters. (Yes, even if you’re impatient like me, resist the urge to rush this.) ---
- Sift That Flour: Skipping the sifting? You’re asking for a cake with pockets of dry flour and a heavier texture. Sift the flour directly into the bowl with the butter mixture—no lumps, no excuses. This also aerates it, which makes a real difference in how light the cake turns out. ---
- Don’t Overmix the Batter: I used to beat the eggs and flour until the batter looked like glue. That’s how you end up with a tough, chewy cake instead of tender layers. Mix just until combined—lumps are fine, but a smooth, slightly streaky batter is the goal. ---
- Use Room-Temp Eggs: Cold eggs? They’ll curdle when they hit the warm butter, and your cake will have weird streaks. Let the eggs sit in warm water for 5 minutes before cracking them—this guarantees they blend in smoothly and keep the batter consistent. (Your future self will thank you.)
Essential equipment for perfect results
Mixing Essentials
You’ll need a stand mixer with a paddle attachment—this is non-negotiable for creaming butter and sugar properly. I use my KitchenAid Artisan Series because it handles the job effortlessly, but a hand mixer works in a pinch if you’re patient. The paddle attachment is key for blending the wet ingredients smoothly. 💛
For measuring, grab a medium mixing bowl (about 5-quart capacity) and a small bowl for your dry ingredients. A rubber spatula helps scrape down the sides when combining the batter. Don’t skip the parchment paper for your cake pans—it prevents sticking and makes removing the cakes a breeze.
Baking Tools
Two 8-inch round cake pans are essential—non-stick or well-seasoned pans work best to avoid sticking. If you don’t have non-stick, lightly grease them with butter and flour before adding batter. A toothpick is your best friend for checking doneness—insert it into the center of the cake, and if it comes out clean, your cake is ready. 🔥
For cooling, a wire rack is a must. Placing the cakes directly on the rack ensures air circulates evenly, preventing a soggy bottom. If you’re in a hurry, a cooling rack that fits inside your cake pans (like the Wilton Cake Cooling Rack) speeds up the process while keeping the cakes stable.
Filling & Frosting Gear
A small saucepan is perfect for warming the strawberry jam filling—low heat is key to avoid scorching. For the frosting, a chilled metal bowl (place it in the freezer for 10 minutes before whipping) ensures your cream whips up light and fluffy. A hand mixer or stand mixer with whisk attachment works here, but avoid overbeating or you’ll end up with butter. 🥛
To assemble your cake like a pro, use an offset spatula for spreading frosting smoothly. A piping bag with a star tip (if you want decorative swirls) or just a spoon works for adding the strawberry filling between layers. For garnish, a sharp knife helps slice fresh strawberries neatly on top.
Optional Upgrades
If you love precision, a digital kitchen scale ensures accurate measurements—especially for the flour and sugar. I also recommend a thermometer to check the internal temperature of your cakes (210°F is the perfect doneness). For extra flair, a cake turntable makes frosting and decorating effortless. 💫
No fancy tools? No problem! A whisk, wooden spoon, and oven thermometer are all you truly need. The key is technique—creaming the butter properly and not overmixing the batter make all the difference, even without high-end gadgets.
Nutrition facts
Frequently asked questions
Can I substitute fresh strawberries with frozen ones?
Yes, but with a few key adjustments! Use thawed and drained frozen strawberries, and squeeze out any excess liquid with a paper towel to prevent a soggy cake. For extra flavor, add 1 tsp lemon juice to the filling to brighten the taste. The texture won't be identical, but it still delivers that classic strawberry flavor.
Why did my cake turn out dense instead of moist?
Overmixing the batter is the most common culprit—stop folding when small flour streaks remain. Another issue could be cold butter (it won't cream properly) or underbaking (check with a toothpick). For extra moisture, try adding 1 tbsp sour cream to the batter or brushing layers with simple syrup after baking.
How can I make this cake gluten-free?
Replace the all-purpose flour with a 1:1 gluten-free baking flour blend (like Bob's Red Mill) and add 1 tsp xanthan gum to improve texture. You may need to reduce the milk by 2 tbsp since GF flours absorb differently. Test the batter consistency—it should be slightly thicker than regular batter.
Can I bake this cake in a different pan size?
For 9-inch pans, reduce baking time by 5 minutes (20-25 minutes). For 6-inch pans, increase time to 35-40 minutes and reduce oven temp to 325°F. Adjust the frosting quantity proportionally—this cake relies on the layer-to-filling ratio for perfect texture.
What's the best way to store leftovers?
Wrap the cake tightly in plastic wrap and store at room temp for 2 days or refrigerate for 4 days. To revive stale cake, warm slices in a 200°F oven for 5-10 minutes—the heat reactivates the moisture. For longer storage, freeze slices (without frosting) for up to 3 months—thaw at room temp before serving.