
Desserts
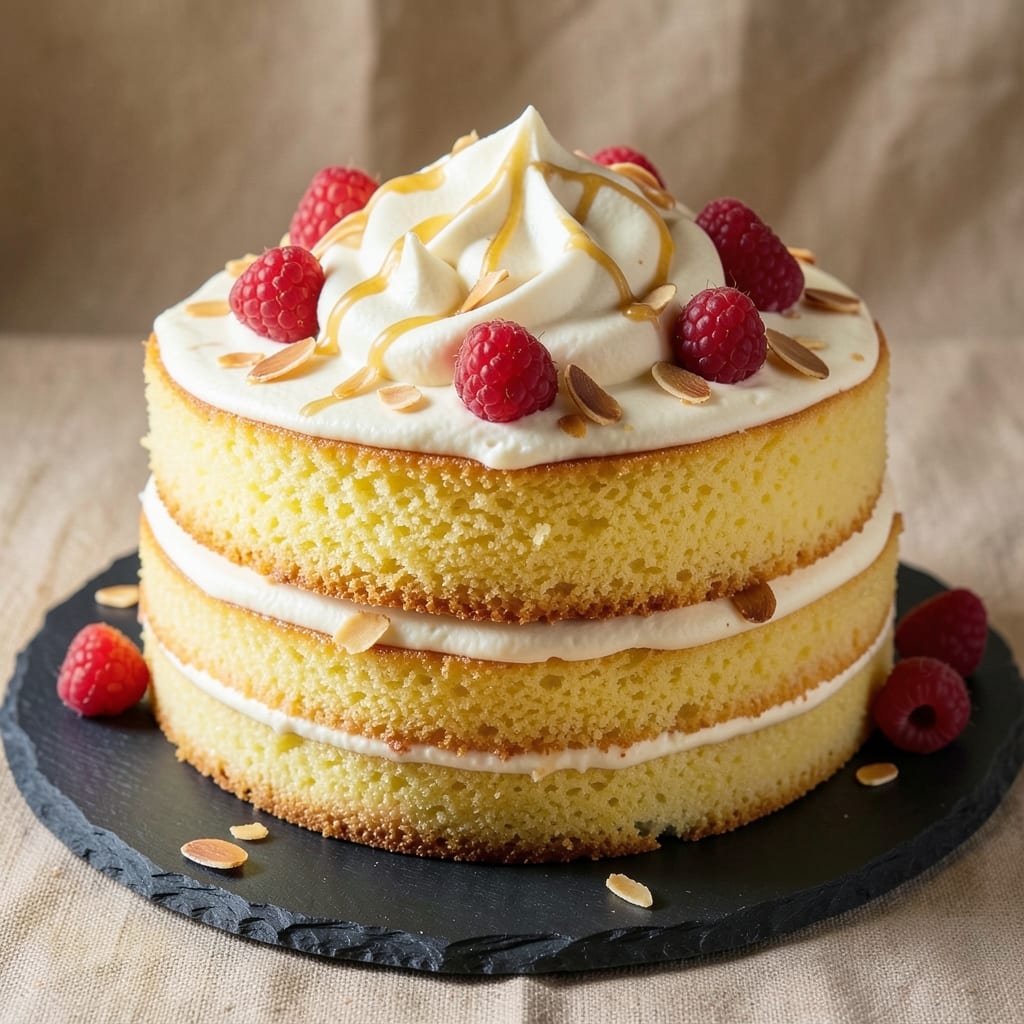
This amazing yellow cake recipe delivers the perfect balance of tender crumb and rich vanilla flavor—every slice is moist, buttery, and impossible to resist. 💛 I’ve baked countless cakes, and this one stands out because it’s foolproof for beginners while still impressing guests with its height and texture. The secret? A touch of sour cream keeps it ultra-moist, and vanilla bean paste elevates the flavor beyond basic extract.
What makes this recipe truly special is the harmony between the cake and its vanilla bean frosting—a creamy, fragrant pairing that tastes like a bakery masterpiece. You’ll bake it at 350°F for 25-30 minutes, then let it cool before layering with the dreamy frosting. No fancy equipment needed, just a few simple steps and patience for the perfect rise.
The result? A golden, fluffy cake with a tender crumb that melts in your mouth, topped with velvety vanilla frosting that’s sweet but not overpowering. The frosting’s swirls add a touch of elegance, making it perfect for birthdays, celebrations, or just treating yourself. Trust me, this cake will disappear faster than you can say "second slice."
Ready to bake? Here’s everything you need to create a cake that’ll have everyone asking for the recipe. Let’s get started!
Ingredients for amazing yellow cake
Simple ingredients that pack a flavor punch—this cake is all about that golden, moist magic.
| Ingredient | Amount | Notes |
|---|---|---|
| All-Purpose Flour 🌾 | 2 ½ cups | Sifted for fluffy texture |
| Granulated Sugar 🍚 | 2 cups | White or light brown |
| Unsalted Butter 🧈 | 1 cup | Room temperature, full-fat |
| Sour Cream 🥛 | ½ cup | Full-fat for moisture |
| Large Eggs 🥚 | 2 whole | Room temperature |
| Vanilla Bean Paste 🌿 | 2 tsp | Not extract, for depth |
| Baking Powder 🧂 | 2 tsp | Diamond Crystal preferred |
| Salt 🧂 | ½ tsp | Fine sea salt |
| Milk 🥛 | ½ cup | Whole milk preferred |
| Heavy Whipping Cream 🥛 | 1 cup | Cold for frosting |
| Powdered Sugar 🍚 | 3 cups | Sifted for smooth frosting |
| Vanilla Extract 🌿 | 1 tbsp | Pure vanilla extract |
The flour and butter are your cake foundation. King Arthur flour or Gold Medal work wonders—both bake up light and fluffy. Butter? Plugrá or Land O'Lakes are my go-tos, but any full-fat brand will do. The sour cream is non-negotiable—it’s what keeps this cake ultra-moist for days. Grab the full-fat version (the good stuff, not the light kind). For the vanilla bean paste, Madagascar bourbon vanilla from Williams Sonoma takes this cake to bakery-level deliciousness, but any quality paste will work. Pro tip: Let your butter and eggs sit out for an hour before mixing—they’ll blend smoother and the cake will rise higher.
No vanilla bean paste? Double the vanilla extract—it won’t be identical, but you’ll still get that vanilla punch. Running low on sour cream? Greek yogurt at half the amount works in a pinch (though the texture won’t be quite the same). For the frosting, powdered sugar is key—Domino or C&H are reliable brands. If you’re feeling fancy, add a splash of Kahlúa coffee liqueur to the frosting for a grown-up twist. And if you’re baking in a dry climate, add an extra tablespoon of milk to the batter—it helps with the crumb. The cake layers should be cooled completely before frosting (trust me on this), but the frosting can be made ahead and chilled for up to 24 hours.
This cake keeps beautifully—3 days at room temperature covered loosely with plastic, or 1 week in the fridge if you’re prepping ahead. The frosting? Store it in an airtight container for 5 days in the fridge. I always make a double batch of frosting—half for the cake, half for filling cupcakes later. For serving, slice with a hot knife (dip it in hot water between cuts) for clean, professional-looking pieces. Leftovers? They disappear faster than you can say "second slice"—so make enough for that extra piece you know you’ll want.
Why You'll Love This Recipe
- No Mixing Madness: I swear by this recipe because it’s one bowl—no fussing with multiple pans or complicated steps. Cream butter and sugar, toss in the dry stuff, fold in the sour cream and eggs, and you’re done. My kids think I’m a baking genius, but honestly, it’s just 10 minutes of work.
- Butter-Sugar Magic: That rich, velvety texture? All thanks to the butter and sugar combo. The sour cream keeps it moist without tasting heavy, and the eggs bind it just right. It’s not too sweet, not too dry—just that perfect, just-baked yellow cake flavor you can’t resist.
- Birthday to Brunch: Serve it with frosting for a celebration, slice it into squares for a quick breakfast, or pack it for lunchboxes. The same batter works for any occasion, and it even reheats beautifully. (Yes, even on a Tuesday morning when you’re running late.)
- Budget-Friendly Stretch: This cake’s ingredients are pantry staples, and a single batch feeds a crowd. Leftovers? I freeze slices for smoothies or toast them for a lazy morning treat. It’s the kind of recipe that makes you feel like you’re feeding the whole neighborhood without breaking the bank.
Step-by-step instructions for perfect vanilla bean yellow cake
Here's how to create a moist, tender cake with that signature vanilla bean aroma.
👨🍳 Step 1: Cream Butter and Sugar to Light and Fluffy
In a large mixing bowl, beat the 1 cup unsalted butter and 2 cups granulated sugar together on medium speed for 3-4 minutes. You're looking for a pale, fluffy mixture that nearly doubles in volume and leaves faint ribbons when the beaters are lifted. This step incorporates air, which creates that signature tender crumb.
Here's the thing—don't rush this part. The butter should be completely smooth with no lumps, and the mixture should look almost like whipped cream. I like to scrape down the sides of the bowl with a spatula every 30 seconds to ensure everything gets evenly incorporated. This ensures your cake will be light and airy, not dense.
👨🍳 Step 2: Add Eggs and Vanilla for Rich Flavor
Add the 2 whole large eggs one at a time, mixing well after each addition. Then stir in the 2 teaspoons vanilla bean paste and 1 tablespoon vanilla extract. The vanilla bean paste gives that authentic vanilla bean flavor without the seeds, while the extract adds that classic vanilla aroma. Mix until fully combined—you should see no streaks of egg or vanilla remaining.
I always use room temperature eggs for this recipe. They blend more smoothly into the batter and help create a more even texture. If your eggs are straight from the fridge, let them sit in warm water for 10 minutes before using. The mixture should be thick and smooth at this stage—like a thick pudding.
👨🍳 Step 3: Alternate Dry and Wet Ingredients
In a separate bowl, whisk together the 2.5 cups all-purpose flour, 2 teaspoons baking powder, and 0.5 teaspoon salt. Sift the flour mixture directly into the wet ingredients, then alternate adding the 0.5 cup sour cream and 0.5 cup milk, beginning and ending with the flour mixture. Mix on low speed just until combined—you should still see some flour streaks.
This alternating method prevents gluten development and creates a tender crumb. Overmixing at this stage will make your cake tough. After adding all the ingredients, give the batter one final stir with a spatula to make sure everything is evenly distributed. The batter should be thick but pourable—like a rich cake batter.
🔥 Step 4: Bake to Golden Perfection
Preheat your oven to 350°F and grease two 9-inch round cake pans with butter or baking spray, then line the bottoms with parchment paper. Divide the batter evenly between the prepared pans. Bake for 25-30 minutes, until a toothpick inserted into the center comes out clean and the edges are golden brown.
Don't open the oven during the first 20 minutes of baking—this helps the cakes rise properly. The reason we wait until the toothpick comes out clean is that this indicates the cakes are fully baked through, not just on the outside. If you pull them out too soon, they'll continue cooking on the wire rack and might end up dry.
🥘 Step 5: Cool and Prepare Vanilla Bean Frosting
Allow the cakes to cool in their pans for 10 minutes, then transfer them to a wire rack to cool completely. While the cakes cool, beat the 1 cup heavy whipping cream and 3 cups powdered sugar together with the 1 tablespoon vanilla extract until soft peaks form. This frosting is light and airy, perfect for pairing with the tender cake.
Here's where it gets fun—taste the frosting before you finish whipping it. You can adjust the sweetness by adding more powdered sugar if needed, or the vanilla flavor by adding a bit more extract. The frosting should be sweet but not overpowering, with just a hint of vanilla bean aroma. Once the cakes are completely cool, spread the frosting between the layers and on the top and sides.
Pro Tips For Making Amazing Yellow Cake
- Bake at 325°F, Not 350°F: I learned this the hard way—yellow cake needs a gentler oven or it dries out before the center sets. At 325°F, the butter melts smoothly, the sour cream stays creamy, and you won’t end up with a crackly crust hiding a gummy middle. (Yes, even if your recipe says otherwise.)
- Whisk Eggs Until Ribbon Stage: Splitting an egg halfway through mixing? Not ideal. Whisk the eggs first until they’re thick and pale, then fold them in last—this keeps the batter light and prevents lumps. The ribbon test (when you lift the whisk, the batter trails slowly) means you’re ready to go.
- Don’t Overmix the Batter: After 30 seconds of mixing dry ingredients with wet, stop. The second you see streaks of flour, you’ve gone too far. Overmixing develops gluten, which makes the cake tough instead of tender. Fold in the sour cream gently—it’s the secret to that buttery moisture.
- Use Room-Temp Butter and Eggs: Cold butter = lumpy batter. Cold eggs? They won’t emulsify properly. Let both sit out for 30 minutes before measuring—this ensures the butter blends silky and the eggs incorporate evenly. (I know, I know, but trust the process.)
Serving suggestions for leftovers
Classic Presentation
For a timeless look, slice your cake with a hot knife (dip in hot water between cuts) to create clean, professional layers. Arrange slices on a white cake stand or platter, dusting the top with a pinch of powdered sugar for an elegant finish. I love adding fresh raspberries or strawberries around the base for a pop of color and freshness. 🍓
Birthday Party Style
Transform your cake into a birthday centerpiece by adding colorful sprinkles or edible glitter to the frosting. For extra flair, pipe a simple border of frosting around the edges using a star tip and piping bag. Place a few candles (use LED candles for safety) and sing "Happy Birthday" before serving. Kids and adults alike will love this festive touch!
Individual Servings
For a more intimate gathering, serve individual slices on mini cake stands or elegant dessert plates. Garnish each slice with a small dollop of whipped cream and a fresh mint leaf for a restaurant-worthy presentation. This approach works beautifully for brunch or afternoon tea settings. 🍽️
Dessert Platter Pairings
Create a stunning dessert platter by pairing your cake with complementary treats. Add chocolate-dipped strawberries, mini macarons, and a small bowl of vanilla bean ice cream for dipping. The vanilla notes in your cake and ice cream will harmonize perfectly, creating a cohesive and delicious spread.
Gift Box Ready
For a thoughtful gift, wrap individual slices in parchment paper and tie them with a ribbon. Place them in a decorative box or basket with a handwritten note. This makes a perfect hostess gift or celebration treat. The cake's rich vanilla flavor travels well, so it's ideal for sharing with friends or family.
Make-Ahead Serving
If you're prepping ahead, assemble the cake the day before and store it in an airtight container at room temperature. Bring it to room temperature before serving for the best texture. For extra freshness, add a final dusting of powdered sugar right before serving. This keeps the cake looking and tasting its best, even after a day of waiting. ✨
Nutrition facts
Frequently asked questions
Can I substitute vanilla bean paste with regular vanilla extract?
Yes, but the flavor won't be identical. Use double the amount of pure vanilla extract (so 4 teaspoons instead of 2 teaspoons of paste). The vanilla bean paste gives a deeper, more complex flavor with subtle floral notes that extract can't fully replicate. If you're on a budget, a high-quality imitation vanilla extract will work better than the cheap kind.
How do I prevent my cake from sinking in the middle?
This usually happens when the cake isn't fully baked or the oven temperature drops. First, make sure your oven is properly calibrated—use an oven thermometer to confirm it's at 350°F. Don't open the oven door during the first 20 minutes of baking, and bake until a toothpick comes out clean. Also, avoid overmixing the batter—just mix until combined. For extra insurance, place the cake pans on the middle rack where heat circulates evenly.
Can I make this cake in a different pan size?
For a 9-inch round pan, this recipe makes two perfect layers. For a 9x13-inch pan, reduce the batter by about 25% (use 1.875 cups flour, 1.5 cups sugar, and 0.75 cup butter). For 8-inch pans, increase the batter by 25% (use 3.125 cups flour, 2.5 cups sugar, and 1.25 cups butter). Always adjust baking time—check with a toothpick after 20-25 minutes.
Why did my frosting turn grainy?
This happens when powdered sugar clumps or moisture content is off. First, make sure your powdered sugar is fresh and sifted. Chill your mixing bowl and beaters for 10 minutes before whipping to prevent melting. Also, add the heavy cream gradually to the powdered sugar while mixing—don't dump it all at once. If it's already grainy, try rewarming the cream slightly and whipping again with a bit more powdered sugar to smooth it out.
How can I make this cake gluten-free?
Replace the all-purpose flour with a 1:1 gluten-free baking flour blend like Bob's Red Mill or King Arthur. Add 1 teaspoon xanthan gum to help with structure. Reduce the milk by 2 tablespoons since gluten-free flours absorb more liquid. Also, let the batter rest for 10 minutes before baking to improve texture. Expect a slightly denser crumb, but the flavor will still be amazing!