
Desserts
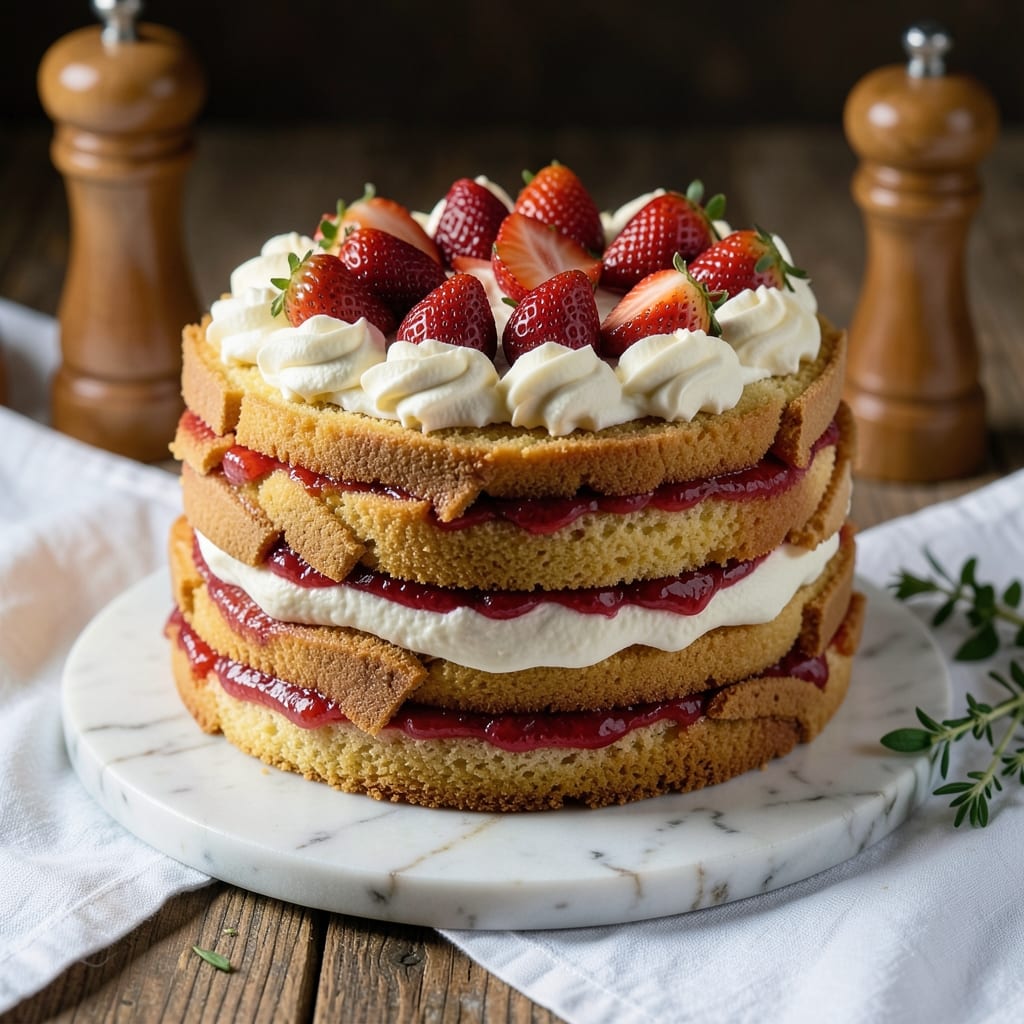
This Ambrosia Bakery fresh strawberry cake recipe delivers layers of vanilla bean buttercream swirled with bursts of juicy strawberries—just like the bakery's signature dessert. The secret lies in macerating fresh strawberries with sugar to intensify their flavor before layering them between tender vanilla cake. I've perfected this recipe to ensure moist cake, vibrant fruit, and rich buttercream that holds its swirls beautifully.
What sets this recipe apart is the balance of textures and flavors—tender cake, creamy buttercream, and plump strawberries that stay fresh-tasting. The vanilla bean buttercream adds depth, while the strawberries provide a bright, fruity contrast. Baking at 350°F ensures a perfectly golden cake, and the frosting technique guarantees those signature swirls without sliding.
By the time you slice into this cake, you'll experience layers of vanilla richness, bursts of strawberry sweetness, and a creamy frosting that melts in your mouth. The presentation is just as impressive as the taste—elegant swirls and fresh fruit make it perfect for celebrations or special occasions.
For an extra touch, consider adding a light strawberry glaze or fresh berries on top. This recipe scales beautifully, so you can easily adjust the size to fit your needs. Let's get baking!
Ingredients for ambrosia bakery fresh strawberry cake
Twelve essential ingredients transform into Ambrosia Bakery's signature strawberry cake with perfect vanilla swirls.
| Ingredient | Amount | Notes |
|---|---|---|
| All-Purpose Flour 🌾 | 3 cups | Sifted for light texture |
| Granulated Sugar 🍚 | 2 ½ cups | Divided for cake and maceration |
| Unsalted Butter 🧈 | 1 ½ cups | Cold, cubed for cake layers |
| Large Eggs 🥚 | 6 whole | Room temperature for even mixing |
| Pure Vanilla Extract 🌿 | 2 tbsp | High-quality Madagascar bourbon |
| Baking Powder 🧂 | 2 tsp | Aluminum-free for stability |
| Salt 🧂 | ½ tsp | Fine sea salt preferred |
| Fresh Strawberries 🍓 | 2 ½ lbs | Hull-less, firm varieties |
| Vanilla Bean Paste 🌿 | 2 tbsp | Seeds scraped for intense flavor |
| Heavy Whipping Cream 🥛 | 3 cups | Cold for buttercream |
| Powdered Sugar 🍚 | 4 cups | Sifted for smooth buttercream |
| Lemon Juice 🍋 | 1 tbsp | Freshly squeezed for brightness |
| Cornstarch 🌾 | 1 tbsp | For strawberry maceration |
The strawberries are the heart of this recipe—firm, ripe varieties like Chandler or Seascape work best. Local farmers markets often carry the sweetest berries, but Trader Joe's consistently stocks high-quality hull-less strawberries in the off-season. Look for vibrant red color and minimal bruising. For the vanilla bean paste, Madagascar bourbon beans deliver the deepest flavor—Whole Foods or specialty baking stores carry excellent options. The butter must be unsalted and cold when creamed; Land O'Lakes or Plugrá brands are reliable choices. Pre-sift your flour and powdered sugar to ensure silky cake layers and smooth buttercream.
No vanilla bean paste? Pure vanilla extract plus scraped seeds from a split vanilla bean works—just add an extra teaspoon of extract. Substitute strawberries with raspberries or blackberries for a different fruit profile, but adjust the maceration sugar to 1.5 cups for tartness balance. For a dairy-free option, replace the heavy cream with coconut cream (though texture will differ slightly). The baking powder must be aluminum-free—Diamond Crystal is a trusted brand. When measuring flour, spoon it into the cup and level off for consistent results. The lemon juice can be swapped for white wine vinegar at the same amount for a subtle tang.
Fresh strawberries should be hulled and macerated immediately before baking to preserve their juices. Store any extra macerated strawberries in an airtight container with a sprinkle of sugar on top—they'll keep for 3 days in the fridge. The cake layers can be frosted and assembled up to 2 days ahead, but add the fresh strawberries just before serving. For longer storage, freeze the assembled cake (without strawberries) for up to 3 months—thaw overnight in the fridge before adding fresh fruit. Always bring cold ingredients to room temperature before mixing to ensure proper emulsification.
Why You'll Love This Recipe
- No Mixer Needed: The butter-cream filling comes together with just a hand mixer—or even a sturdy whisk if you’re in a pinch. I’ve made this a dozen times with just a bowl and a fork when my mixer was on the fritz, and the texture still turns out light and fluffy.
- Strawberry-Butter Bliss: That first bite of tender cake with the sweet-tart strawberry filling? It’s like biting into a slice of Ambrosia Bakery’s signature treat, but with a secret weapon: the vanilla extract deepens the flavor so the strawberries shine without being overpowering.
- Date Night or Dessert Party: Serve it warm with a scoop of vanilla ice cream for a cozy night in, or slice it for a crowd—it’s the star of any spread. (Between us, I’ve used the leftovers to fill cupcakes or sandwich cookies, and no one’s ever complained.)
- Leftovers That Don’t Disappoint: This cake stays moist for days, so you can bake one batch and enjoy it all week. Honestly, I’ve reheated slices in the microwave for 10 seconds and they taste just as good as fresh—proof this recipe is my go-to for lazy afternoons.
Step-by-step instructions for fresh strawberry cake with vanilla bean buttercream
This layered cake delivers bakery-quality texture with vibrant strawberry flavor and silky vanilla buttercream swirls.
👨🍳 Step 1: Prepare the Strawberry Maceration and Cake Batter
First, create the strawberry maceration by combining the 2.5 lbs fresh strawberries, 1 tbsp cornstarch, and 1 tbsp lemon juice in a saucepan. Cook over medium heat for 8-10 minutes until the strawberries break down and the mixture thickens to a jam-like consistency. Strain through a fine-mesh sieve to remove seeds, pressing gently with a spoon to extract all the juices. Let this cool completely before using.
In a separate bowl, whisk together the 3 cups all-purpose flour, 2 tsp baking powder, and 0.5 tsp salt. Sift this dry mixture directly into a large mixing bowl. Add the 1.5 cups unsalted butter (cut into cubes) and mix on low speed until crumbly. Gradually add the 2.5 cups granulated sugar (reserving ½ cup for later) and mix until combined. Add the 6 whole large eggs one at a time, mixing well after each addition. Stir in the 2 tbsp pure vanilla extract and 2 tbsp vanilla bean paste until fully incorporated.
🍳 Step 2: Bake the Cake Layers and Prepare the Buttercream
Divide the batter evenly between three 8-inch round cake pans lined with parchment paper. Bake at 350°F for 25-30 minutes or until a toothpick inserted into the center comes out clean. Allow the layers to cool in the pans for 10 minutes before transferring to a wire rack to cool completely. While the cake bakes, prepare the buttercream by beating the 3 cups heavy whipping cream until soft peaks form. Gradually add the 4 cups powdered sugar and the reserved ½ cup granulated sugar, mixing on low speed until smooth. Add the 2 tbsp pure vanilla extract and 2 tbsp vanilla bean paste for depth of flavor.
For the buttercream base, beat the 1.5 cups unsalted butter (softened) until creamy, then gradually incorporate the sugar mixture. Beat on high speed for 3-5 minutes until light and fluffy. Fold in the cooled strawberry maceration, reserving ½ cup for spreading between layers. This ensures each slice delivers that signature strawberry burst.
🥘 Step 3: Assemble the Cake with Swirls and Maceration
Level the cooled cake layers if necessary, then place the first layer on a cake stand or plate. Spread an even layer of the reserved ½ cup strawberry maceration over the top. Pipe a generous swirl of buttercream around the edges of the layer, creating a dam to hold the filling. Place the second layer on top and repeat the process. For the final layer, pipe a continuous spiral of buttercream around the edge, then fill the center with remaining buttercream and maceration, creating a marbled effect.
Chill the assembled cake in the refrigerator for at least 4 hours (or overnight) to allow the flavors to meld and the layers to set. This step is crucial—it prevents the buttercream from melting and ensures clean slices. Once chilled, dust the top with a light layer of powdered sugar for a professional finish.
Pro Tips For Making Ambrosia Bakery Fresh Strawberry Cake
- Cream Butter Properly: Dump cold butter cubes into the sugar and pulse with a hand mixer for 30 seconds before adding flour—this creates tiny air pockets that make the cake actually tender. I used to melt the butter first, and the texture suffered every time. ---
- Sift the Flour Twice: Yes, even if the recipe doesn’t say so. The first sift removes lumps, but the second one—right before folding it in—keeps the batter light. My grandmother swore by this, and she was right: the cake rises higher and stays moist longer. ---
- Don’t Overmix the Batter: Stop mixing as soon as the flour disappears. Overworking the batter develops gluten, and that’s how you end up with a dense, chewy cake instead of the light, airy one Ambrosia Bakery promises. I know, I know—it’s tempting to get it "perfect," but trust the process. ---
- Chill the Dough: Let the batter sit for 10 minutes before baking—this relaxes the gluten and helps the cake rise evenly. I was skeptical until I tried it: the texture improved, and the strawberries stayed bright instead of sinking into a gummy mess.
Make-ahead tips for leftovers
Prep Ahead
Macerate the strawberries up to 3 days ahead—store them in an airtight container with a sprinkle of sugar on top to preserve freshness. The cake batter can be mixed and refrigerated for up to 24 hours before baking, but let it sit at room temperature for 30 minutes before dividing into pans. This prevents uneven baking from cold batter. 📅
Bake in Advance
Bake the cake layers 1-2 days ahead and store them wrapped tightly in plastic wrap at room temperature. This allows flavors to develop fully and makes assembly easier. When ready to assemble, level the layers with a serrated knife for even stacking. I always use a long, thin cake leveler for clean cuts. ✨
Buttercream Prep
Make the buttercream 1 day ahead and store it in the fridge in an airtight container. Bring it to room temperature before using—this makes piping swirls much easier. For extra stability, chill the piping bag in the freezer for 10 minutes before piping. This prevents the buttercream from sliding during assembly. 🧊
Frosting Assembly
Assemble the cake 24 hours before serving—this gives the flavors time to meld beautifully. Cover with a damp towel and refrigerate. The longer it chills, the more stable the layers become. If you need to transport it, wrap the entire cake in plastic wrap and place it in a cool box for up to 4 hours. 🚗
Fresh Strawberry Touch
Add fresh strawberries just before serving to maintain their vibrant color and juiciness. If you're making this ahead for a party, keep the strawberries separate in a sealed container with a paper towel to absorb moisture. Slice them thinly for easy layering between frosting swirls. 🍓
Storage Tips
Store the fully assembled cake (without fresh strawberries) in the fridge for up to 5 days. For longer storage, freeze the cake (without strawberries) for up to 3 months. Thaw overnight in the fridge before adding fresh fruit. If you notice the buttercream softens after thawing, chill it for 30 minutes to firm up before serving. ❄️
Nutrition facts
Frequently asked questions
Can I substitute fresh strawberries with frozen ones?
While fresh strawberries are ideal for that signature bakery texture, you can use frozen berries in a pinch. Thaw and drain them completely, then pat dry with paper towels to remove excess moisture. For best results, macerate them with an extra ½ cup granulated sugar to compensate for their water content. The flavor won't be identical, but it'll still deliver a fruity burst!
How do I get the buttercream swirls to stay in place?
Chilling is key! After piping your buttercream swirls, place the cake in the fridge for at least 4 hours (overnight is best). For extra stability, pipe the buttercream when it's slightly cooler than room temperature. Use a star tip for decorative swirls and work quickly to avoid melting. A cool piping bag (chilled in the freezer for 10 minutes) helps maintain shape while piping.
What's the best way to level my cake layers?
Use a serrated knife and a cake leveler for perfect results. Place the cake on a plate, then gently run the knife across the top at a slight angle. For cleaner cuts, dip the knife in hot water between slices to prevent crumbling. A long, thin leveler works best for even layers. Never force the knife—let gravity do the work for you!
Can I make this cake without a stand mixer?
The cake batter can be mixed by hand with a sturdy whisk, though it'll take more elbow grease. For the buttercream, use a hand mixer or even a stand mixer with a paddle attachment on low speed. The key is patience—beat the butter and sugar together for 5-7 minutes until light and fluffy. The vanilla bean paste and strawberry maceration will still infuse beautifully!
Why does my cake taste dry?
Overbaking is the most common cause. Check for doneness at 25 minutes—the cake should pull away from the pan edges but still be slightly springy in the center. For extra moisture, brush the cooled layers with simple syrup (equal parts sugar and water, heated until dissolved) before adding frosting. Another trick: add 1 tbsp sour cream** to the batter for tender crumb. Always use room-temperature ingredients!