
Desserts
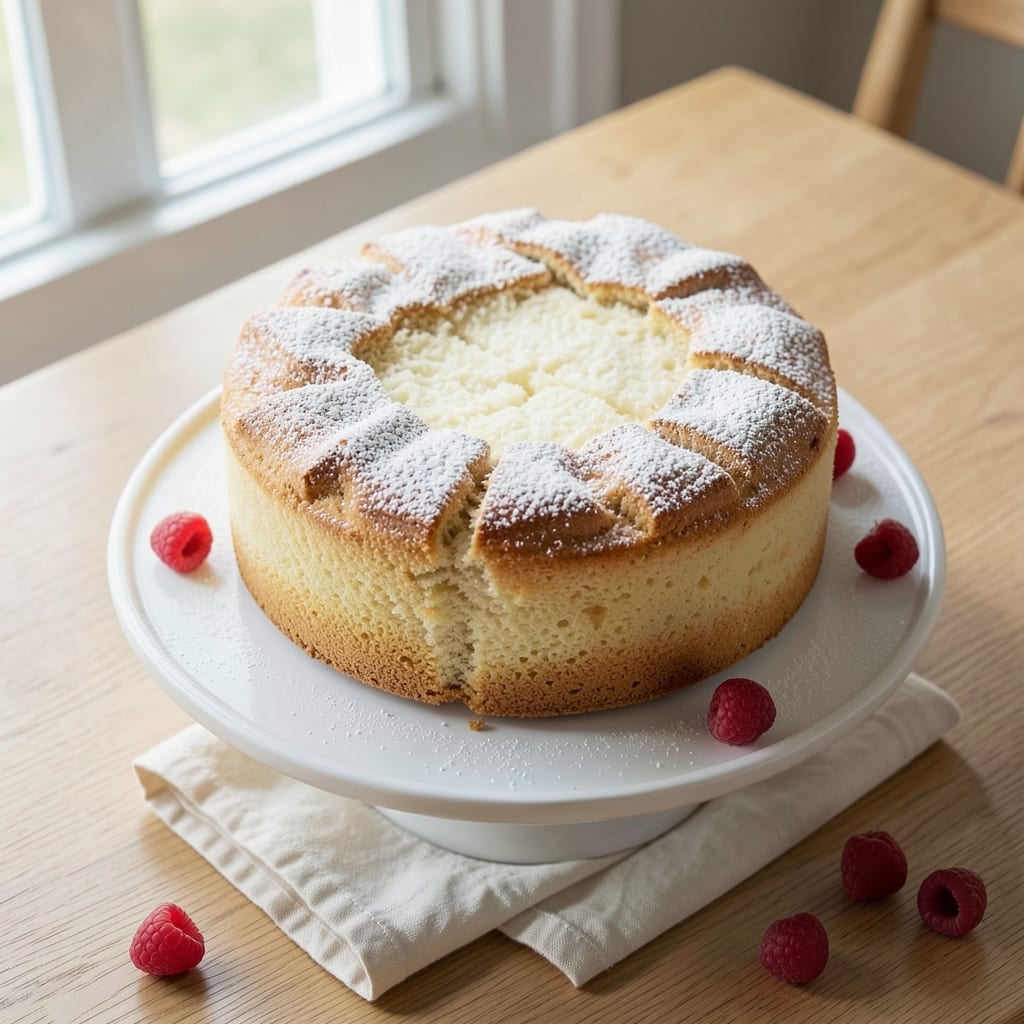
A 1lb sponge cake that stays moist for days is the secret weapon behind perfect layer cakes, trifles, and decadent desserts. This recipe delivers buttery, tender layers that hold their shape and flavor—no dry crumbs in sight. The key lies in precise ingredient ratios and gentle folding, which creates that signature light, airy texture that separates professional results from homemade disappointments.
What sets this sponge cake apart is its foolproof method: room-temperature ingredients, careful whipping, and a controlled bake that ensures even rising. You'll achieve moist layers without greasing the pan excessively or adding extra fat—just the right balance of butter and eggs to create structure while keeping the crumb delicate. Perfect for beginners but refined enough for experienced bakers, this recipe builds confidence with every batch.
The result is a cake that slices cleanly, stays fresh for days when properly stored, and forms the foundation for everything from classic vanilla slices to elegant wedding tiers. The layers remain tender yet sturdy enough to support fillings and frostings without collapsing. Whether you're making a showstopping dessert or a simple afternoon treat, this is the sponge cake recipe that delivers professional-quality results every time.
Ready to master the art of perfect sponge cake? We'll cover everything from mixing techniques to baking times, plus pro tips for achieving that signature domed shape and golden crust. Let's get started.
Ingredients for 1lb sponge cake
Buttery, tender layers that stay moist for days—just 11 ingredients transform into perfection.
| Ingredient | Amount | Notes |
|---|---|---|
| Unsalted Butter 🧈 | ½ cup | Room temperature, European-style preferred |
| Granulated Sugar 🍚 | 1 ¼ cups | Superfine sugar for smoother texture |
| Large Eggs 🥚 | 5 whole | Room temperature, separated |
| All-Purpose Flour 🌾 | 1 ¼ cups | Sifted, plus extra for dusting |
| Cake Flour 🍞 | ¼ cup | For ultra-tender crumb |
| Baking Powder 🧂 | ½ tsp | Aluminum-free for stability |
| Salt 🧂 | ¼ tsp | Fine sea salt preferred |
| Vanilla Extract 🌿 | 1 tbsp | Pure Madagascar bourbon |
| Lemon Zest 🍋 | 1 tbsp | Fresh, organic preferred |
| Lemon Juice 🍋 | 1 tbsp | Freshly squeezed |
| Vegetable Oil 🫒 | 1 tbsp | Light neutral oil |
The butter is non-negotiable here—European-style or cultured butter gives the richest flavor and best texture. Grab the Plugrá or Kerrygold from the specialty section if you can, but any good-quality unsalted butter works. Room temperature is key: press it between two sheets of parchment and let it sit for 2 hours. The eggs? Room temperature is absolutely essential for proper emulsification—cold eggs sink like stones. I always buy organic, free-range eggs from the farmers market for that extra richness, but store-bought works fine too. The flour blend is crucial: all-purpose plus cake flour creates that signature tender crumb without being too delicate. Sift it together to avoid lumps—trust me on this one.
No vanilla extract? Vanilla bean paste works perfectly, or scrape seeds from a pod. Short on lemon zest? Double the juice for brightness. The vegetable oil is just insurance—it keeps the cake moist without adding extra fat. Need a substitution? Melted coconut oil at the same amount works in a pinch, though it adds a subtle coconut note. The baking powder must be aluminum-free—Clabber Girl is my go-to brand. And if you're baking in a dry climate, consider adding 1 extra tbsp of water to the mix for extra moisture. This recipe is forgiving, but these little tweaks take it from good to showstopping.
Store the cake in an airtight container with a slice of bread or a damp paper towel to maintain moisture. Keeps 4-5 days at room temperature or 1 week in the fridge. For longer storage, wrap tightly in plastic and freeze for up to 3 months. The secret to reheating? 5 seconds in the microwave with a damp paper towel—revives that fresh-baked texture instantly. I always bake an extra layer for trifles or French toast—this cake is too good to waste on just one dessert.
Why You'll Love This Recipe
- No Fuss, No Fail: I’ve made this sponge cake more times than I can count—it’s the kind of recipe where you almost don’t need to measure the flour by weight. Just cream the butter and sugar until light, fold in the eggs one at a time, and let the cake flour do its magic. The batter’s so forgiving that even if you overmix (which I definitely have), it still rises like a dream.
- Butter-Sugar Magic: That rich, creamy butter-sugar combo? It’s the star here. The eggs add structure without heaviness, and the mix of all-purpose and cake flour gives you that perfect crumb—light enough to eat plain, but sturdy enough to hold up to fillings or frosting. Honestly, it’s the kind of flavor that makes you want to bake it just to enjoy a slice with tea.
- Weeknight or Celebration: This cake is my go-to for when I need something quick but still feels special. Serve it plain with whipped cream for a lazy Sunday, or layer it with jam and cream for a birthday dessert that doesn’t require a day of prep. Between us, I’ve even used leftover slices for French toast—yes, really.
- Leftover Goldmine: A pound of cake might sound like a lot, but trust me, you’ll use it all. The slices keep well for days (if they last that long), and the recipe’s budget-friendly enough that you’re not breaking the bank if you do end up with extras. I’ve turned stale pieces into crumbs for cheesecake crusts or even breadcrumbs for meatballs—waste not, want not.
Step-by-step instructions for a perfectly moist sponge cake
This method ensures a tender, buttery crumb that stays moist for days—no dry crumb in sight.
Prepare Ingredients for Optimal Texture
First, let the 5 whole large eggs and 0.5 cup unsalted butter sit at room temperature for 30 minutes—this prevents lumps and ensures even mixing. Sift together the 1.25 cups all-purpose flour, 0.25 cup cake flour, 0.5 tsp baking powder, and 0.25 tsp salt in a bowl. The cake flour gives that signature tender crumb, while sifting removes air pockets for a smoother batter.
In a separate small bowl, whisk together the 1 tbsp vanilla extract, 1 tbsp lemon zest, and 1 tbsp lemon juice—this bright citrus note keeps the cake from tasting flat. The zest adds subtle texture while the juice balances sweetness. Keep these ingredients separate until we combine everything in the next step.
Cream Butter and Sugar for Maximum Fluffiness
Using a stand mixer fitted with the paddle attachment, beat the 0.5 cup unsalted butter and 1.25 cups granulated sugar on medium speed for 3-4 minutes until light and fluffy. You’ll see the mixture nearly double in volume and turn pale—this incorporates air, which is key for that airy sponge texture. Scrape down the bowl occasionally to ensure even mixing.
If your butter isn’t perfectly softened, the cake will turn out dense. European-style butter works best here because it has a higher fat content, which keeps the cake moist longer. Once creamed, add the 1 tbsp vegetable oil and mix for another 30 seconds—this adds extra richness without altering the cake’s structure.
Incorporate Eggs and Dry Ingredients Gently
Add the 5 whole large eggs, one at a time, mixing on low speed after each addition. This gradual incorporation prevents the eggs from breaking. Once fully combined, add the dry flour mixture in three batches, alternating with the citrus-vainilla mixture. Start and end with the flour—this ensures even distribution and prevents a heavy crumb.
Mix just until combined—overmixing develops gluten, which makes the cake tough. The batter should be smooth and slightly thicker than cake batter typically is. Here’s the thing—don’t worry if it looks a little thick; the lemon juice and zest will keep it from being too dense.
Bake at Low Heat for Even Cooking
Preheat your oven to 325°F—this lower temperature prevents the cake from browning too quickly while allowing it to cook through evenly. Grease and flour two 8-inch round cake pans (or one 9x13-inch pan if preferred), then divide the batter evenly between them. Tap the pans gently on the counter to remove air bubbles.
Bake for 30-35 minutes (or 40-45 minutes for the sheet pan) until a toothpick inserted into the center comes out clean. The cake should spring back when touched lightly—this ensures it’s fully set but still moist. Real talk: Ovens vary, so start checking at the 25-minute mark if you’re unsure.
Cool and Layer for Maximum Moisture Retention
Let the cakes cool in their pans for 10 minutes, then transfer to a wire rack to cool completely. This gradual cooling prevents cracking. Once fully cooled, wrap each layer tightly in plastic wrap—this locks in moisture for days. Store at room temperature for up to 3 days or refrigerate for up to 5 days if you’re prepping ahead.
The secret to keeping this sponge cake moist? The butter-to-flour ratio and the citrus brighteners. The lemon zest and juice not only add flavor but also help retain moisture longer than vanilla alone. Slice and serve with whipped cream, fresh berries, or a dusting of powdered sugar for a showstopping dessert.
Pro Tips For Making 1lb Sponge Cake
- Weigh Eggs Cold: Grab eggs straight from the fridge—room temperature eggs lose volume when whipped, and you’ll end up with a cake that’s dense instead of light. I learned this the hard way after making a batch that collapsed like a sad soufflé. Trust me, the cold shock is worth it.
- Cream Butter Slowly: Start your butter and sugar at medium speed, then gradually increase to high once they’re fully combined. Rushing this step traps air unevenly, and your cake will turn out greasy instead of tender. Think "smooth operator," not "whip it like a maniac."
- Sift Flours Together: Mix cake flour and all-purpose flour in a bowl first, then sift them together. This keeps the cake flour’s lightness from getting clumpy when measured directly, and your batter will be silky instead of gritty. (Yes, even if you’re impatient like me.)
- Check Doneness Early: Pull your cake 2-3 minutes before the recipe’s suggested time—it’ll keep rising while cooling. Overbaking dries it out, and you’ll end up with a brick instead of a cloud. Insert a toothpick: if it comes out clean but with a few moist crumbs, you’re golden.
Make-ahead tips for this dish
Batter Prep Ahead
Mix the batter up to 24 hours ahead and store it in an airtight container in the fridge. The flavors meld beautifully overnight, and the citrus brighteners intensify. When ready to bake, let the batter sit at room temperature for 30 minutes before dividing it into pans—this ensures even baking without cold spots. 💡
Baked Layers Storage
Bake the layers as directed, then let them cool completely. Wrap each layer individually in plastic wrap and store at room temperature for up to 3 days. For longer storage, place wrapped layers in a sealed plastic bag with a slice of bread to absorb excess moisture—this keeps them fresh for 5 days. 🥖
Freezing for Later
Freeze fully cooled layers in airtight containers or heavy-duty freezer bags for up to 3 months. Thaw overnight in the fridge before assembling your dessert. The texture remains tender when properly wrapped—just avoid condensation buildup. I always freeze an extra layer for unexpected guests! ❄️
Assembling Make-Ahead
Assemble your cake (with frosting or filling) up to 1 day ahead. Keep it refrigerated if using cream-based fillings to prevent sogginess. For buttercream or ganache, assemble at room temperature and refrigerate for 4 hours before serving. This method ensures clean slices and perfect presentation. 🎂
Reviving Stale Layers
If your sponge cake starts to dry out, brush the layers lightly with simple syrup (equal parts sugar and water, heated until dissolved) before adding frosting. For a quick fix, microwave a slice for 5-10 seconds with a damp paper towel—it’ll taste almost fresh-baked again. This trick saves perfect cakes from becoming crumbs! 🔥
Nutrition facts
Frequently asked questions
Why does this sponge cake recipe use both all-purpose and cake flour?
The combination creates the perfect texture—all-purpose flour provides structure while cake flour keeps the crumb ultra-tender. Cake flour has a lower protein content, which prevents toughness, but it needs the strength of all-purpose flour to hold its shape when baked. This blend gives you that signature light, airy sponge cake you love!
Can I make this recipe without a stand mixer?
Use a hand mixer or even whisk with elbow grease. For creaming butter and sugar, beat by hand for 5-7 minutes until light and fluffy. The key is patience—keep mixing until the mixture doubles in volume. For eggs, add them one at a time with a whisk or fork, mixing just until each is fully incorporated.
How do I prevent my sponge cake from cracking?
Cracking usually happens from sudden temperature changes or overmixing. Let the cake cool gradually in the pan for 10 minutes before transferring to a rack. Also, avoid opening the oven door too early—temperature fluctuations cause cracks. If it does crack, don't worry! Brush with simple syrup before frosting to disguise it.
What's the best way to adjust this recipe for a 9x13-inch pan?
For a single layer in a 9x13-inch pan, bake at 325°F for 40-45 minutes instead of the round pans. The batter will spread differently, so check for doneness at 35 minutes. Line the pan with parchment paper for easy removal, and grease it well to prevent sticking. The texture will be slightly denser but still delicious!
Can I substitute butter with oil for a lighter texture?
Not recommended for this recipe—the butter is what gives it that rich, moist crumb. However, if you must, replace the butter with 1/2 cup melted coconut oil (cooled slightly) plus an extra 1 tbsp vegetable oil. The cake will be slightly less flavorful but still tender. For best results, stick with the butter for that signature taste!