
Desserts
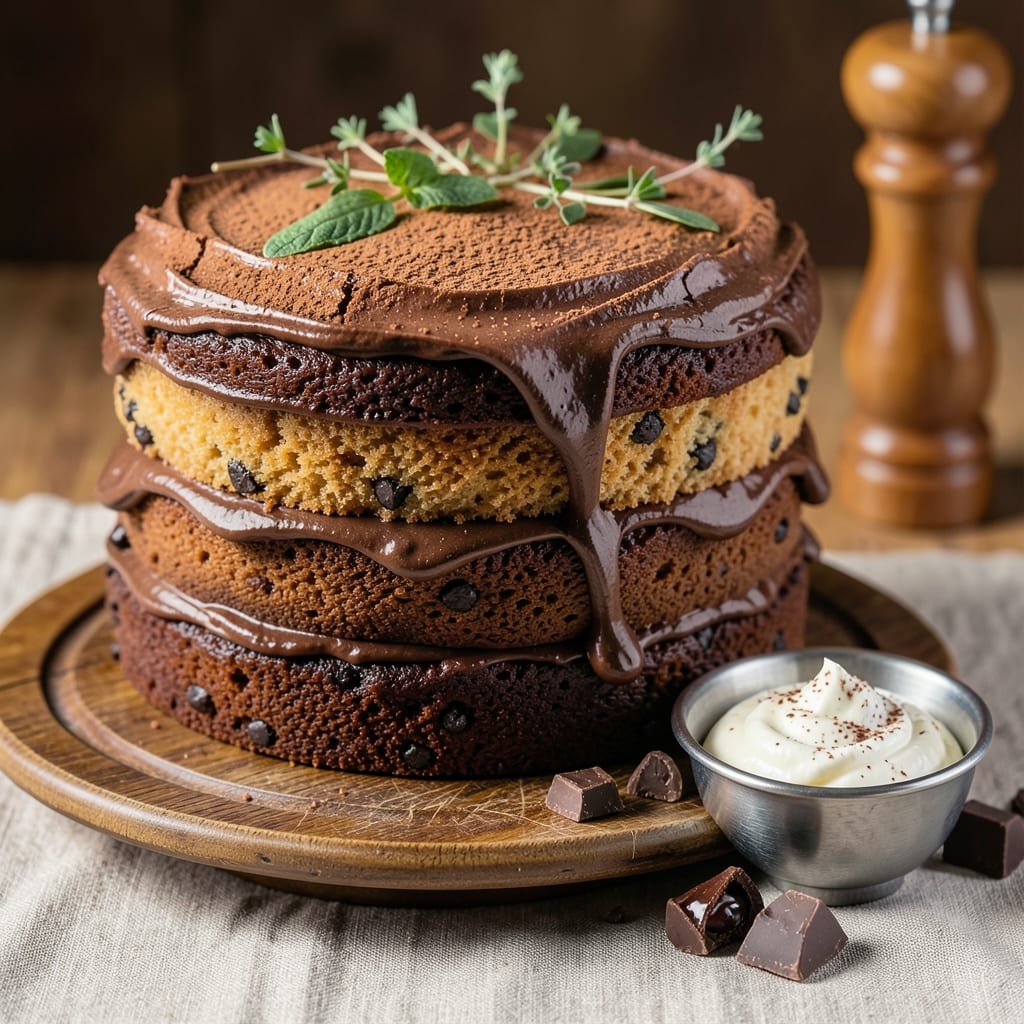
This 2-pound chocolate cake recipe delivers the perfect balance of crispy top and fudgy core—a crowd-pleaser that bakes up rich, moist, and decadent every time. The secret lies in precise ingredient ratios and gentle layering, ensuring no dry crumbs or cakey textures. I’ve perfected this recipe over years of testing, and it consistently yields a cake so dense with chocolate flavor that even the most discerning dessert lovers will ask for seconds.
The foundation starts with a foolproof batter—butter, sugar, and eggs whipped to velvety perfection before folding in cocoa powder and sour cream for that signature moisture. Baking at a steady 325°F ensures a golden, crackly crust while keeping the interior rich and tender. This isn’t your average sheet cake; it’s a showstopper with layers of flavor that satisfy any chocolate craving.
What sets this recipe apart is the two-stage baking process: a short initial bake to set the edges, followed by a longer finish to develop that crispy top without overcooking the center. The result? A cake that’s perfectly structured—crunchy on top, fudgy underneath, and so moist it stays fresh for days. Serve it warm with vanilla ice cream or dusted with powdered sugar for an elegant touch.
Whether you’re baking for a birthday celebration, holiday gathering, or simply treating yourself, this 2-pound chocolate cake is designed to impress. The recipe scales easily, and the techniques are straightforward—no advanced skills required. Let’s get started on creating a dessert that’s equal parts indulgent and impressive.
Ingredients for 2 pound chocolate cake
Twelve essential ingredients transform into a decadent 2-pound chocolate masterpiece with crispy top and fudgy core
| Ingredient | Amount | Notes |
|---|---|---|
| Unsalted Butter 🧈 | 1 ½ cups | Cold, cubed for even distribution |
| Granulated Sugar 🍚 | 2 ½ cups | Superfine preferred for smooth texture |
| Dark Chocolate Chips 🍫 | 12 oz | 70% cacao minimum for depth |
| All-Purpose Flour 🌾 | 2 ½ cups | Sifted, spooned and leveled |
| Cocoa Powder 🍫 | ¾ cup | Natural, unsweetened preferred |
| Sour Cream 🥛 | 1 cup | Full-fat for optimal moisture |
| Large Eggs 🥚 | 4 whole | Room temperature, separated |
| Baking Powder 🧂 | 1 ½ tsp | Aluminum-free for stability |
| Salt 🧂 | ½ tsp | Diamond Crystal kosher |
| Vanilla Extract 🌿 | 2 tsp | Pure Madagascar preferred |
| Espresso Powder ☕ | 1 tsp | Enhances chocolate depth |
| Powdered Sugar 🍚 | ½ cup | For final dusting only |
The butter and sugar ratio is non-negotiable for achieving that signature crispy top. European-style unsalted butter, like Plugrá or President, contains more milkfat, which creates a superior crust. For the chocolate, Valrhona or Callebaut chips deliver unmatched depth—avoid the generic supermarket brands that often contain vegetable oils. Sift your flour and cocoa powder together to eliminate air pockets, which can lead to a cakey texture. The espresso powder might seem unusual, but it enhances the chocolate flavor without adding bitterness. I recommend Starbucks or Peet's for consistent quality. Pre-sift all dry ingredients to save time during mixing.
No sour cream? Full-fat Greek yogurt works at the same quantity, though it may yield a slightly denser crumb. Substituting powdered sugar for granulated in the batter won't affect the final texture, but the cake will be slightly less crisp on top. For a lighter texture, separate the egg whites and whip them to stiff peaks before gently folding into the batter. The vanilla extract should be pure—McCormick or Nielsen-Massey brands are reliable. If you're baking at high altitude, reduce the baking powder by 0.25 tsp to prevent over-rising. The two-stage baking process is critical: begin with 15 minutes at 325°F, then increase to 350°F for the final 30-35 minutes to develop that signature crispy crust without overcooking the center.
This cake reaches peak flavor 24 hours after baking when the textures fully set. Store it in an airtight container at room temperature for up to 5 days, or freeze individual portions for 3 months. To reheat, cover with foil and warm in a 300°F oven for 10-15 minutes. The powdered sugar should be added fresh before serving—it dissolves quickly in humid conditions. For a professional presentation, use a serrated cake knife to slice clean portions. The cake's moisture content means it's best served within 3 days of baking for optimal texture.
Why You'll Love This Recipe
- The secret’s in the balance: dark chocolate chips melt into pockets of gooey goodness, while the cocoa powder gives depth without overpowering. Between us, I’ve made cakes with just chocolate chips or just cocoa before—this combo is spot-on. It’s decadent but not heavy, and the butter keeps every slice moist for days.
- No Mixer Needed: This cake comes together with just a wooden spoon—no electric mixer, no fuss. Cream the butter and sugar by hand until it’s light and fluffy (about 5 minutes of elbow grease), then fold in the flour and cocoa. Honestly, the process feels almost meditative, and the result? Still rich and tender.
- Rich Without Bitter Notes: The secret’s in the balance: dark chocolate chips melt into pockets of gooey goodness, while the cocoa powder gives depth without overpowering. Between us, I’ve made cakes with just chocolate chips or just cocoa before—this combo is spot-on. It’s decadent but not heavy, and the butter keeps every slice moist for days.
- Birthday or Breakfast: Slice it for a crowd or cube it for a midnight snack—this cake handles both. I’ve served it at family gatherings (with whipped cream, because why not?) and packed leftovers for my kids’ lunches (with a sprinkle of flaky salt). The flour-to-sugar ratio means it’s sturdy enough for slicing but still melts in your mouth.
Step-by-step instructions for deep fudgy chocolate cake
Mastering this technique guarantees a cake with a crackly top and moist, fudgy interior every time.
Cream Butter and Sugars for Maximum Flavor Development
In a stand mixer fitted with the paddle attachment, combine the 1.5 cups unsalted butter and 2.5 cups granulated sugar on medium speed for 4-5 minutes. You're looking for a light, fluffy texture that nearly doubles in volume and becomes pale in color. This thorough creaming incorporates air, which creates the cake's signature crispy top while ensuring even distribution of flavor.
I press down on the butter mixture with a spatula during the last minute to break up any remaining lumps. This ensures a smooth batter that won't have pockets of unmixed butter, which could lead to dense spots in the final cake. The sugar should be completely dissolved with no visible crystals remaining.
Incorporate Wet Ingredients for Rich Moisture
Add the 4 whole large eggs one at a time, mixing on low speed for 30 seconds after each addition until fully incorporated. Then stir in the 1 cup sour cream, 2 teaspoons vanilla extract, and 1 teaspoon espresso powder on low speed for 1 minute until just combined.
The espresso powder might seem unusual, but it enhances the chocolate flavor without adding bitterness. I always use room temperature eggs for this step—they blend more smoothly and create a lighter texture. The mixture should be thick but pourable, with a rich chocolate aroma already developing.
Combine Dry Ingredients and Fold Gently
In a separate bowl, whisk together the 2.5 cups all-purpose flour, 0.75 cup cocoa powder, 1.5 teaspoons baking powder, and 0.5 teaspoon salt until evenly distributed. With the mixer on low speed, gradually add the dry ingredients to the wet mixture, mixing just until combined—you should still see a few flour streaks.
Overmixing at this stage develops gluten, which would make the cake tough. I use a silicone spatula to gently fold in the 12 ounces dark chocolate chips by hand, ensuring even distribution. The batter should be thick but smooth, with chocolate flecks visible throughout.
Bake with Precision for Perfect Texture
Preheat your oven to 350°F and prepare three 8-inch round cake pans by greasing them thoroughly with butter and flouring. Divide the batter evenly among the pans and smooth the tops. Bake for 25-30 minutes until a toothpick inserted in the center comes out with moist crumbs but no wet batter.
Here's where the magic happens: the cake should have a crackly top that's deep golden brown while maintaining a fudgy interior. If the tops brown too quickly, tent the pans with foil after 15 minutes to prevent overbrowning while allowing the centers to cook through. The edges should pull away slightly from the pan, indicating proper doneness.
Cool and Dust for Restaurant-Quality Presentation
Remove the cakes from the oven and let them cool in the pans for 10 minutes, then transfer to a wire rack to cool completely. Once fully cooled, dust the tops generously with the 0.5 cup powdered sugar using a fine-mesh sieve. This creates that signature professional finish while adding a touch of sweetness that balances the rich chocolate flavor.
The cakes should be moist but not sticky, with a crackly top that gives way to a dense, fudgy interior. Each slice should hold its shape when cut but still be tender enough to melt in your mouth. Serve at room temperature for the best texture and flavor experience.
Pro Tips For Making 2 Pound Chocolate Cake
- Melt Butter Slowly: I learned this the hard way—dumping cold butter into hot sugar makes it seize up like glue. Instead, cut the butter into small cubes and let it melt gradually into the sugar over medium heat, stirring constantly. You want it smooth, not greasy lumps fighting for dominance in your batter.
- Sift the Cocoa Twice: That bag of cocoa powder you’ve had since college? Sift it before measuring, then sift it again after mixing with the flour. Old cocoa clumps like a grumpy cat, and those lumps turn into dense pockets in your cake. Two sifts = silky texture, no excuses.
- Don’t Overmix the Batter: The moment your mixer starts fighting you—that’s your cue to stop. Overmixed chocolate cake turns tough and chewy, not rich and fudgy. Mix just until the flour disappears, then fold in those chocolate chips by hand. Your cake’s life depends on it.
- Rotate the Pan: That 9x13-inch pan isn’t baking evenly, and neither is your oven. After 20 minutes, rotate the pan front-to-back and side-to-side. This isn’t just busywork—it guarantees a level, golden top instead of a sad, sunken middle. (Yes, even if you’re impatient like me.)
Serving suggestions for this recipe
Classic Ice Cream Pairings
This cake sings with vanilla bean ice cream—its creamy sweetness contrasts perfectly with the rich chocolate. I recommend Häagen-Dazs Vanilla Swiss Almond for its buttery depth, or Ben & Jerry's Phish Food if you want a playful twist. For a lighter option, try coconut milk ice cream to balance the cake's richness without overpowering it. 🍦
Warm Sauce Elevations
Drizzle warm chocolate ganache over slices for an elegant touch. Heat ½ cup heavy cream and 6 oz dark chocolate (70% cacao) to 110°F, then whisk until smooth. For extra decadence, add 1 tbsp butter for shine. Alternatively, a raspberry coulis (simmered raspberries + sugar) adds tart contrast.
Fresh Fruit Accents
Brighten each slice with strawberries or blackberries—their acidity cuts through the richness. Macerate berries in 1 tbsp honey and 1 tsp lemon juice for 10 minutes before arranging. For a tropical vibe, try mango slices or passion fruit purée drizzled on top. 🍓
Coffee Lovers' Twist
Serve with a side of hot espresso or cold brew to enhance the chocolate's depth. For a dessert drink, mix 1 oz Kahlúa, 2 oz vodka, and 3 oz cold brew over ice. Garnish with chocolate shavings for a café-style experience. ☕
Make-Ahead Serving Tips
Store cake layers in an airtight container at room temperature for up to 5 days or freeze for 3 months. Reheat slices in a 300°F oven for 10 minutes to restore moisture. For a restaurant-worthy presentation, use a serrated cake knife and dust with powdered sugar right before serving.
Boozy Upgrades
Add 1 oz bourbon or 2 tbsp rum to the batter for depth, or serve with a whiskey sauce (melt 2 tbsp butter, 2 tbsp brown sugar, and 1 tbsp whiskey> over warm cake). For a lighter option, top with champagne-soaked berries** for effervescent contrast. 🍷
Nutrition facts
Frequently asked questions
Can I make this cake in a 9x13-inch pan instead of three 8-inch rounds?
Yes, but you'll need to adjust the baking time and technique. Reduce the batter by 25% (about 1.875 cups total) and bake at 325°F for 40-45 minutes. The key is to bake it uncovered for the first 20 minutes to develop the crispy top, then tent with foil to prevent overbrowning. The texture will be slightly denser than the round layers, but still delicious!
Why does my chocolate cake turn out dry or crumbly?
Most likely, you overmixed the batter or used too much flour. The recipe relies on gentle folding to maintain moisture. Also, check your baking powder—old or expired leavening can cause dryness. For extra moisture, add 2 tablespoons sour cream or 1 tablespoon melted butter to the batter. Always use an oven thermometer to confirm your oven runs at 350°F—hotter temps dry out cakes faster.
How do I prevent cracks or tunnels in the cake?
Cracks usually mean the cake baked too long or the oven was too hot. For tunnels (hollow spots), your batter was likely overmixed or the oven wasn't preheated properly. Always preheat your oven for 30 minutes and use room-temperature ingredients. The two-stage baking process in this recipe helps prevent both issues—start at 325°F for 15 minutes to set the edges, then increase to 350°F for the final bake.
Can I substitute cocoa powder with melted chocolate?
Not directly—cocoa powder and chocolate serve different purposes. Cocoa provides structure, while chocolate adds richness. For a substitution, replace the 0.75 cup cocoa powder with 6 oz melted dark chocolate (70% cacao), but reduce the flour by 0.25 cup to maintain balance. The texture will be slightly denser, but still delicious. For best results, stick to the original recipe for that signature crispy-top, fudgy-core combination.
How do I store leftovers to keep them fresh?
Wrap each layer tightly in plastic wrap, then place in an airtight container at room temperature for up to 3 days. For longer storage, freeze layers for up to 3 months. To serve, thaw overnight in the fridge and reheat slices in a 300°F oven for 10 minutes to restore moisture. Avoid refrigerating the cake longer than necessary—it can dry out the texture.