
Desserts
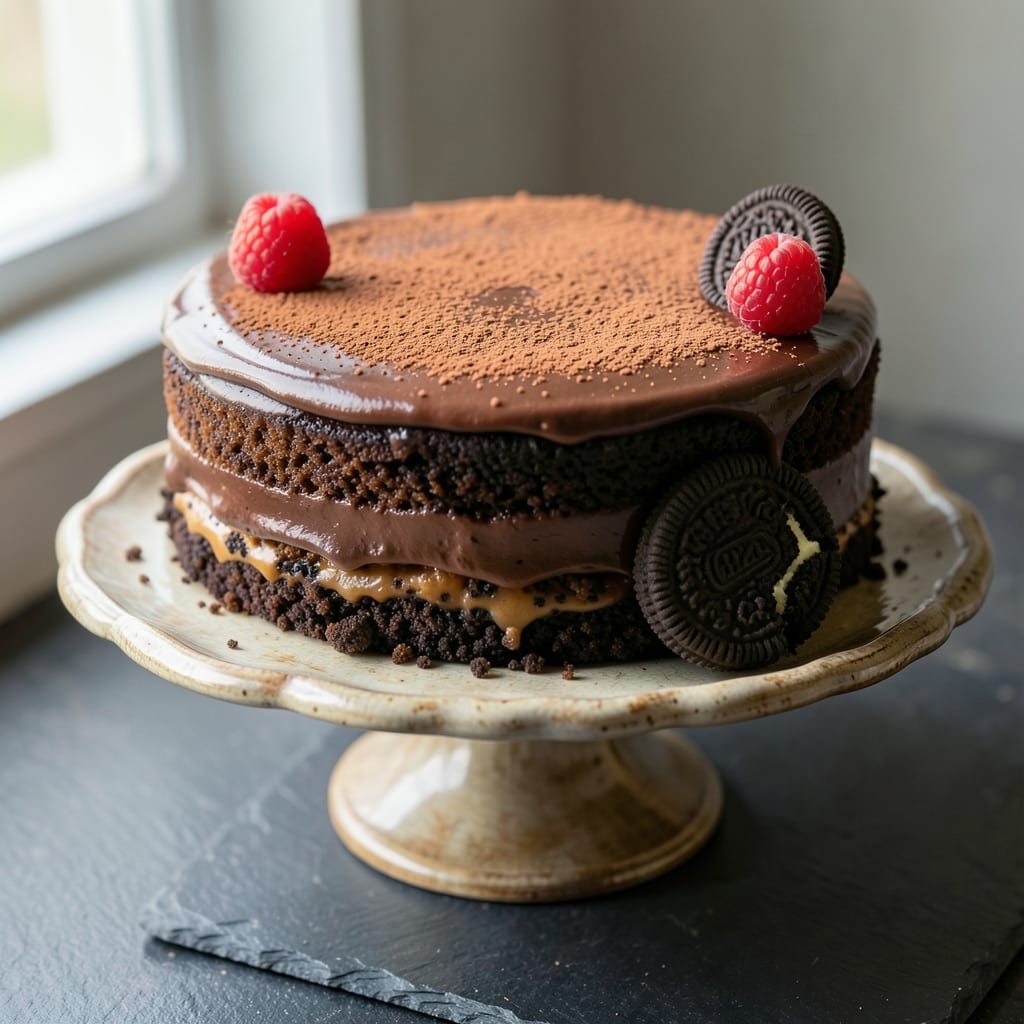
This 4 ingredient Oreo cake recipe delivers decadent, fudgy layers with zero fuss—just one bowl and 15 minutes of prep. The secret lies in crushing Oreos perfectly and balancing them with melted butter and eggs for that signature moist, cookie-cake texture. I’ve tested this recipe countless times, and it never fails to impress with its rich chocolate flavor and effortless assembly.
The beauty of this recipe is its simplicity: no flour, no sugar, no measuring cups—just four ingredients that transform into a restaurant-worthy dessert. The cake bakes in 25 minutes at 350°F, yielding layers that stay moist and tender, not dry. The key is crushing the Oreos finely enough to create that iconic crumbly texture while keeping the structure intact for clean slices.
What you’ll end up with is a fudgy, chocolatey cake that tastes like a cross between brownie and cookie cake—perfect for birthdays, potlucks, or satisfying that late-night sweet tooth. The edges stay slightly crispy, while the center remains soft and gooey, just like your favorite bakery version. Serve it warm with vanilla ice cream or dust with powdered sugar for an extra touch of elegance.
This recipe scales perfectly for any occasion—whether you’re feeding a crowd or treating yourself to a single slice. The one-bowl method means minimal cleanup, and the short baking time ensures you won’t be stuck in the kitchen for hours. Let’s get baking!
Ingredients for 4 ingredient oreo cake
Four simple ingredients transform into a decadent, fudgy cake with minimal effort and maximum flavor.
| Ingredient | Amount | Notes |
|---|---|---|
| Oreos (Original Flavor) 🍪 | 24 whole | Crushed into fine crumbs |
| Unsalted Butter 🧈 | ½ cup | Melted, cooled slightly |
| Large Eggs 🥚 | 2 whole | Room temperature preferred |
| Vanilla Extract 🌸 | ½ tsp | Pure extract for best flavor |
The Oreos are the foundation—original flavor only delivers that iconic taste. Grab a family-sized pack from Walmart or Target for convenience, or buy individual packs if you're making just one cake. For crushing, pulse in a food processor until you get a fine, sand-like texture—no large chunks. The butter should be unsalted to control the saltiness, and Land O'Lakes or Plugrá are reliable brands. Room-temperature eggs mix better, but if they're cold, just let them sit out for 10 minutes before using.
No vanilla extract? Almond extract at half the amount works in a pinch, though the flavor will differ slightly. The eggs are non-negotiable—no substitutes like applesauce will give you that signature moist texture. For a dairy-free version, swap the butter for vegan butter (like Miyoko's), though the texture may be slightly less rich. If you're short on Oreos, crush 12 and add 1/4 cup of chocolate chips to the mix, but the texture won't be as perfect. Always melt the butter gently—don't let it brown, or it'll add bitterness to the cake.
Store the cake in an airtight container at room temperature for up to 3 days, though it's best enjoyed fresh. For longer storage, wrap tightly in plastic wrap and refrigerate for up to 5 days. The cake freezes beautifully—slice before freezing for easy single servings. Thaw at room temperature for 30 minutes before serving. Leftovers reheat well in the microwave for 10-15 seconds to restore that warm, gooey texture. Dust with powdered sugar or serve with vanilla ice cream for a restaurant-quality finish.
Why You'll Love This Recipe
- Four-Ingredient Magic: I swear by this recipe when I’m too tired to measure anything. Crush Oreos, melt butter, crack eggs, add vanilla—done. No sifting, no folding, no stress.
- Creamy Crunch Perfection: That first bite? The crispy Oreo shards melting into a velvety, buttery cake with just a whisper of vanilla. It’s like dessert hugs you in the best way.
- Party in a Box: Make it ahead for birthdays, book clubs, or just because. Slice it cold or warm—it’s always a crowd-pleaser. (Yes, even my picky nephew devours it.)
- Pantry Goldmine: You’re already using what’s there: Oreos, butter, eggs, and vanilla. No extra shopping, no wasted leftovers (unless you eat the whole thing in one sitting). Budget-friendly and foolproof.
Step-by-step instructions for one-bowl Oreo cake
This cake comes together faster than you can say "fudgy perfection"—just four ingredients, one bowl, and minimal effort.
Crush the Oreos into Fine Crumbs
Place the 24 whole Oreos in a sturdy resealable plastic bag. Using a rolling pin or heavy pan, crush them into fine crumbs—think powdery, not chunky. I press down firmly and roll until every cookie is completely broken down. This texture is crucial for that signature moist, velvety crumb. If any large pieces remain, pulse them in a food processor for a few seconds, but avoid over-processing or you'll end up with cookie dust instead of crumbs.
Transfer the crushed Oreos to a large mixing bowl. The goal is to have a uniform consistency—no visible chunks—so the cake bakes evenly. If you're using a food processor, sift the crumbs to remove any fine powder that might affect the cake's structure. This step sets the foundation for that rich, chocolatey flavor in every bite.
Melt and Cool the Butter
In a small microwave-safe bowl, melt the 0.5 cup of unsalted butter in 30-second intervals, stirring between each interval until fully melted. The butter should be smooth and liquid, but not hot—just warm to the touch. Let it cool for 5 minutes, stirring occasionally, until it reaches a temperature where it won't cook the eggs when mixed. This slight cooling ensures the eggs don't scramble and keeps the cake tender.
Pour the cooled melted butter over the crushed Oreos in the mixing bowl. Use a spatula to gently fold the butter into the crumbs until fully combined. The mixture should look like wet sand, with no dry spots remaining. This step is where the fat begins to distribute evenly, creating that signature fudgy texture. Don't overmix—just enough to incorporate the butter completely.
Add Eggs and Vanilla for Moisture
Crack the 2 whole large eggs directly into the bowl with the Oreo-butter mixture. Add the 0.5 teaspoon of vanilla extract and stir gently with a spatula until just combined. You're looking for a thick, dough-like consistency—almost like wet cookie dough. The eggs provide structure and moisture, while the vanilla enhances the chocolate flavor. Avoid overmixing, as this can develop gluten and make the cake dense. A few streaks of flour are okay at this stage.
At this point, the batter should be thick but still pourable. If it's too stiff, let it sit for 2-3 minutes—sometimes the eggs need a moment to fully incorporate. The batter should cling to the spatula when lifted, indicating it's ready for the oven. This consistency ensures a dense, moist cake rather than a dry or crumbly one.
Bake Until Golden and Springy
Preheat your oven to 350°F. Grease an 8-inch round cake pan or line it with parchment paper, then pour the batter into the prepared pan and smooth the top with a spatula. Bake for 25-30 minutes, or until the edges are golden brown and a toothpick inserted into the center comes out with a few moist crumbs but no wet batter. The cake should spring back slightly when pressed gently in the center—this indicates it's fully set but still moist.
I like to check the cake at the 25-minute mark because ovens vary. If the top browns too quickly, tent the pan with foil to prevent over-browning while the center finishes baking. The cake is done when it passes the toothpick test and has a slight pull-back when touched. Let it cool in the pan for 10 minutes before transferring to a wire rack to cool completely. This resting period allows the flavors to meld and the texture to set properly.
Serve at Room Temperature
Once the cake has cooled completely, slice it into 8 equal pieces using a sharp knife. The texture should be dense and moist, with a rich chocolate flavor from the Oreos. The cake will be fudgy but still hold its shape—no crumbling or falling apart. For the best experience, serve it at room temperature, allowing the flavors to fully develop. This cake is best enjoyed within 2-3 days, stored in an airtight container at room temperature.
The simplicity of this recipe belies its decadent results. With just four ingredients and minimal effort, you've created a cake that's rich, moist, and packed with chocolatey goodness. The key lies in the texture of the crushed Oreos and the careful balance of fat and moisture from the butter and eggs. Enjoy every bite of this effortless dessert!
Pro Tips For Making 4 Ingredient Oreo Cake
- STOP CRUSHING OREOS DRY: Crushing Oreos into fine crumbs is the thing that matters most—don’t just dump them whole or you’ll end up with a cake that’s more texture than flavor. Pulse them in a food processor until they’re almost like flour, but resist the urge to overdo it. (Yes, even if you’re impatient like me.)
- MELT BUTTER SLOW: I learned this the hard way—microwaving butter for the batter leads to greasy Oreos and a cake that’s too dense. Instead, melt it in a bowl over simmering water (double boiler) until just liquid. Let it cool slightly before mixing—room temp butter works better here.
- WHISK EGGS ROOM TEMP: Cold eggs from the fridge won’t blend smoothly into the batter, and you’ll end up with lumps that ruin the texture. Pop them in warm water for 5 minutes first, or just let them sit out while you crush the Oreos. The batter will be silky, not gloppy.
- BAKE UNTIL SPRINGY: The cake’s done when the edges pull away from the pan and a toothpick comes out clean—or at least mostly clean, with a few crumbs. Overbaking dries it out, but underbaking leaves it gummy. If you’re unsure, check at 25 minutes (standard 350°F) and cover loosely with foil if the top browns too fast.
Serving suggestions for this 4 ingredient oreo cake
Classic Ice Cream Pairing
This cake practically begs for a scoop of vanilla bean ice cream—the creamy, cool contrast makes every bite even more decadent. I like to serve it with Breyer's vanilla or Häagen-Dazs vanilla bean for that rich, velvety texture. For a fun twist, try chocolate chip cookie dough ice cream to double down on the cookie-cake vibes. 🍦
Whipped Cream Topping
Add a dollop of homemade whipped cream sweetened with 2 tablespoons powdered sugar and a splash of vanilla. I use Cool Whip in a pinch, but nothing beats freshly whipped cream with a pinch of flaky sea salt for that gourmet touch. Pipe it directly onto slices or serve it on the side for dipping.
Chocolate Drizzle Finish
Elevate your serving with a melted chocolate drizzle. Heat 4 ounces of semi-sweet chocolate chips with 1 teaspoon coconut oil until smooth, then drizzle over slices. For extra flair, add crushed Oreos or chocolate sprinkles on top. This turns a simple slice into a showstopper dessert. 🍫
Warm Caramel Sauce
Drizzle warm homemade caramel sauce over each slice for a gooey, sweet contrast. My go-to recipe uses ½ cup granulated sugar, ¼ cup heavy cream, and 2 tablespoons butter, simmered until golden. Store-bought Smucker's caramel works in a pinch. The sauce adds a luxurious touch that pairs perfectly with the fudgy cake.
Fresh Berries Balance
Brighten the richness with fresh raspberries or strawberries. The tartness cuts through the chocolate, adding a refreshing element. Arrange them on a plate with the cake or serve them on the side for dipping. I also love adding a few blackberries for a deeper flavor contrast. 🍓
Coffee or Espresso Shot
For a sophisticated touch, serve a small espresso shot or strong brewed coffee alongside the cake. The bitterness enhances the chocolate flavors, making each bite taste even more indulgent. A splash of vanilla syrup in the coffee adds a sweet contrast. This pairing feels like a dessert from a high-end bakery. ☕
Nutrition facts
Frequently asked questions
Can I use a different type of cookie instead of Oreos?
While Oreos are ideal for this recipe, you can substitute with other chocolate sandwich cookies like Nutter Butters or Chocolate Wafer Cookies. For best results, use cookies with a similar texture and chocolate content. Avoid overly soft cookies, as they may not hold up well in the cake structure. If substituting, you might need to adjust the baking time slightly.
Why is my cake dry or crumbly?
Dry or crumbly texture usually means the Oreos were crushed too finely (like powder) or the butter wasn't properly incorporated. Always crush Oreos into crumbs, not dust, and ensure the melted butter is fully combined with the crumbs before adding eggs. Also, avoid overbaking—check the cake at 25 minutes using the toothpick test.
Can I make this cake in a different pan size?
Yes! For an 8-inch round pan, use the full recipe. For a 9-inch pan, reduce baking time by 2-3 minutes (check at 23 minutes). For a 6-inch pan, increase baking time by 3-5 minutes. Always adjust for your specific oven—high altitudes may require additional time. Grease pans well to prevent sticking.
How do I fix a sunken center?
A sunken center often happens if the cake wasn't fully baked or the pan wasn't properly prepped. Next time, ensure your oven is fully preheated to 350°F and bake until a toothpick comes out clean. If it happens, you can still salvage it—slice the cake horizontally, spread a thin layer of whipped cream or caramel between the layers, and reassemble.
Can I make this cake ahead of time?
This cake actually tastes better the next day. Store it in an airtight container at room temperature for up to 3 days. For longer storage, freeze slices individually for up to 1 month. Thaw at room temperature for 30 minutes before serving. The flavors deepen as it sits, making it perfect for make-ahead desserts.