
Desserts
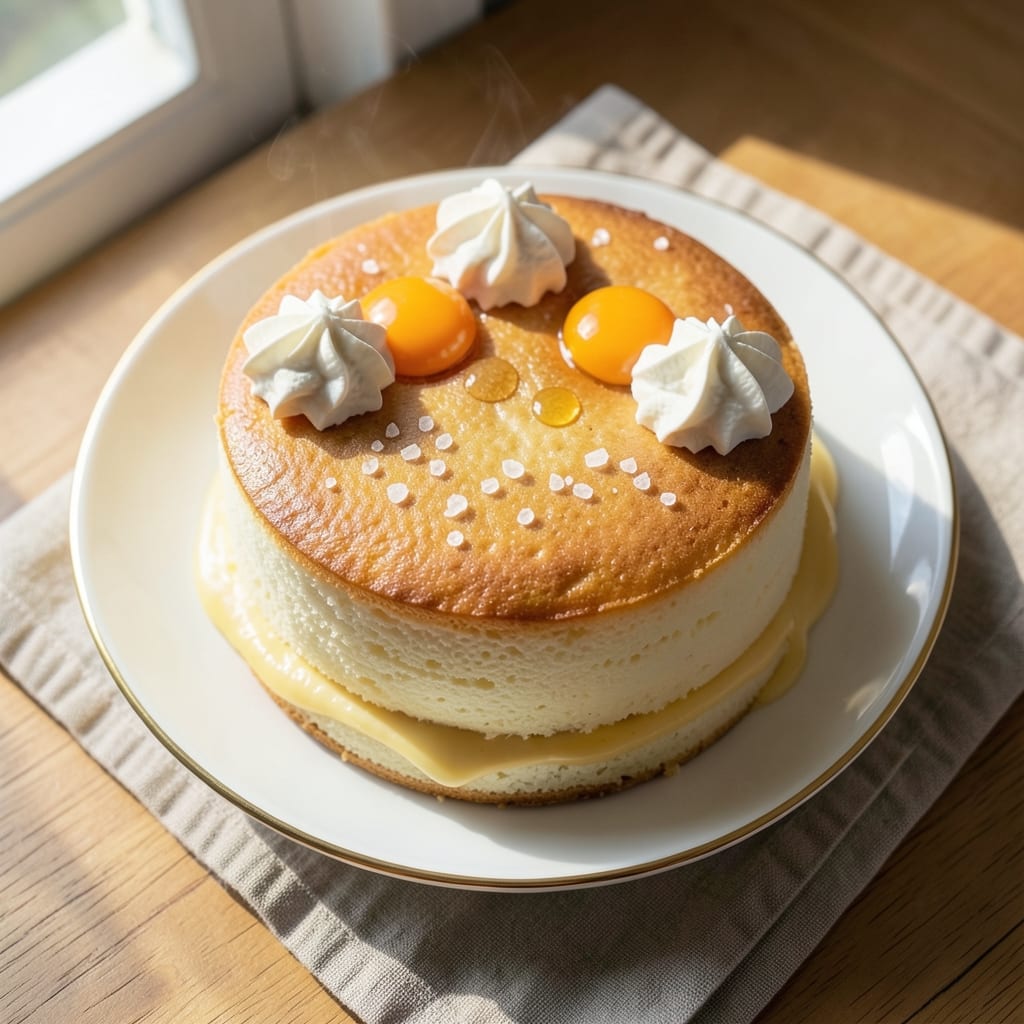
An 8-egg sponge cake delivers the perfect balance of lightness and stability—layers that stay moist for days without turning gummy or dry. This recipe uses a precise ratio of eggs to flour, creating a delicate yet sturdy crumb that holds its shape even when stacked. The secret lies in folding the batter just enough to maintain air pockets while ensuring even baking for consistent texture.
Professional bakers rely on this method for its reliability, especially when making multi-layer cakes or filling with creams. The high egg content creates a tender crumb, while proper folding prevents dense spots. Baked at 350°F for 25-30 minutes, the cake emerges golden with a springy texture that defies the common "dry sponge cake" reputation.
What sets this recipe apart is its moisture retention—no need for extra butter or oil to compensate for dryness. The layers stay tender for 3-4 days when properly stored, making it ideal for weddings, celebrations, or everyday indulgence. Whether you prefer classic vanilla, rich chocolate, or bright citrus flavors, this foundation delivers.
For best results, use room-temperature eggs and sift your flour to avoid lumps. The folding technique is critical—gentle but thorough to maintain structure without overworking the batter. Once baked, let the cake cool completely before assembling layers with your favorite filling or frosting.
Ingredients for 8 egg sponge cake
Eight eggs, precise folding, and no extra fat—this is the professional baker's secret to ultra-moist sponge layers.
| Ingredient | Amount | Notes |
|---|---|---|
| Large Eggs 🥚 | 8 whole | Room temperature, separated |
| All-Purpose Flour 🌾 | 3 cups | Sifted, plus extra for dusting |
| Granulated Sugar 🍚 | 2 cups | Superfine preferred for smoothness |
| Unsalted Butter 🧈 | ½ cup | Cold, cubed, for folding |
| Vanilla Extract 🌸 | 1 tbsp | Pure vanilla preferred |
| Cream of Tartar 🧂 | ¼ tsp | Stabilizes egg whites |
| Salt 🧂 | ¼ tsp | Fine sea salt preferred |
| Lemon Zest 🍋 | 1 tbsp | Freshly grated for brightness |
| Cake Flour 🌾 | ½ cup | Optional for lighter texture |
| Cornstarch 🌾 | 1 tbsp | For tender crumb |
The eggs are non-negotiable here—room temperature is critical for proper emulsification. Kirkland Signature or Organic Valley brands yield consistent results, but any large eggs work. Separate whites from yolks immediately to prevent over-whipping. For flour, King Arthur or Bob's Red Mill all-purpose brands are ideal due to their fine grind. If substituting cake flour, omit 2 tbsp of all-purpose flour and add the cornstarch separately. The sugar should be superfine—regular granulated works but may create a slightly grainier texture. Domino superfine sugar is widely available and eliminates the need for pulverizing.
No cream of tartar? Substitute with lemon juice at half the amount, though it won't stabilize whites as effectively. The butter must be cold—softened but not melted—to maintain structure during folding. For vanilla, Nielsen-Massey pure extract delivers the most authentic flavor. Lemon zest should be freshly grated—pre-packaged zest often lacks potency. If you're making multiple batches, use a microplane for consistent zest quality. The folding technique is where precision matters most: incorporate the yolks in three additions, alternating with flour, to maintain air pockets without deflating the batter.
This batter holds for up to 24 hours in the fridge, covered tightly with plastic wrap pressed directly on the surface. For longer storage, freeze portions in airtight containers for up to 3 months. Once baked, the layers stay moist for 3-4 days when wrapped individually in plastic and stored at room temperature. To prevent drying, never stack layers until you're ready to assemble the final cake. The cake's structure allows it to be frosted with heavy creams or ganaches without collapsing—ideal for multi-tiered desserts where stability is paramount.
Why You'll Love This Recipe
- No Mixer Needed: I swear by this recipe when my stand mixer’s on vacation. Whisking those eggs and sugar until pale and tripled in volume? Pure arm workout, but the light, airy crumb makes every second worth it.
- Butter-Sugar Magic: That creamed butter and sugar step isn’t just fluff—it’s where the real flavor happens. The vanilla ties it all together, but honestly? The contrast of tender crumb and subtle sweetness keeps me reaching for seconds.
- Party in a Box: Slice it for brunch, layer it with whipped cream for dessert, or stash slices in the fridge for impromptu snacks. Between us, I’ve even used it as a base for trifle—because why not?
- Budget Baking Wins: Eight eggs might sound pricey, but this cake stretches further than you’d think. A single batch feeds a crowd or fuels my snack attacks for days, and the ingredients? Basic pantry staples that won’t break the bank.
Step-by-step instructions for ultra-stable sponge cake layers
Mastering this method guarantees tender, moist layers that defy drying out for days.
Separate and Stabilize the Egg Whites
Divide the 8 whole Large Eggs into yolks and whites at room temperature. I use two separate bowls—one for yolks, one for whites—to prevent any accidental mixing. Add the 0.25 tsp Cream of Tartar to the whites and beat them on medium speed until soft peaks form. This stabilizer is crucial—it prevents the whites from collapsing later.
Gradually increase the speed to high and beat for 5-7 minutes until the whites form stiff, glossy peaks that hold their shape when the whisk is lifted. The bowl should feel cool to the touch, and the peaks should stand straight up. If you wait too long, the whites may become grainy, so watch closely. This step ensures your cake will rise properly and maintain its structure.
Whip the Yolks with Sugar and Butter
In a separate large bowl, combine the 8 egg yolks, 2 cups Granulated Sugar, and 0.5 cup Unsalted Butter (cold and cubed). Beat on medium speed for 3-4 minutes until the mixture is pale, thick, and nearly tripled in volume. The sugar should dissolve completely, and the butter should be fully incorporated. This process aerates the yolks, creating a light, airy base for the cake.
Add the 1 tbsp Vanilla Extract, 1 tbsp Lemon Zest, 0.25 tsp Salt, and 1 tbsp Cornstarch to the yolk mixture. Whisk on low speed for 30 seconds until just combined. The cornstarch helps tenderize the crumb, while the lemon zest adds brightness. Avoid overmixing—just until everything is evenly distributed. This step ensures your cake will be flavorful and tender without being dense.
Gently Fold in Dry Ingredients
In a separate bowl, sift together the 3 cups All-Purpose Flour and 0.5 cup Cake Flour (if using). This ensures no lumps form and the flour is evenly distributed. With the mixer on low speed, gradually add the dry ingredients to the yolk mixture, stopping the mixer occasionally to scrape down the sides of the bowl. The goal is to combine just until no flour streaks remain—overmixing develops gluten, which can make the cake tough.
Now, carefully fold in the stabilized egg whites using a spatula. Work in two additions to maintain the airiness of the whites. Gently scrape the bottom and sides of the bowl to ensure no unmixed batter remains. The batter should be smooth, thick, and ribbon-like when the spatula is lifted. This step is critical—if the whites are overfolded, the cake will be dense. If underfolded, it may collapse during baking.
Bake in a Preheated Oven
Preheat your oven to 350°F and grease three 8-inch round cake pans with butter or baking spray. Dust the pans generously with flour, tapping out any excess. Divide the batter evenly among the pans, spreading it smoothly to the edges. The batter should fill each pan about ¾ full—it will rise significantly during baking.
Bake for 25-30 minutes, or until a toothpick inserted into the center comes out clean and the tops spring back when lightly touched. Avoid opening the oven door early—this can cause the cakes to sink. The edges should be light golden brown, and the centers should look slightly underbaked. This ensures a moist, tender crumb rather than a dry one. Let the cakes cool in the pans for 10 minutes, then transfer to a wire rack to cool completely before assembling.
Layer and Store for Maximum Moisture
Once the cakes are fully cooled, level the tops if necessary using a serrated knife. Place the first layer on a cake stand or plate and spread a thin layer of vanilla buttercream (made from the remaining 0.5 cup Unsalted Butter, 1 cup Granulated Sugar, and 1 tbsp Vanilla Extract). Repeat with the remaining layers, ensuring each is evenly coated. This buttercream not only adds flavor but also acts as a moisture barrier, keeping the cake fresh for days.
For long-term storage, wrap the assembled cake tightly in plastic wrap and place it in an airtight container. Store at room temperature for up to 5 days or refrigerate for up to 1 week. The cake’s moisture will remain intact thanks to the stabilized egg whites and proper layering technique. Slice and serve at room temperature for the best texture and flavor.
Pro Tips For Making 8 Egg Sponge Cake
- Whip Eggs Cold: Start your mixer bowl in the fridge for 10 minutes before beating the eggs. Cold eggs whip up fluffier—this recipe needs that extra lift, especially with 8 yolks. I used to skip this and ended up with a cake that was dense enough to weigh down a submarine.
- Sift Flour Twice: Don’t just sift the flour once—do it twice, and use a fine-mesh sieve. The first sift removes lumps, but the second ensures no gritty surprises when folding. My grandmother swore by this, and she was right: the texture of an 8-egg sponge cake actually changes when you skip this step.
- Butter at Room Temp: Unsalted butter straight from the fridge will sabotage your cake’s moisture. Let it sit out for 2 hours (or microwave it in 10-second bursts) until it’s soft but not melted. I learned this the hard way—my first attempt with cold butter turned out dry as a desert.
- Don’t Overmix: Once you fold in the flour, stop mixing the second it disappears. Overmixing develops gluten, and an 8-egg sponge cake will turn out tough instead of light. Use a spatula to gently fold—just until the batter looks like it’s holding together. Your future self will thank you.
Make-ahead tips for leftovers
Batter Prep Ahead
Prepare the batter up to 24 hours in advance and store it in the refrigerator. Cover the bowl tightly with plastic wrap pressed directly onto the surface to prevent a skin from forming. When ready to bake, let the batter sit at room temperature for 30-60 minutes before dividing into pans. This gives the eggs time to warm slightly, ensuring even baking and a lighter texture. 💫
Baked Layer Storage
Bake your sponge cake layers and let them cool completely on a wire rack. Once cooled, wrap each layer individually in plastic wrap and store them in an airtight container at room temperature. They’ll stay fresh for 3-4 days without drying out. For longer storage, freeze the wrapped layers for up to 3 months—thaw at room temperature before assembling. This method preserves the delicate crumb perfectly.
Assembled Cake Timing
Assemble your cake within 24 hours of baking the final layer to maintain moisture. Store the assembled cake in an airtight container wrapped tightly in plastic. At room temperature, it’ll keep for 5 days, while refrigeration extends shelf life to 1 week. For special occasions, assemble the cake the day before serving—this allows flavors to meld beautifully. 📅
Freezing Fully Assembled
If you need to freeze the fully assembled cake, wrap it tightly in plastic wrap followed by a layer of aluminum foil. Place it in a freezer bag to prevent freezer burn. Thaw in the refrigerator overnight, then bring to room temperature before serving. The texture remains moist and tender, though the layers may lose a tiny bit of springiness after freezing. This is ideal for weddings or large gatherings where you need to prepare ahead.
Reheating Slices
If you’ve stored individual slices in the refrigerator, warm them at room temperature for 10-15 minutes before serving. For a quick fix, microwave a slice on 50% power for 5-8 seconds to restore moisture without overcooking. Avoid reheating in the oven—it can dry out the delicate crumb. Always serve at room temperature for the best texture and flavor experience. 🔥
Nutrition facts
Frequently asked questions about 8-Egg sponge cake
Why does this recipe use 8 eggs instead of the usual 4-6?
The extra eggs create a lighter, more stable structure that stays moist for days without drying out. Each egg adds air pockets while binding the flour, resulting in a tender crumb that holds its shape even when stacked. This method is especially useful for multi-layer cakes where structural integrity matters.
Can I substitute cake flour for all-purpose flour?
Yes! For every 1 cup of all-purpose flour, replace 3 tbsp with cake flour (or add 1 tbsp cornstarch per cup). This creates a finer, more delicate crumb. The recipe already includes cake flour as an optional ingredient—just adjust the all-purpose flour accordingly to maintain the same total volume.
What's the best way to test if my egg whites are ready?
When properly whipped, the whites should form stiff, glossy peaks that hold their shape when the whisk is lifted. The bowl should feel cool to the touch, and the peaks should stand straight up. If you tilt the bowl, the whites shouldn't slide off—this confirms they're ready for folding.
Why did my cake sink in the center?
This usually happens from overmixing the batter or opening the oven door too early. To prevent it: fold the whites gently in two additions, avoid overbaking (check at 25 minutes), and let the cakes cool in the pans for 10 minutes before removing. A toothpick should come out clean but slightly moist when done.
Can I make this cake without butter?
Yes, but the texture will be slightly less tender. Replace the 0.5 cup butter with 0.5 cup neutral oil (like vegetable or canola) or an extra 2 tbsp melted butter folded into the yolk mixture. The cake will still rise well, though the crumb may be marginally denser.